
Indulge in Perfection: The Ultimate Chocolate Chip Cheesecake with an Easy Oreo Crust
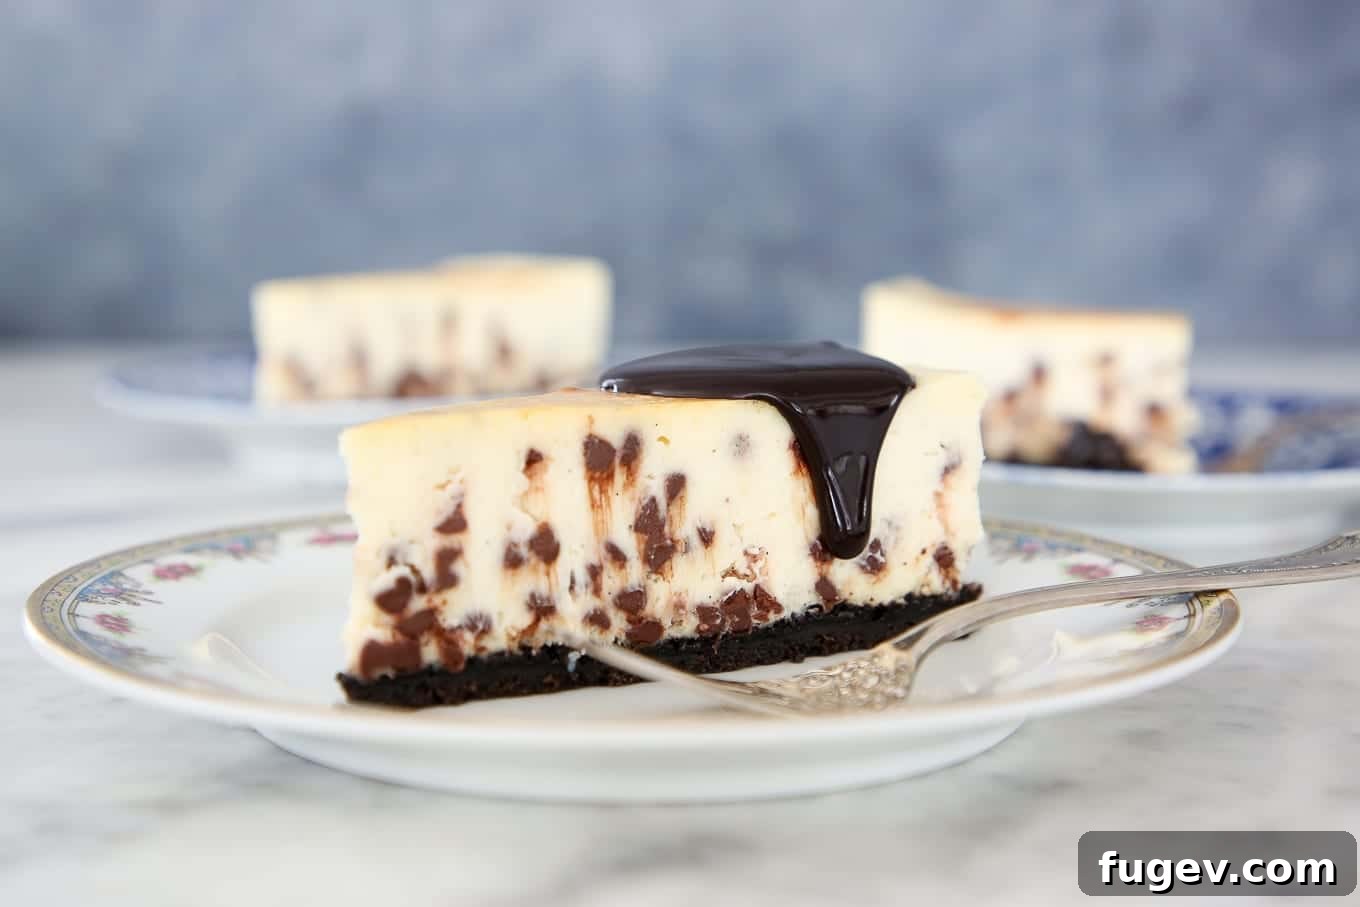
Prepare to elevate your dessert game with a Chocolate Chip Cheesecake that redefines perfection. This isn’t just any cheesecake; it’s a sublime creation featuring a delightfully simple Oreo crust, a filling that’s both silky and dense yet wonderfully light, and the unmistakable, traditional tang that connoisseurs expect from a true New York Style Cheesecake. If you thought you knew the best cheesecake you’d ever tasted, get ready for a delicious revelation – this one is better.
Indeed, this particular recipe has a legendary status in my kitchen. I’ve witnessed veritable “mass hysteria” and friendly disputes over the last delectable scraps of this cheesecake in various settings. It’s a true story, and it speaks volumes about the coveted nature of this dessert. This isn’t just a recipe; it’s a testament to passionate baking, a culinary masterpiece that demands attention and adoration.
I confess, I take my cheesecake extraordinarily seriously. In fact, I take all pastry seriously, but cheesecake holds a special place in my heart, especially this classic Chocolate Chip Cheesecake. Its rich flavor and impeccable texture are the result of meticulous development, ensuring every bite is a moment of pure bliss. For those seeking the gold standard in homemade cheesecakes, your quest ends here.

A Sweet Journey Down Memory Lane: My Inspiration for the Best Chocolate Chip Cheesecake
Allow me to whisk you away on a brief journey down memory lane, a pivotal moment that cemented my dedication to crafting the ultimate cheesecake. Years ago, shortly after my family moved to St. Louis, my birthday approached, and I found myself in a delightful dilemma. I desperately wanted one of my mom’s elaborate, tiered chocolate extravaganzas, a tradition she lovingly upheld for every birthday. Yet, I also yearned for the specific, unforgettable taste of a Dierberg’s Chocolate Chip Cheesecake – a local grocery store chain renowned for its exceptional desserts.
My mom, being the absolute best and taking birthdays even more seriously than I take pastry (which is saying a lot!), managed to procure both! That year, I celebrated with two incredible cakes, an experience that left an indelible mark on my culinary aspirations. While I’m unsure if Dierberg’s still crafts those exact cheesecakes today, I can confidently say that my version not only lives up to but arguably surpasses those cherished childhood memories. And that, my friends, is no small feat.

Mastering the Silky Texture: Key Tips for a Flawless NY Style Chocolate Chip Cheesecake
The secret to achieving the incredibly silky, dense, yet surprisingly light texture in this Chocolate Chip Cheesecake, much like my acclaimed Pumpkin Cheesecake, lies in two crucial elements: ensuring all ingredients are at room temperature and committing to the necessary beating time. These steps are fundamental for a smooth, homogenous batter that bakes beautifully without lumps or inconsistencies. Room temperature ingredients emulsify better, leading to a richer, creamier final product.

And yes, I understand the dread that some home bakers have for the water bath method, but I must insist: baking your cheesecake in a water bath is, sadly, crucial for a truly flawless finish. This technique provides a gentle, even heat distribution, preventing the cheesecake from cracking and ensuring a custardy, tender interior. It’s a small extra step that yields monumental results in terms of texture and appearance. For those who prioritize a crack-free, professional-looking cheesecake, the water bath is non-negotiable.
However, if you’re feeling adventurous and willing to accept a slight risk of cracking, you could attempt to press extra crust up the sides of your springform pan (beyond just the bottom) and bake it without a water bath. While it’s almost certainly going to crack – a common aesthetic issue that doesn’t affect taste – as long as it doesn’t boil, your cheesecake will still be golden and delicious. Alternatively, for the ultimate easy button, you could always opt for an easy no-bake cheesecake recipe, though it won’t quite capture the classic New York Style experience.
Elevate Your Experience: Serving Suggestions for Your Chocolate Chip Cheesecake
While this Chocolate Chip Cheesecake is undeniably magnificent on its own, a truly show-stopping dessert often benefits from thoughtful accompaniments. May I humbly suggest pairing a generous slice with a spoonful of rich, warm chocolate fudge sauce? The combination of cool, creamy cheesecake and decadent, melty chocolate is simply divine. For a touch of freshness and vibrant color, a scattering of fresh berries – raspberries, strawberries, or blueberries – adds a wonderful counterpoint to the sweetness. Imagine the interplay of textures and flavors: the crisp Oreo crust, the smooth cheesecake, the bursts of chocolate, and the juicy tang of fruit. Perfection in every bite!
Chocolate Chip Cheesecake: The Ultimate NY Style Recipe
This homemade Chocolate Chip Cheesecake features an easy Oreo cookie crust and a remarkably silky, dense, yet surprisingly light filling with the authentic tang of a New York Style Cheesecake. It’s truly the best chocolate chip cheesecake you’ll ever make!
By: Chef Lindsey
Prep Time: 30 mins
Cook Time: 1 hr 30 mins
Chill Time: 4 hrs
Total Time: 6 hrs
Servings: 12 people
Makes: One 9-inch round cheesecake
Ingredients
For the Easy Oreo Crust:
- 250 g Oreo Crumbs (approx. 25-30 Oreo cookies, finely crushed – you can use any chocolate sandwich cookie)
- 50 g Butter, melted
For the Silky Cheesecake Filling:
- 800 g Cream cheese (I highly recommend Philadelphia Cream Cheese for the best results), softened to room temperature
- 4 g Vanilla extract (approximately 1 teaspoon)
- ½ Vanilla bean pod, split lengthwise and scraped (seeds only), optional but adds incredible depth of flavor. Find quality vanilla beans here.
- 240 g Granulated Sugar (about 1 ¼ cups). A good quality sugar can be found here.
- 134 g Whole eggs (approximately 2 large eggs), at room temperature. For consistent results, consider weighing your eggs.
- 20 g Egg Yolk (approximately 1 large yolk), at room temperature. This adds extra richness.
- 143 g Sour cream (about ½ cup + 1 tablespoon), full-fat, at room temperature. Look for a good brand here.
- 143 g Heavy cream (about ½ cup + 1 tablespoon), full-fat, at room temperature. Find heavy cream here.
- 255 g Mini chocolate chips (approximately ¾ cup). Mini chips distribute more evenly.
- 2 t All-Purpose Flour (approximately 2 teaspoons). This helps prevent chocolate chips from sinking.
Instructions for a Perfectly Baked Chocolate Chip Cheesecake
- Preheat Oven: Preheat your oven to 325°F (160°C). If you have a convection setting, I recommend using it at a slightly lower temperature (e.g., 300-310°F or 150-155°C) as it prevents direct, intense heat from cracking the top of your cheesecake.
- Prepare the Crust: Line the bottom of a 9 or 10-inch springform pan with a circle of parchment paper and then secure it by clamping the pan. For extra insurance against water bath leakage and for easy release, wrap the bottom and sides of the pan securely with aluminum foil.
- In a medium bowl, combine the finely crushed Oreo crumbs and the melted butter. Mix well until the crumbs are thoroughly moistened.
- Press the mixture firmly and evenly into the bottom of the prepared springform pan. You can use the bottom of a glass or your knuckles to create a compact, uniform crust.
- Bake Crust: Bake the crust in the preheated oven for 8-10 minutes, or until it looks matte and smells fragrant and toasted.
- Remove the crust from the oven and cool it for at least 10 minutes, or until the sides of the pan are no longer hot to the touch. It’s fine if it’s still slightly warm.
- Prepare Pan for Water Bath: Once the crust is sufficiently cooled, wrap the entire outside of the springform pan with two layers of heavy-duty aluminum foil. Ensure the foil extends high up the sides and is securely crimped, rolling the top edges outwards so as not to direct water into the lining during the water bath. This creates a watertight barrier.
- Prepare the Filling (Key Steps for Smoothness): In the bowl of a stand mixer fitted with the paddle attachment, beat the room temperature cream cheese on medium-low speed. Beat until it is incredibly silky, creamy, and completely smooth, with absolutely no lumps. This is crucial for a smooth cheesecake. Stop and scrape down the sides and bottom of the bowl frequently to ensure even mixing.
- Gradually add the granulated sugar to the cream cheese mixture. Continue beating on medium-low speed until no sugar granules are visible and the mixture appears shiny and exceptionally silky. Again, scrape the bowl thoroughly.
- Add the vanilla extract and, if using, the scraped vanilla bean seeds. Beat until they are fully incorporated into the smooth batter.
- Add the room temperature whole eggs one at a time. After each egg addition, beat for a full minute on low speed. Yes, an actual minute. This extended beating time after each egg ensures proper emulsification and contributes significantly to the cheesecake’s structure and crack-free surface.
- Gently fold in the room temperature sour cream and heavy cream. Mix only until just combined to avoid incorporating too much air, which can lead to cracks.
- In a separate small bowl, toss the mini chocolate chips with the all-purpose flour. This light coating of flour is a classic baker’s trick to prevent the chocolate chips from sinking to the bottom of your cheesecake during baking.
- Add the flour-coated chocolate chips to the cheesecake batter. Using a spatula, gently fold them in until they are evenly distributed throughout the filling. Be careful not to overmix at this stage.
- Bake the Cheesecake (Water Bath Method): Pour the exquisite cheesecake filling into the prepared and cooled Oreo crust.
- Place the foil-wrapped springform pan into a larger roasting pan. Carefully pour hot (not boiling) water into the roasting pan until it reaches halfway up the sides of the springform pan. Ensure no water splashes into the cheesecake batter.
- Carefully transfer the roasting pan with the cheesecake into your preheated oven. Bake for approximately 1 hour and 30 to 40 minutes. The cheesecake is done when the edges are set and slightly puffed, but the very center (about a 2-inch circle) still has a slight, jiggle-like wobble when gently shaken. It will continue to set as it cools.
- Cooling Process (Crucial for Crack-Free Results): Once baked, turn off the oven. Crack the oven door open slightly (you can prop it with a wooden spoon) and allow the cheesecake to cool slowly in the water bath for an additional hour. This gradual cooling prevents drastic temperature changes that often cause cracking.
- After one hour, carefully remove the cheesecake from the water bath and the roasting pan. Gently remove the aluminum foil from around the springform pan.
- Place the cheesecake on a wire rack and allow it to cool completely to room temperature. This can take several hours.
- Chill Thoroughly: Once fully cooled, transfer the cheesecake (still in the springform pan) to the refrigerator and chill for at least 4 hours, or preferably overnight. This extended chilling time is absolutely crucial for the cheesecake to firm up, achieve its optimal dense yet creamy texture, and for the flavors to fully meld and deepen.
- Before serving, run a thin, sharp knife carefully around the edge of the cheesecake to loosen it from the springform pan. Release the spring and remove the ring. Slice and serve your magnificent homemade Chocolate Chip Cheesecake!
Watch the Video Tutorial!
Prefer visual guidance? Watch this step-by-step video to ensure your Chocolate Chip Cheesecake turns out perfectly every time. Chef Lindsey guides you through all the nuances of this delectable recipe!
Chef’s Notes & Pro Tips for Perfect Cheesecake
- This recipe yields one glorious 9 to 10-inch round cheesecake, providing approximately 12 generous servings.
- Room Temperature is Key: For the smoothest, lump-free batter, ensure ALL your dairy ingredients (cream cheese, eggs, sour cream, heavy cream) are at true room temperature. This allows them to blend harmoniously without curdling or creating a grainy texture.
- Gluten-Free Option: The small amount of all-purpose flour used to coat the chocolate chips helps prevent them from sinking. For a gluten-free version, you can substitute an equal amount of cornstarch or gluten-free all-purpose flour for the regular flour.
- Why the Water Bath? The water bath creates a moist, consistent cooking environment, mimicking a steamed custard. This gentle heat helps the cheesecake bake evenly, preventing the edges from over-baking and the center from cracking, while also producing that signature creamy texture.
- Preventing Cracks: Beyond the water bath, gradual cooling (leaving it in the oven with the door ajar) and thorough chilling are vital. Avoid drastic temperature changes.
- Troubleshooting Sinking Chips: If your chocolate chips still sink, ensure they are fully coated in flour and gently folded into a properly thickened batter.
- Storage: Store leftover cheesecake, tightly covered, in the refrigerator for up to 5-7 days. It also freezes beautifully for up to 2 months. Thaw slowly in the refrigerator overnight.
- Flavor Enhancements: For an extra layer of flavor, consider adding a hint of orange zest to the filling, which pairs wonderfully with chocolate.
Nutrition Information (Estimated Per Serving)
Calories: 642 kcal |
Carbohydrates: 53 g |
Protein: 9 g |
Fat: 45 g |
Saturated Fat: 25 g |
Polyunsaturated Fat: 3 g |
Monounsaturated Fat: 10 g |
Trans Fat: 1 g |
Cholesterol: 160 mg |
Sodium: 348 mg |
Potassium: 152 mg |
Fiber: 1 g |
Sugar: 41 g |
Vitamin A: 1399 IU |
Vitamin C: 1 mg |
Calcium: 122 mg |
Iron: 1 mg
Disclaimer: Nutritional information is an estimate based on common ingredient values and may vary depending on specific brands and preparation methods. It is provided for informational purposes only.
Recipe Details
Course: Dessert
Cuisine: American
Before You Go: Dive Deeper into Delicious Desserts!
We are confident that this Chocolate Chip Cheesecake will become a cherished recipe in your baking repertoire. Its rich flavors and luxurious texture make it a standout for any occasion. If you’ve enjoyed mastering this classic, we invite you to explore more of our decadent, pastry chef-created Cake Recipes. Each one is designed to bring a touch of professional pâtisserie to your home kitchen. Or, for those who simply can’t get enough of chocolate, you absolutely must head straight to our sensational Chocolate Cheesecake Recipe next!
Did you bake this incredible Chocolate Chip Cheesecake? We’d love to hear about your experience! Please take a moment to leave a comment below and share your success stories or any tips you discovered along the way. Your feedback truly inspires our community of home bakers!