
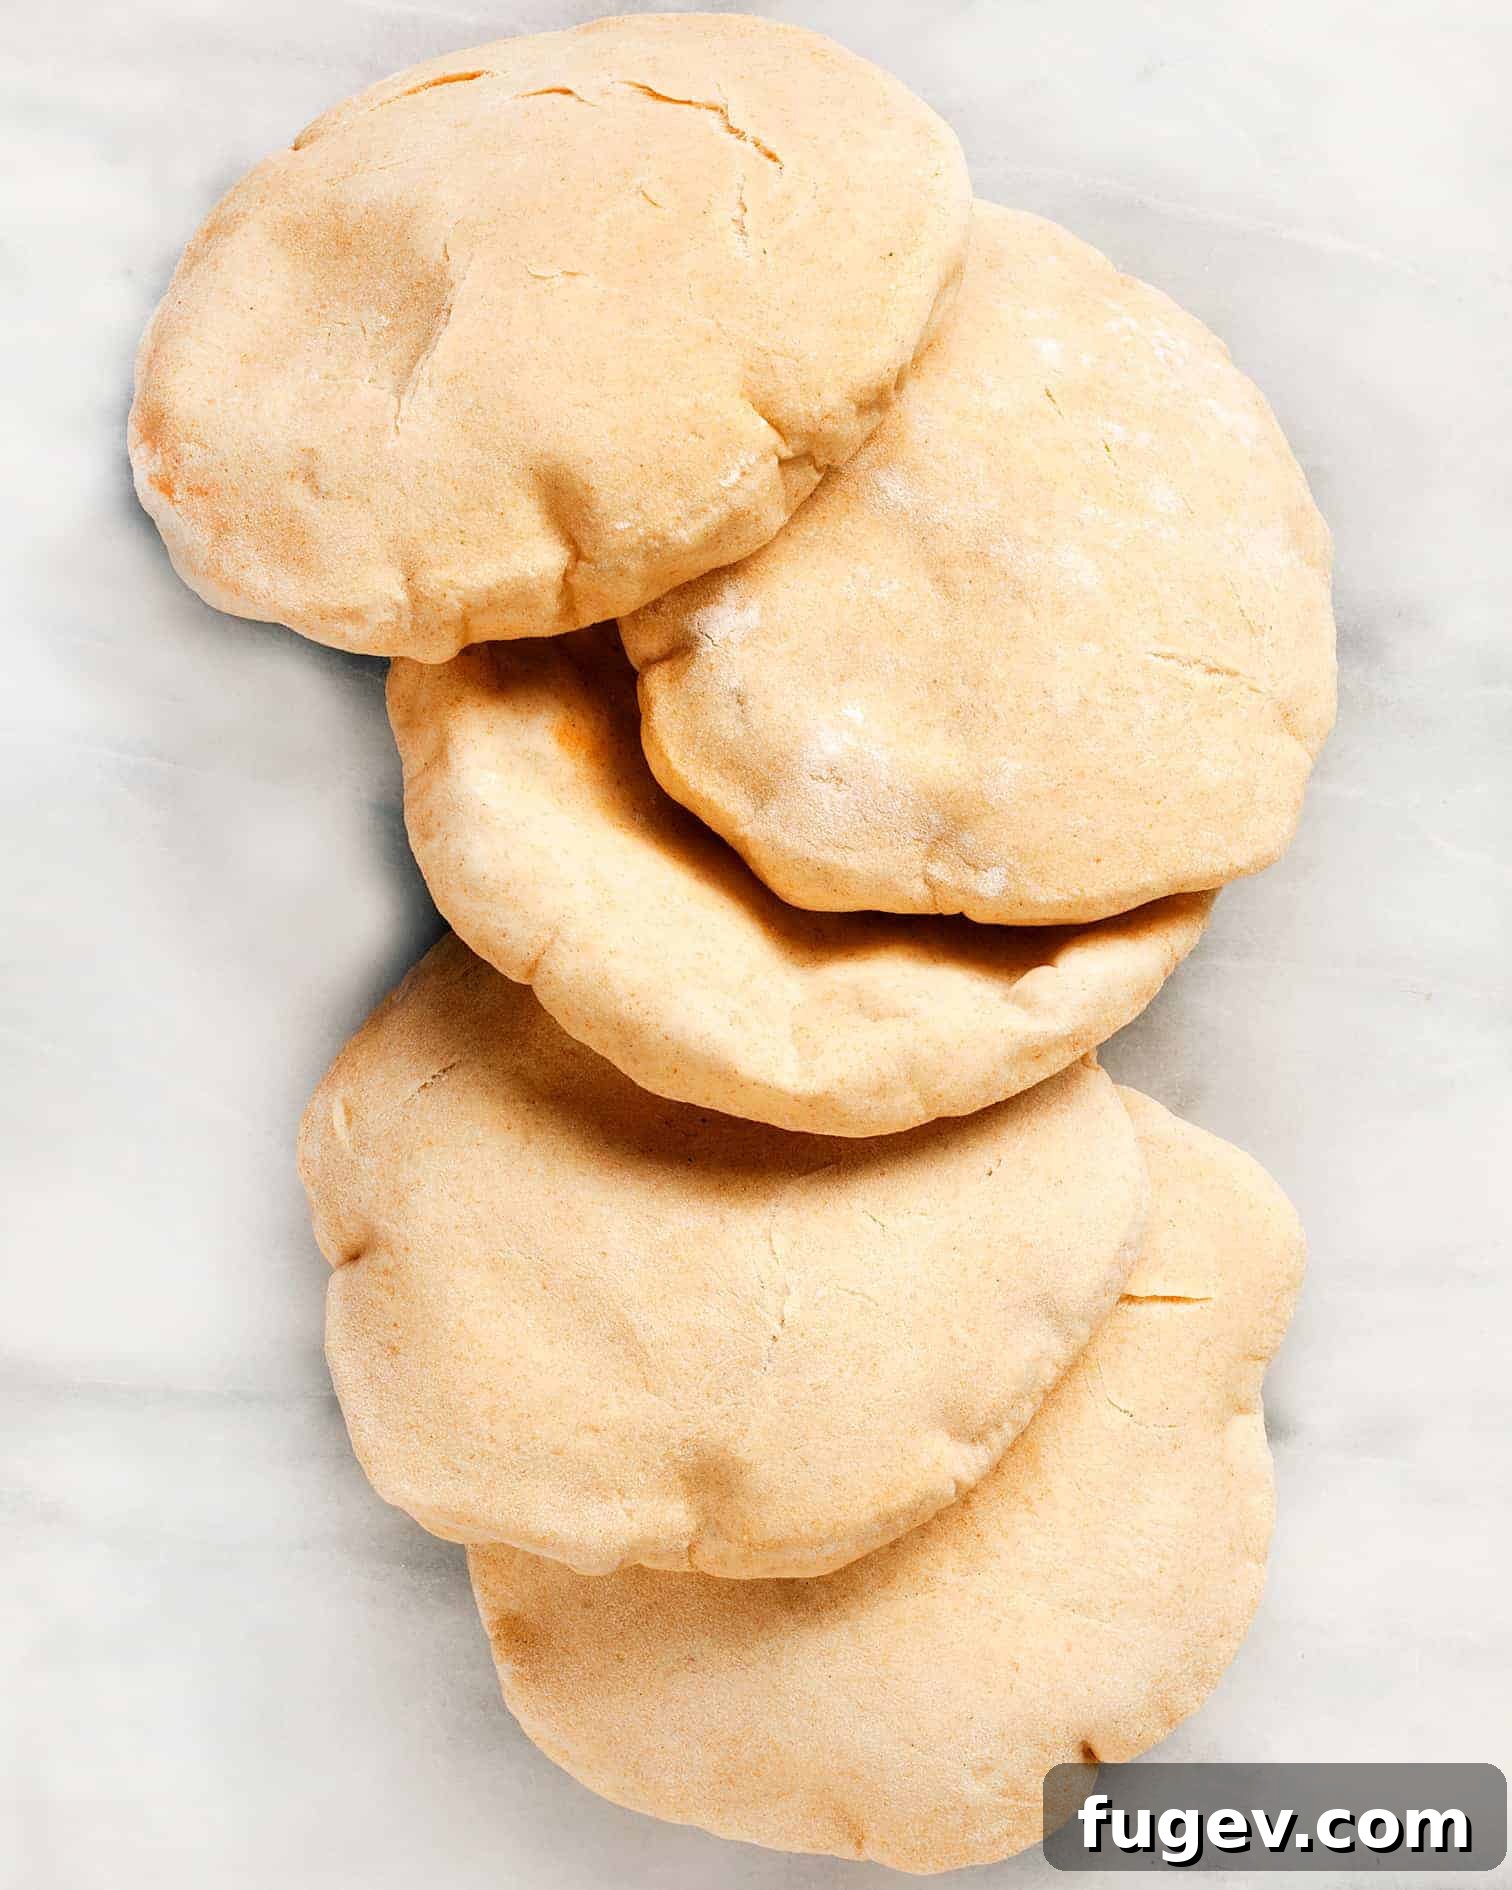
Have you ever experienced the sheer delight of freshly baked bread? The aroma filling your kitchen, the warmth in your hands, the exquisite taste that store-bought versions simply can’t replicate. If you’ve been relying on pre-packaged options for your pita bread, prepare to transform your culinary experience. Making pita bread from scratch is surprisingly straightforward, requiring just a bit of stirring and minimal kneading. The reward? Beautifully puffed, soft, and flavorful pita pockets that are a world apart from anything you’ll find on a grocery store shelf.
For many of us, bread is an indispensable part of daily life. My own weekly grocery list almost always includes multiple loaves to keep my family well-fed, from morning toast to classic peanut butter and jelly sandwiches. The sheer joy and sustenance that carbohydrates provide are undeniable. While I deeply sympathize with those navigating gluten intolerances, I personally find immense satisfaction in the diverse world of bread.
Beyond the everyday loaf, I love to explore more artisanal varieties like crusty baguettes or hearty sourdough rounds. There’s a special magic in baking these specialty breads in my own kitchen when time allows. The process itself is a therapeutic journey, transforming simple ingredients into something truly special.
The inspiration to tackle homemade pita bread recently struck me, sparked by a fresh batch of hummus patiently waiting in the fridge. There’s nothing quite like the perfect accompaniment for a creamy, homemade dip. My previous experiences with store-bought pita had always been a letdown. Despite trying numerous brands, I consistently found them to be dry, stiff, and utterly lacking in flavor – almost like edible cardboard to a self-proclaimed bread connoisseur!
Determined to find a better solution, I decided to embark on the adventure of making pita from scratch. The most wonderful discovery was just how uncomplicated it truly is. Since that first successful attempt, homemade pita has become a regular staple in my kitchen, bringing immense satisfaction and unmatched flavor to our meals.
Why Homemade Pita Bread is a Game Changer
If you’re still on the fence about making pita bread at home, let me assure you, the benefits far outweigh the minimal effort. Homemade pita offers unparalleled freshness, a soft and chewy texture, and a rich flavor profile that simply cannot be replicated by mass-produced options. You control the ingredients, ensuring a wholesome and delicious product free from unnecessary additives or preservatives. Plus, there’s an incredible sense of accomplishment that comes with baking your own bread, transforming simple flour, water, and yeast into golden, puffy perfection.
The Magic Behind the Pita Puff
One of the most captivating aspects of baking pita is watching it spectacularly puff up in the oven. This magical transformation is not just for show; it’s what creates the characteristic pocket that makes pita so versatile. The science behind it is fascinating: when the thin, rolled-out dough hits the intense heat of a preheated baking stone or steel, the moisture within the dough rapidly turns into steam. This steam becomes trapped inside the dough, pushing the top and bottom layers apart, forming that iconic pocket. A perfectly hot oven is key to achieving this dramatic puff, ensuring a light, airy interior.
Essential Ingredients for Perfect Pita
Crafting delicious pita bread requires only a few basic ingredients, each playing a crucial role:
- Warm Water: Essential for activating the yeast. The ideal temperature is usually between 105-115°F (40-46°C). Too hot, and it kills the yeast; too cold, and the yeast won’t activate.
- Active Dry Yeast: The leavening agent that makes the dough rise and gives pita its airy texture.
- Granulated Sugar: A small amount acts as food for the yeast, helping it activate and thrive, resulting in a more active rise and better flavor development.
- Whole Wheat Flour: Adds a subtle nutty flavor and contributes to the dough’s structure and nutritional value. Even a small amount makes a difference.
- All-Purpose Flour: The primary flour, providing the bulk of the structure and elasticity for a soft, chewy pita.
- Kosher Salt: Enhances the flavor of the bread and controls yeast activity. Don’t skip it!
- Olive Oil: Adds richness, tenderness, and helps keep the pita soft. It also contributes to a lovely golden crust.
How To Make Pita Bread: A Detailed Guide
The beauty of this recipe lies in its simplicity, involving just a few key steps of stirring and minimal kneading. Let’s walk through the process:
1. The Sponge Method: Activating the Yeast
We begin by creating a “sponge,” a starter mixture that ensures your yeast is active and thriving. In a large bowl, combine warm water, active dry yeast, a touch of granulated sugar, whole wheat flour, and a small portion of the all-purpose flour. Stir it all together, then let this mixture sit for about 15 minutes. During this time, you should observe bubbles forming on the surface, indicating that your yeast is alive and ready to work its magic. This initial step is vital for developing flavor and ensuring a good rise.
2. Forming the Dough: Gentle Kneading is Key
Once your sponge is bubbly, it’s time to complete the dough. Add the salt, olive oil, and the majority of the remaining all-purpose flour to the bowl. Stir it until a shaggy dough forms. Then, with your hands, knead the dough directly in the bowl for just 1 minute. Transfer the dough to a lightly floured work surface and continue kneading for an additional 2 minutes. The goal is to achieve a smooth, elastic dough without overworking it. Add as little of the remaining flour as possible to prevent the dough from becoming stiff, only using it if the dough is excessively sticky.
3. Resting and Rising: Patience Pays Off
After the initial kneading, let the dough rest for 10 minutes. This allows the gluten to relax, making it easier to work with. Follow this with one more brief knead for about 2 minutes. Place the dough back into a clean, lightly oiled bowl, cover it tightly with plastic wrap or a damp cloth, and let it rise in a warm spot until it has doubled in size. This usually takes about 1 hour, depending on the warmth of your kitchen. The first rise (bulk fermentation) is crucial for developing flavor and texture.
4. Preheat the Oven: High Heat for the Perfect Puff
About 30 minutes before you’re ready to bake, place a baking stone or a heavy-duty baking sheet (like cast iron) in your oven and preheat it to a very hot 475 degrees F (245°C). The high, sustained heat of the baking surface is absolutely critical for the pita to puff up correctly. Without it, your pita might bake flat.
5. Divide and Shape: Creating the Rounds
Once the dough has risen, gently deflate it and divide it into 8 equal balls. Cover these dough balls with a damp towel to prevent them from drying out and let them rest for another 10 minutes. This second brief rest allows the gluten to relax again, making the dough much easier to roll. On a lightly floured surface, roll each ball into an 8-inch diameter circle, aiming for a uniform thickness of about 1/8-inch. Consistency in thickness helps ensure even puffing.
6. Baking the Pita: Watch the Magic Unfold
Carefully transfer the rolled-out pita circles onto the preheated baking stone or sheet in the oven. Bake for approximately 2 minutes. This is the moment of truth! You’ll be able to marvel as the pita bread dramatically puffs up like a balloon. Once fully puffed, use a spatula to flip it over and bake for an additional minute. This ensures even cooking and a soft, pliable texture. Repeat this process with the remaining dough, working in batches as your oven allows.
The fresh aroma and the sight of your homemade pita puffing up are incredibly satisfying. Once baked, you’ll have delicious, warm pita bread perfect for dipping, stuffing, or simply enjoying on its own.
Pita Bread
Ingredients
- 1 cup warm water
- 2 teaspoons active dry yeast
- 1/2 teaspoon granulated sugar
- 1/4 cup whole wheat flour
- 2-1/2 cups all-purpose flour
- 1 teaspoon kosher salt
- 2 tablespoons olive oil
Instructions
-
In a large bowl, stir together the water, yeast, sugar, whole wheat flour and 1/4 cup all-purpose flour. Let the mixture sit for 15 minutes. You should see bubbles form.
-
Add the salt, olive oil and 1-3/4 cups flour. Stir it into a shaggy dough. Knead in the bowl for 1 minute. Transfer to a work surface to knead for an additional 2 minutes. Add as little of the remaining flour as possible.
-
Let the dough rest for 10 minutes, and knead again for 2 minutes. Place the dough back in the bowl, cover and let rise until it has doubled in size, about 1 hour.
-
Place a baking stone in the oven and preheat to 475 degrees F.
-
Divide the dough into 8 balls. Cover the dough with a damp towel and let them rest for 10 minutes. Roll each ball into an 8-inch diameter circle about 1/8-inch thick.
-
Place the pita on the hot baking stone. Bake for 2 minutes. It should puff up. Then use a spatula to flip it over and bake for another minute. Repeat with the remaining dough.
-
Pita is best eaten the day it is baked. Store in an airtight container once it has cooled.
Notes
Nutrition
Nutrition information is automatically calculated, so should only be used as an approximation.
Additional Info
Beyond Hummus: Creative Ways to Enjoy Your Homemade Pita
While homemade pita bread is the perfect companion for a creamy bowl of hummus, its versatility extends far beyond that. Don’t let your leftover pita go to waste! After a delightful meal with hummus, I often find myself with extra pita, which I quickly transform into delicious pita chips. Simply tear the cooled pita into rustic pieces, drizzle generously with olive oil, and sprinkle with a pinch of sea salt. Bake in a 350-degree F (175°C) oven for about 15 minutes, or until golden and crisp. These homemade pita chips are fantastic on their own, with dips, or as a crunchy topping for salads.
But the possibilities don’t stop there. Consider using your fresh pita for:
- Authentic Wraps: Fill with falafel, grilled chicken, marinated vegetables, or thinly sliced meats for a portable and satisfying meal.
- Mini Pizzas: Use pita as a quick and easy base for individual pizzas. Top with your favorite sauce, cheese, and toppings, then bake until bubbly.
- Breakfast Pockets: Stuff with scrambled eggs, cheese, and your choice of breakfast meats or vegetables for a delicious start to your day.
- Dips & Spreads: Serve with classic Middle Eastern dips like baba ghanoush, tzatziki, or labneh.
- Open-Faced Sandwiches: Create savory open-faced sandwiches with roasted vegetables, feta, and a drizzle of olive oil.
Storage and Reheating Tips for Fresh Pita
Homemade pita is always best enjoyed the day it’s baked, when it’s at its absolute freshest and softest. However, if you have any leftovers, proper storage will help maintain its quality. Once the pita has fully cooled, store it in an airtight container or a sealed plastic bag at room temperature for up to 2-3 days. For longer storage, pita bread freezes exceptionally well. Wrap individual pitas tightly in plastic wrap, then place them in a freezer-safe bag. They can be frozen for up to 3 months.
To reheat, you have a few options: A quick toast in a dry skillet over medium heat for about 30 seconds per side will bring back its warmth and softness. Alternatively, wrap it in foil and warm in a preheated oven at 350°F (175°C) for a few minutes, or even a quick zap in the microwave for 10-15 seconds.
Troubleshooting Common Pita Baking Issues
While making pita is generally straightforward, sometimes things don’t go exactly as planned. Here are a few common issues and how to address them:
- Pita Not Puffing: The most common culprit is insufficient oven temperature. Ensure your oven is fully preheated, and your baking stone/sheet is scorching hot. Cold dough or dough that hasn’t risen enough can also cause this. Make sure your yeast is active!
- Tough or Dry Pita: This usually indicates too much flour was added during kneading, or the dough was over-kneaded. Next time, be sparing with additional flour and rely on minimal kneading. Overbaking can also lead to dryness.
- Uneven Puffs: Uneven thickness when rolling out the dough can cause some areas to puff more than others. Practice makes perfect when it comes to rolling uniform circles.
- Sticking to the Baking Surface: Ensure your baking stone or sheet is clean and well-seasoned (if applicable). A very light dusting of flour can also help, but too much will burn.
Don’t be discouraged if your first batch isn’t picture-perfect. Baking is an art, and every attempt is a learning opportunity. The flavor will still be miles better than store-bought!