
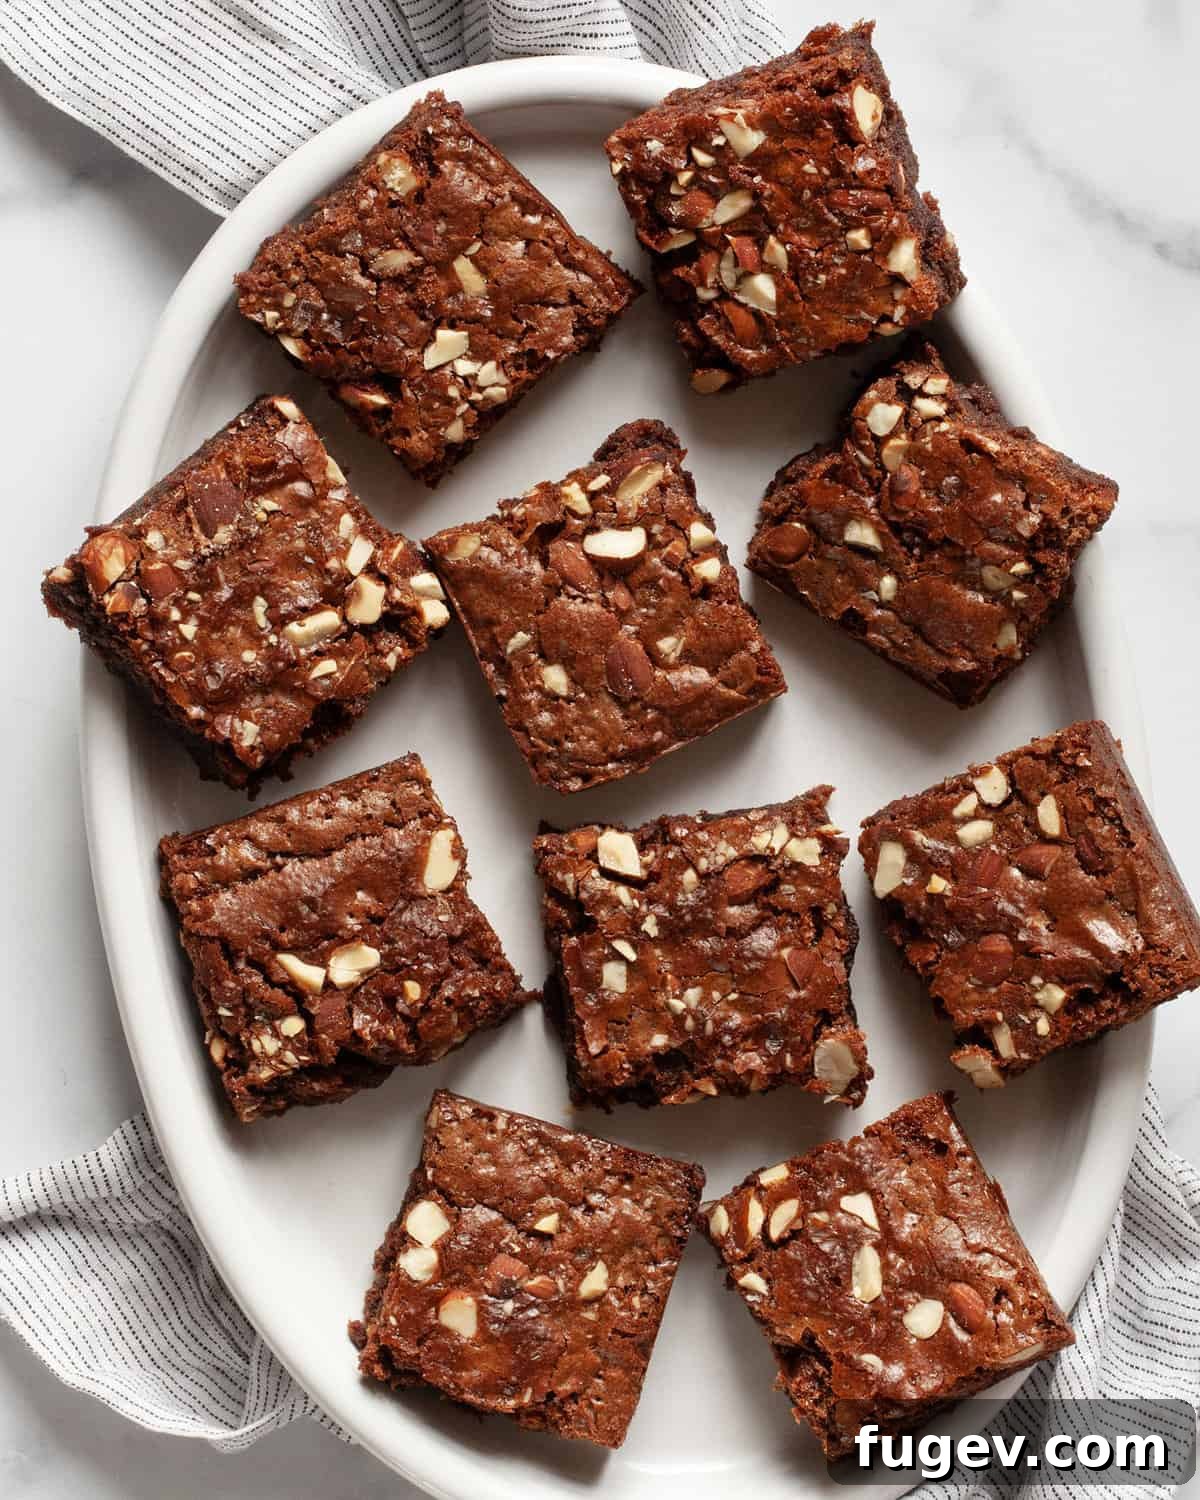
Irresistibly Fudgy Milk Chocolate Almond Brownies: Your New Go-To Recipe
Not everyone is drawn to the intense, bittersweet notes of dark chocolate. If your heart yearns for a sweeter, more comforting chocolate experience, then you absolutely must try these incredibly easy Milk Chocolate Almond Brownies. This recipe delivers a wonderfully rich chocolate flavor, beautifully complemented by a delicate touch of almond extract and the satisfying crunch of chopped almonds. It’s a perfect symphony of creamy chocolate and toasted nuts, elevated further by a subtle hint of sea salt, creating a classic baking masterpiece that’s simple to make and impossible to resist.
Looking for a nut-free alternative? Explore our decadent Sea Salt Fudge Brownies for an equally satisfying, purely chocolate experience.
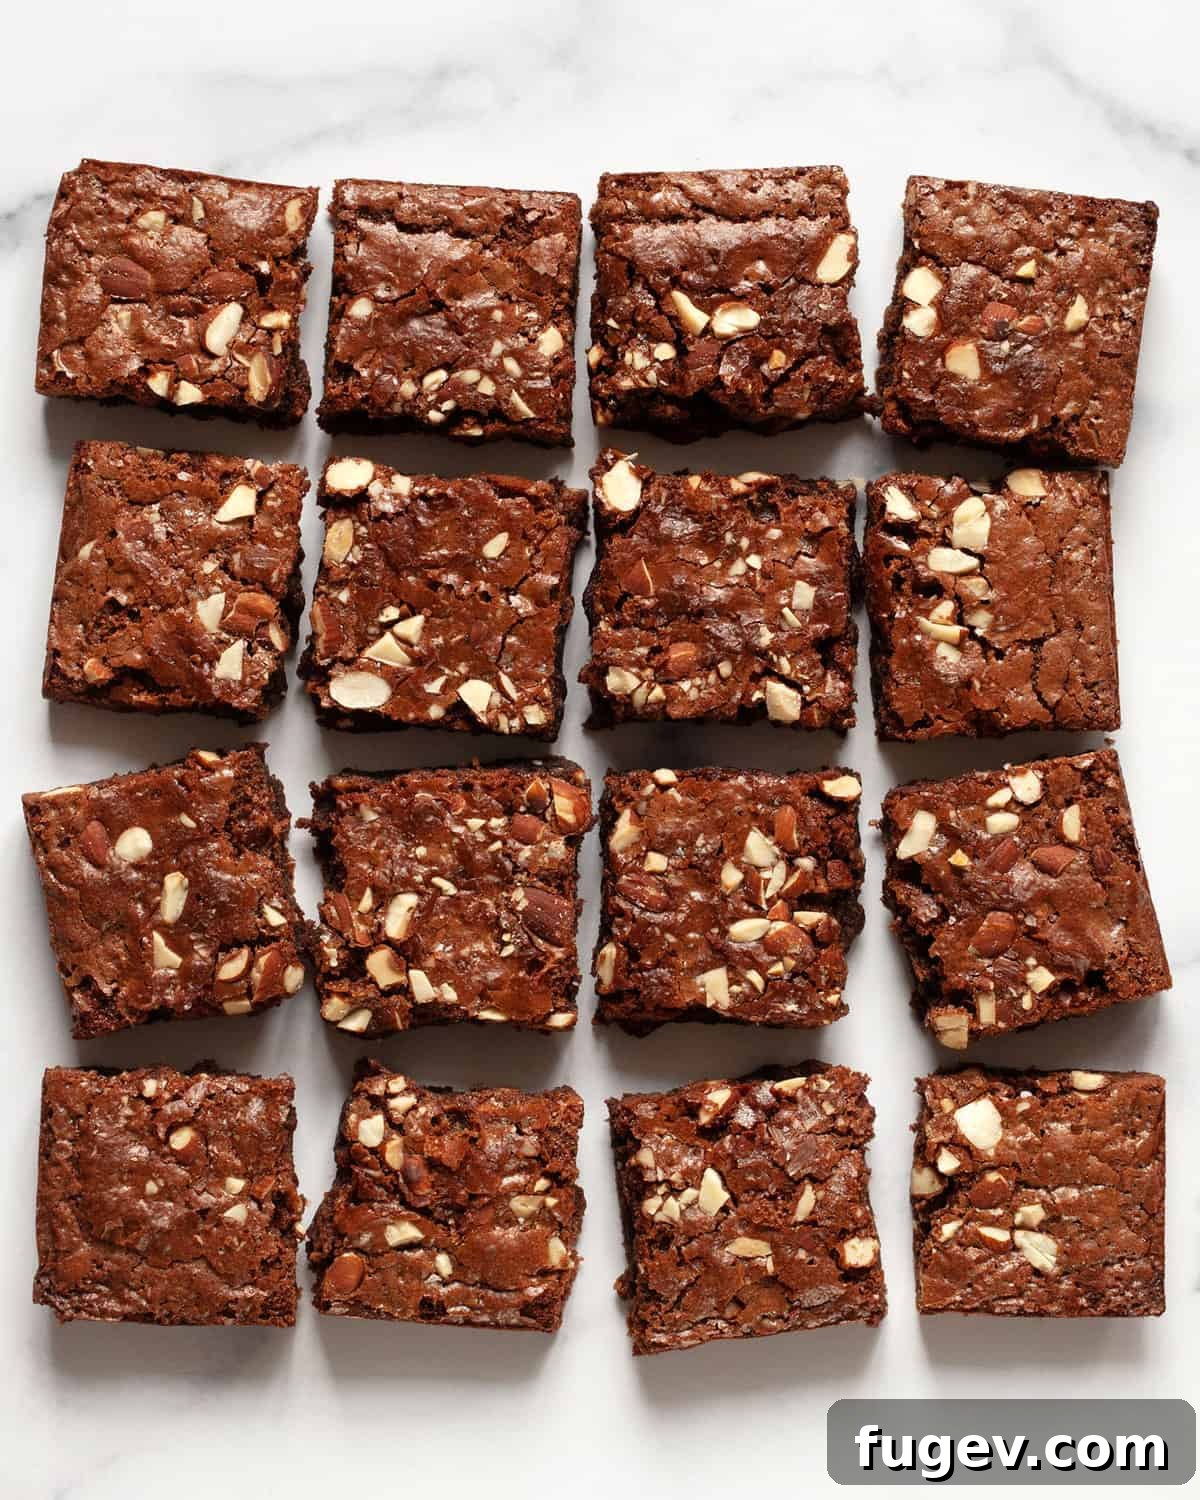
Table of Contents
- Why These Brownies Are a Must-Try
- Mastering the Ingredients for Perfect Brownies
- Step-by-Step Guide to Baking Milk Chocolate Almond Brownies
- Achieving Perfect Brownie Cuts
- Serving Suggestions for Your Brownies
- Storage and Freezing Tips for Brownies
- Top Tips for Brownie Baking Success
- Frequently Asked Questions About Milk Chocolate Almond Brownies
- Explore More Bar Cookie Recipes
- Milk Chocolate Brownies with Almonds Recipe Card
Why These Brownies Are a Must-Try
Prepare to fall in love with these milk chocolate almond brownies for a multitude of reasons. They offer a delightful blend of simplicity, irresistible flavor, and practical convenience that makes them stand out from your average dessert.
Effortless Baking with Minimal Cleanup
One of the greatest joys of this recipe is its incredible simplicity. Designed as a straightforward, one-bowl dessert, the preparation process is remarkably uncomplicated. This not only makes baking accessible for even novice bakers but also significantly reduces the amount of dishes you’ll need to wash afterward – a win-win in any kitchen! Despite their easy preparation, these brownies consistently achieve a rich, fudgy texture, defying the common belief that only dark chocolate can deliver such indulgence.
A Symphony of Sweet, Salty, and Nutty Flavors
What truly sets these brownies apart is their expertly balanced flavor profile. They feature a tantalizing trio of sweet milk chocolate, crunchy almonds, and a sprinkle of flaky sea salt. The creamy sweetness of the milk chocolate provides a comforting base, while the roasted almonds introduce a warm, nutty depth. The final touch of flaky sea salt isn’t just for show; it enhances the entire experience, cutting through the sweetness and highlighting the chocolate and almond notes. This simple addition elevates the brownies from good to gourmet, making them feel much more sophisticated and special.
Perfect for Planning Ahead: Freezer-Friendly Goodness
Hate the idea of leftover brownies drying out? We’ve got you covered! These homemade milk chocolate almond brownies are wonderfully freezable, making them an ideal treat for meal prepping or simply ensuring you always have a delicious dessert on hand. Freezing allows you to preserve their fresh-baked taste and fudgy texture. When a craving strikes, simply thaw them at room temperature, and they’ll be just as delicious as the moment they emerged from the oven. This convenience makes them perfect for busy schedules, unexpected guests, or satisfying your sweet tooth whenever it calls.
Mastering the Ingredients for Perfect Brownies
Crafting the perfect batch of fudgy milk chocolate almond brownies starts with understanding the role each ingredient plays. Here’s a closer look at what you’ll need and why each component is essential for that irresistible flavor and texture:
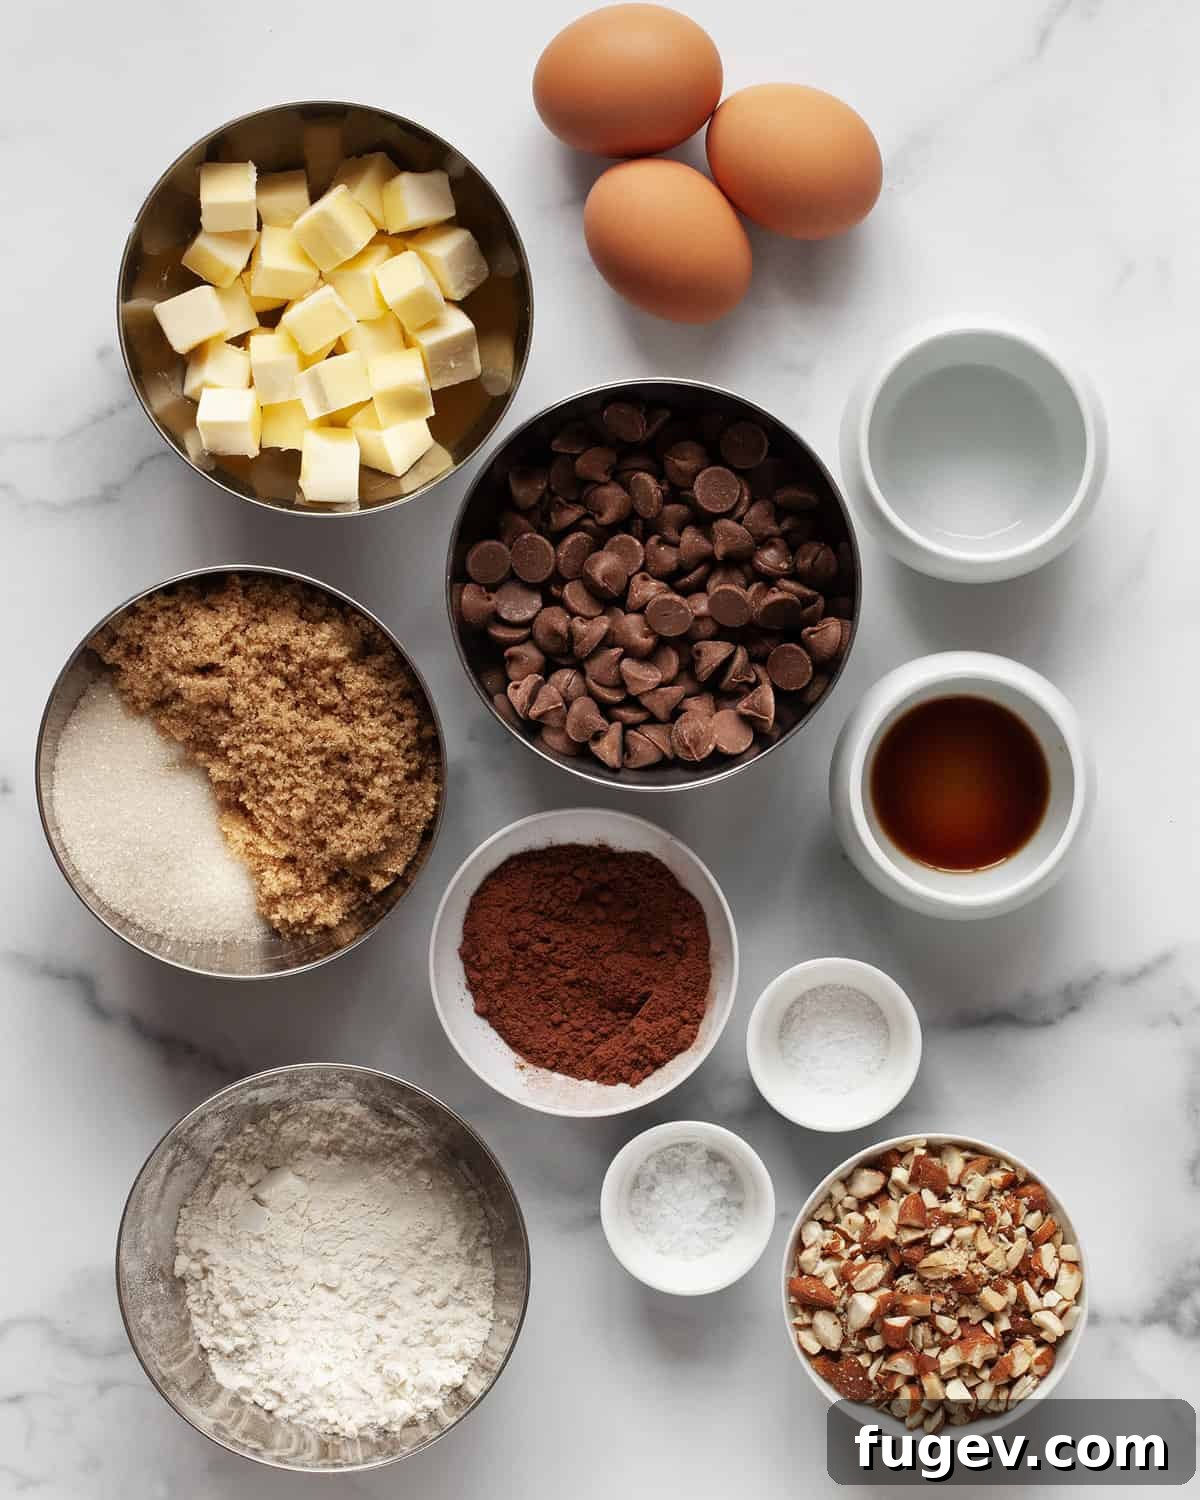
- Milk Chocolate: The star of the show! We recommend 6 ounces of roughly chopped milk chocolate. This is roughly equivalent to 1 cup of jumbo milk chocolate chips. Using good quality milk chocolate will impart a creamy, mellow sweetness that sets these brownies apart from their darker counterparts. Chopping ensures it melts smoothly and integrates evenly into the batter.
- Unsalted Butter: To ensure even melting and a luxurious texture, cut your butter into cubes before combining with the chocolate. Butter is crucial not just for moisture but also for adding a rich, nuanced flavor that oil simply cannot replicate, contributing significantly to the brownies’ decadent taste.
- Granulated Sugar and Light Brown Sugar: This dynamic duo creates a balanced sweetness and contributes to the perfect texture. Granulated sugar provides crispness to the brownie edges and top, while packed light brown sugar introduces moisture, chewiness, and a more complex, caramel-like sweetness, making the overall flavor profile more interesting and appealing.
- Large Eggs: You’ll need 3 large eggs. Eggs are essential for binding the ingredients together, providing structure, and contributing to the rich, fudgy consistency of the brownies. They also add moisture and help create that signature crackled top.
- Vanilla Extract: While often overlooked in chocolate desserts, a teaspoon of good quality vanilla extract is vital. It doesn’t just add its own flavor; it amplifies and enhances the chocolate notes, making the brownies taste even more intensely chocolatey and well-rounded.
- Almond Extract: A small amount of almond extract goes a long way. This ingredient is the secret weapon, introducing a fragrant, nutty aroma and a delicate almond flavor that beautifully complements the milk chocolate without overpowering it. It’s what gives these brownies their unique and irresistible character.
- Roasted Unsalted Almonds: We prefer roasted unsalted almonds for a reason. Roasting brings out their natural toasty flavor, adding depth and a satisfying crunch without introducing excessive saltiness that could disrupt the overall balance. Roughly chop them for ideal distribution and texture.
- Unsweetened Cocoa Powder: Used in conjunction with the melted milk chocolate, cocoa powder intensifies the chocolate flavor and contributes to the brownies’ deep color and fudgy consistency. It ensures a robust chocolate presence that isn’t solely reliant on the milk chocolate.
- All-Purpose Flour: The foundational dry ingredient. All-purpose flour provides the necessary structure without making the brownies too cakey. It’s important to measure accurately and avoid overmixing to maintain that desirable fudgy texture.
- Kosher Salt and Flaky Sea Salt: Kosher salt is used within the batter to balance the sweetness, while flaky sea salt (like Maldon) is sprinkled on top before baking. The large flakes of sea salt not only add a beautiful visual appeal but also provide delightful bursts of salty contrast, elevating the entire flavor experience and making the brownies seem more gourmet.
Step-by-Step Guide to Baking Milk Chocolate Almond Brownies
Baking these fudgy milk chocolate almond brownies is a straightforward and enjoyable process. Follow these detailed steps to ensure a perfect batch every time:
Preparation is Key
First, preheat your oven to 350 degrees F (175 degrees C). This ensures your oven is at the correct temperature when the batter is ready, promoting even baking. Next, prepare a 9-inch square baking pan. Line it with parchment paper or aluminum foil, allowing an overhang on two sides to create “slings” for easy removal later. Lightly grease the parchment paper or foil with butter or cooking spray to prevent sticking.
1. Melt the Butter and Chocolate: The best method for melting butter and chocolate together is using a double-boiler. Fill a large saucepan with about 1 inch of water and bring it to a gentle simmer over low heat. Place your cubed butter and roughly chopped milk chocolate into a large, heatproof bowl that fits snugly over the saucepan without its bottom touching the simmering water. The steam will gently melt the chocolate and butter. Stir occasionally with a spatula to ensure an even, smooth melt. Once completely melted and smooth, remove the bowl from the heat and set it aside to cool slightly.
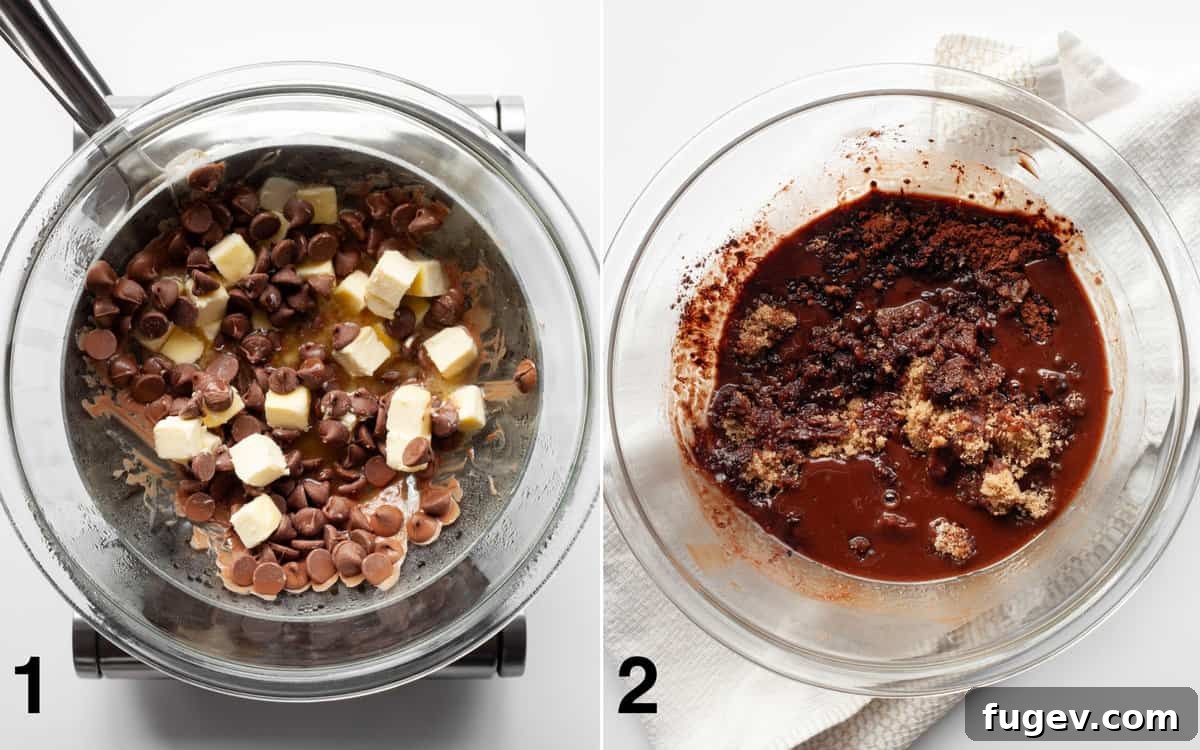
2. Combine Sugars and Flavorings: With the bowl still off the heat, stir the granulated sugar, light brown sugar, cocoa powder, kosher salt, vanilla extract, and almond extract into the warm, melted chocolate and butter mixture. Stir until all ingredients are well combined and the sugars begin to dissolve. The mixture should be glossy and fragrant. The warmth of the chocolate helps the sugars dissolve better, contributing to a smoother batter.
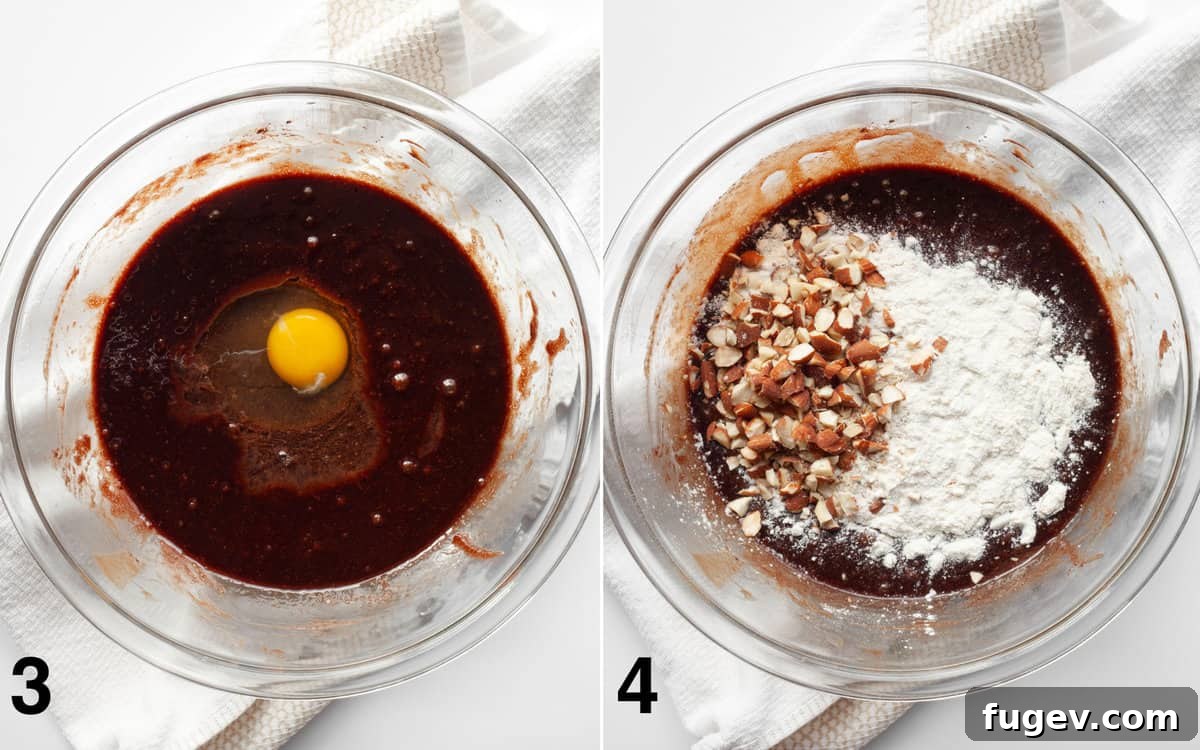
3. Incorporate the Eggs: Add the large eggs one at a time, beating well after each addition. This ensures each egg is fully incorporated into the batter, which is crucial for the brownies’ structure and fudgy texture. Continue mixing until the batter is smooth and homogeneous.
4. Fold in Dry Ingredients and Nuts: Gently fold in the all-purpose flour until just combined. Be careful not to overmix, as overdeveloping the gluten can lead to tough, cakey brownies instead of fudgy ones. Once the flour is mostly incorporated, fold in the majority of the chopped roasted unsalted almonds, reserving about 2 tablespoons for sprinkling on top.
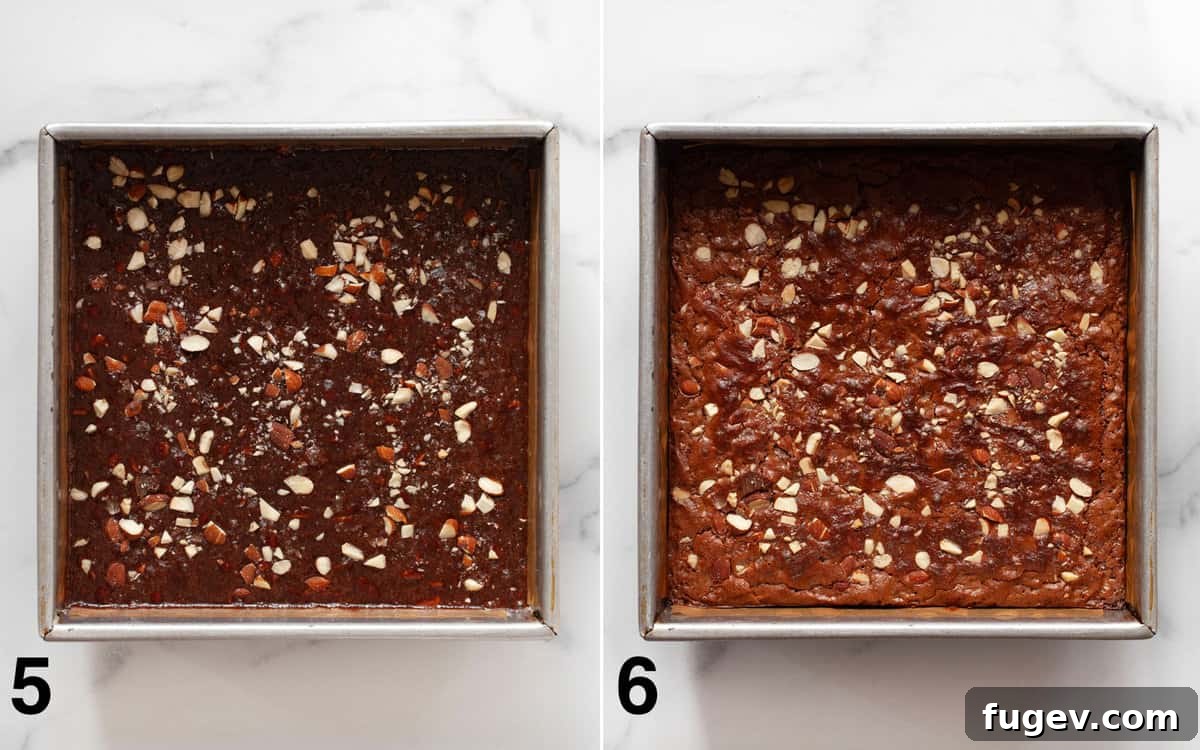
5. Prepare for Baking: Spread the brownie batter evenly into your prepared 9-inch square baking pan using an offset spatula. Ensure it reaches all corners. Sprinkle the top with the reserved chopped almonds and the flaky sea salt. This not only adds visual appeal but also delivers that delightful salty crunch with every bite.
6. Bake to Perfection: Transfer the pan to the preheated oven and bake for approximately 35 minutes. Brownies are ready when they are just set in the middle, and a toothpick inserted into the center comes out with moist crumbs attached – not wet batter, but not completely clean either. It’s always better to slightly underbake brownies than overbake them, as they will continue to set as they cool. The top surface should have developed some characteristic cracks, indicating their readiness.
Achieving Perfect Brownie Cuts
Cutting brownies into neat, appealing squares is an art that requires a bit of patience and the right technique. Here’s how to get those picture-perfect slices every time:
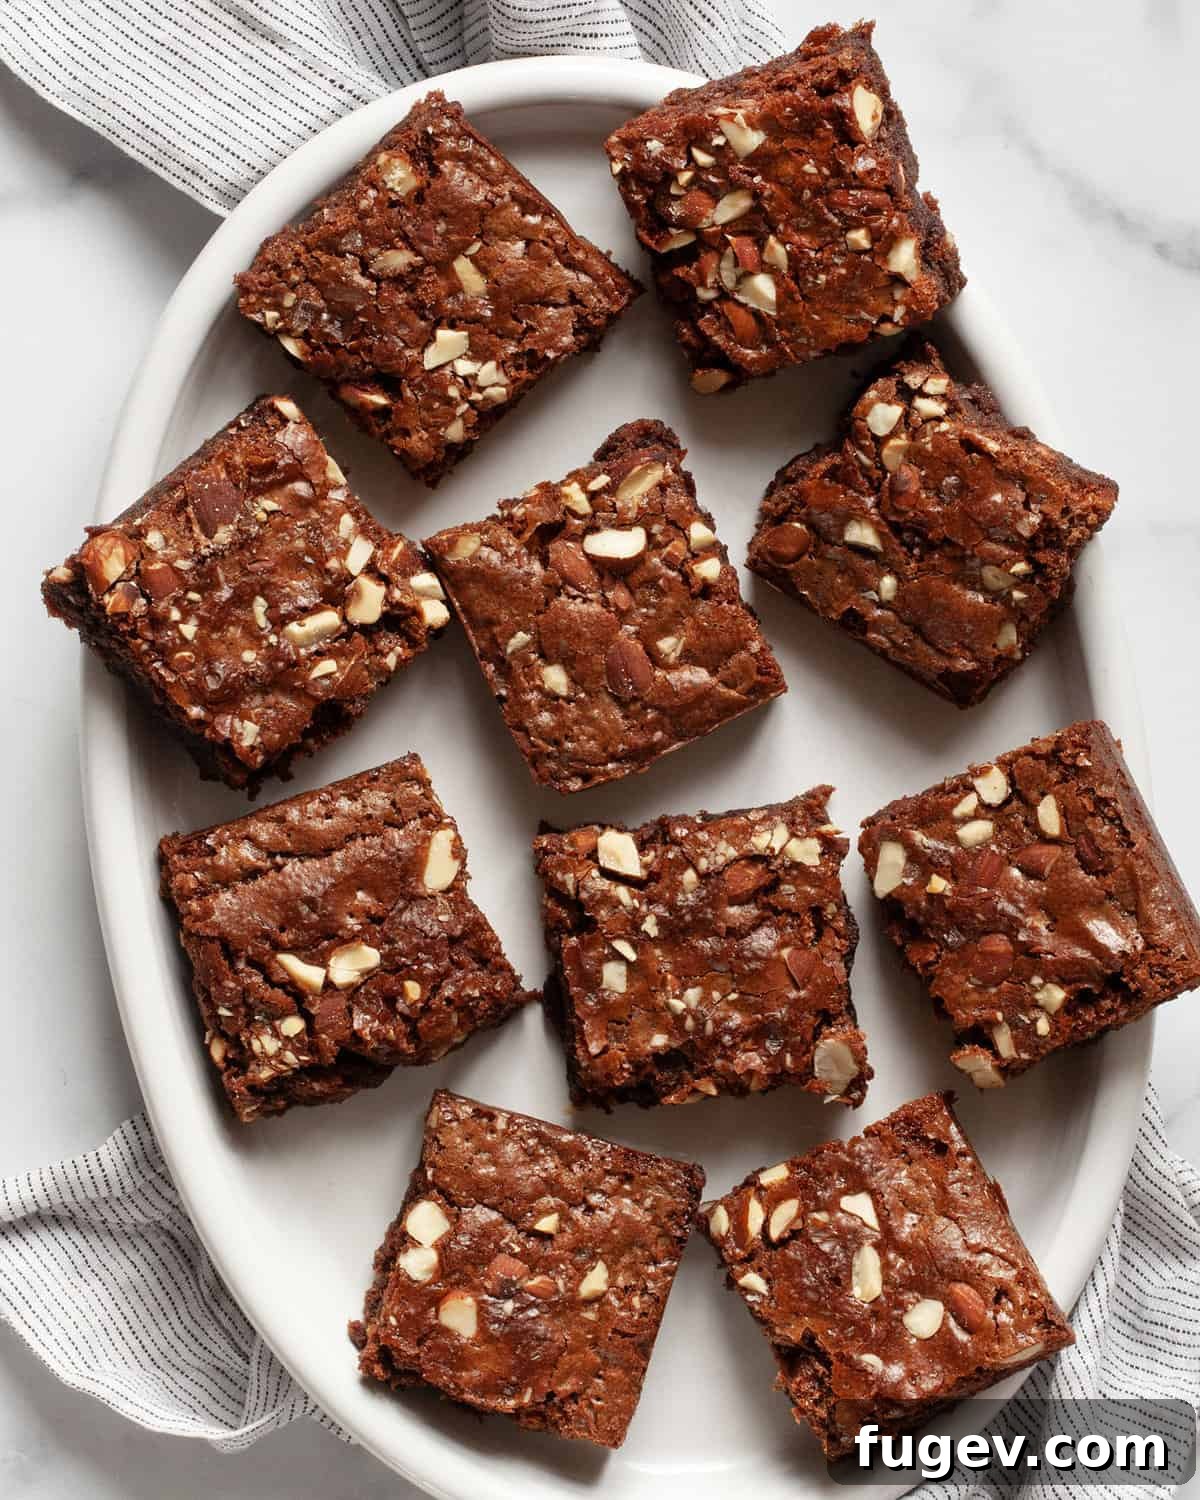
The golden rule for cutting brownies is to wait until they have fully cooled. This cooling period is crucial, as it allows the brownies to set completely, ensuring they are firm enough to cut without crumbling or sticking. Trying to cut warm brownies will result in a messy, sticky ordeal and uneven pieces.
Once cooled, select the right tool: a sharp chef’s knife is ideal. Avoid using a serrated knife, as its sawing motion can tear and drag the fudgy interior. Instead, use a chef’s knife and make straight, decisive downward cutting motions. Never saw back and forth, as this will create jagged edges and smear the chocolate. For the cleanest cuts, it helps immensely to wipe the knife blade clean with a damp paper towel in between each cut. This removes any sticky residue, allowing for a smooth pass through the next section of brownie. For those who appreciate precision and perfectly equal squares, a metal ruler can be a handy tool to guide your cuts and ensure uniformity.
Serving Suggestions for Your Brownies
Brownies and bar cookies are renowned for being incredibly easy to make, yet they offer endless possibilities for enjoyment. These milk chocolate almond brownies are no exception and are always a crowd-pleaser for any gathering or simple indulgence.
They are fantastic for sharing at cookie exchanges, potlucks, bake sales, or even casual game day gatherings like Super Bowl Sunday. Their robust flavor and satisfying texture make them a universal favorite. If you’re looking to make your single batch go further and serve more people, consider cutting the brownies into smaller squares. Instead of the standard 16 servings, you might easily yield 24 or even 32 mini brownies, perfect for a larger crowd or for offering a smaller bite-sized treat.
Beyond casual sharing, these brownies are also excellent served alongside a scoop of vanilla bean ice cream for a classic pairing, or with a dollop of freshly whipped cream. For an extra touch of decadence, a drizzle of caramel or hot fudge sauce can transform them into a gourmet dessert. They also pair wonderfully with a warm cup of coffee, a glass of cold milk, or even a robust tea, making them a versatile treat for any time of day.
Storage and Freezing Tips for Brownies
Proper storage is essential to keep your milk chocolate almond brownies fresh, moist, and delicious for as long as possible. Here’s how to best store and even freeze your homemade treats:
Room Temperature Storage
Your brownies will maintain their optimal freshness and fudgy texture for up to 3 days when stored at room temperature. The key is to keep them covered in the baking pan. For cut brownies, pay special attention to the exposed edges. To prevent them from drying out, press a layer of plastic wrap directly onto the cut surfaces. A pro tip for maximizing freshness is to resist the urge to slice the entire batch at once. Instead, cut only the brownies you plan to eat immediately. This keeps the uncut brownies more protected and moist. If you do have leftover cut brownies, transfer them to an airtight container to prevent air exposure and keep them soft.
Longer Term Storage: Freezing Brownies
For longer storage, freezing is an excellent option that preserves the brownies’ quality for up to 1 month. To freeze them effectively, first, ensure the brownies are completely cooled. Then, cut them into individual squares. Wrap each brownie tightly in plastic wrap, and then place the individually wrapped brownies into a freezer-safe bag or an airtight container. This double layer of protection helps prevent freezer burn and keeps them from sticking together. When you’re ready to enjoy a frozen brownie, simply remove it from the freezer and let it thaw at room temperature while still wrapped. This method allows the moisture to redistribute, ensuring they taste just as good as fresh-baked.
Top Tips for Brownie Baking Success
Baking perfect fudgy brownies isn’t just about following a recipe; it’s about understanding a few key principles. These tips will help ensure your milk chocolate almond brownies turn out wonderfully every single time:
- Do Not Overmix the Batter: This is perhaps the most crucial rule for achieving fudgy brownies. Unlike cakes, which benefit from extensive mixing, brownie batter should be handled gently. Once you add the flour, mix only until no dry streaks remain. Overmixing develops the gluten in the flour, leading to a tougher, more cake-like texture rather than the desired dense, fudgy consistency. Stir slowly and thoughtfully, stopping immediately when the flour is just combined.
- Avoid Overbaking Your Brownies: The line between perfectly fudgy and dry brownies is thin. Brownies are ready when they are “just set” in the middle. A toothpick inserted into the center should come out with moist crumbs, not wet batter, and not completely clean. The top will likely have some appealing cracks. If you bake them until the toothpick is completely clean, they will be overdone and less fudgy. Keep a close eye on them towards the end of the baking time.
- Use a Metal Baking Pan: For optimal results, bake your brownies in a metal baking pan. Metal is a superior conductor of heat compared to glass, which means it heats up and cools down more quickly and evenly. This consistent heat distribution helps bake the brownies uniformly, reducing the risk of overcooked edges and an undercooked center. While glass pans can be used, you might need to adjust baking time and temperature slightly.
- Always Cool Brownies Completely Before Cutting: Patience is a virtue, especially when it comes to cutting brownies. If you attempt to slice warm brownies, they will be soft, gooey, and difficult to cut neatly, often resulting in messy, crumbled pieces. Allowing them to cool completely, ideally for at least 2-3 hours (or even chilling them briefly), allows them to set fully. This makes them firm enough for clean, sharp cuts and enhances their fudgy texture.
- Measure Ingredients Accurately: Baking is a science, and precision matters. Use proper measuring cups and spoons, and for dry ingredients like flour, consider using a kitchen scale for the most accurate results. Too much or too little of any ingredient can significantly alter the brownies’ texture and flavor.
Frequently Asked Questions About Milk Chocolate Almond Brownies
This recipe is specifically developed and balanced for the unique sweetness and creamy texture of milk chocolate. Making a substitution with dark chocolate would significantly alter the flavor profile and potentially the texture. For the best results and the intended sweet and mellow taste, we strongly recommend sticking to milk chocolate as specified.
Absolutely! If you’re not a fan of nuts, you can easily omit the chopped almonds from this recipe. The brownies will still be wonderfully fudgy and flavorful. If you’d like to add another texture or chocolate boost, you could stir in extra chocolate chips or chunks instead of nuts.
Yes, as an alternative to the double boiler method, you can melt the butter and chocolate in a microwave-safe bowl. Microwave in short 30-second bursts, stirring thoroughly after each interval. Be very careful not to overheat or burn the chocolate, as this can cause it to seize. Stirring frequently helps distribute the heat evenly.
If you don’t have parchment paper, you can use aluminum foil. Line your baking pan with foil, leaving an overhang on the sides. Make sure to grease the foil generously with butter or cooking spray to prevent the brownies from sticking. This will still allow for easy lifting and cutting once the brownies are cooled.
The best way to check for doneness is to insert a toothpick into the center of the pan. It should come out with moist crumbs, but not wet batter. If it comes out completely clean, your brownies are likely overbaked and will be drier. A slightly underbaked brownie is usually preferred for a truly fudgy texture, as they continue to set as they cool.
Explore More Bar Cookie Recipes
If you’ve enjoyed these delicious milk chocolate almond brownies, you’re in for a treat! Our collection of bar cookie recipes offers a diverse range of flavors and textures, perfect for any occasion. From classic comforts to exciting new combinations, there’s something for everyone:
- Chewy Chocolate Chip Cookie Bars
- Candy Bar Blondies
- Cinnamon Squares
- Cream Cheese Brownies
- Ricotta Cheesecake Bars
- Pretzel Shortbread Bars
- No-Bake Cookies & Cream Cheesecake Bars
- Rocky Road Bars
- Zucchini Brownies
Milk Chocolate Brownies with Almonds
These fudgy milk chocolate brownies are enhanced with a delicate touch of almond extract, crunchy chopped almonds, and a sprinkle of flaky sea salt. They offer the perfect balance of sweet, salty, and nutty flavors in every bite.
Ingredients
- 1/2 cup (113g) unsalted butter, cubed, plus more for greasing pan
- 6 ounces (170g) milk chocolate, roughly chopped (about 1 cup jumbo milk chocolate chips)
- 1/2 cup (100g) granulated sugar
- 1/2 cup (100g) packed light brown sugar
- 2 tablespoons (10g) unsweetened cocoa powder
- 1/2 teaspoon kosher salt
- 1 teaspoon vanilla extract
- 1/2 teaspoon almond extract
- 3 large eggs
- 1/2 cup (60g) all-purpose flour
- 1/2 cup (60g) roughly chopped roasted unsalted almonds (reserve 2 tablespoons for topping)
- 1 teaspoon flaky sea salt, for sprinkling
Instructions
- Preheat the oven to 350°F (175°C). Line a 9-inch square baking pan with parchment paper or aluminum foil, leaving an overhang on two sides, and lightly grease it with butter or cooking spray.
- Place the cubed butter and roughly chopped milk chocolate in a large heatproof bowl. Set the bowl over a saucepan with about 1 inch of simmering water (double-boiler method), ensuring the bottom of the bowl does not touch the water. Stir occasionally with a spatula until the butter and chocolate are completely melted and smooth. Remove the bowl from the heat.
- Stir the granulated sugar, light brown sugar, cocoa powder, kosher salt, vanilla extract, and almond extract into the warm chocolate mixture until well combined and glossy.
- Beat in the eggs one at a time, mixing well after each addition until fully incorporated and the batter is smooth.
- Gently fold in the all-purpose flour until just combined and no dry streaks remain. Be careful not to overmix. Then, fold in most of the chopped almonds, reserving about 2 tablespoons for the topping.
- Spread the brownie batter evenly into the prepared pan. Sprinkle the top with the reserved chopped almonds and the flaky sea salt.
- Bake for 35 minutes, or until the brownies are just set in the middle and a toothpick inserted into the center comes out with moist crumbs attached (not wet batter). The top should have some cracks. It’s better to slightly underbake for fudgier results.
- Let the brownies cool completely in the pan on a wire rack before removing them using the parchment paper slings. Once cooled, cut them into squares using a sharp chef’s knife, wiping the blade clean between cuts for perfect slices.
Notes
- For a different nutty flavor, you can substitute the almonds with chopped pecans or walnuts.
- Store brownies covered in the pan at room temperature for up to 3 days. To keep cut edges moist, press plastic wrap directly onto them. Keep already cut brownies in an airtight container.
- Brownies can be frozen for up to 1 month. Cut them into individual squares and wrap each tightly in plastic wrap before placing them in a freezer-safe bag or container. Thaw at room temperature while still wrapped.
Nutrition (Approximate per serving)
- Calories: 209kcal
- Carbohydrates: 24g
- Protein: 3g
- Fat: 12g
- Saturated Fat: 6g
- Polyunsaturated Fat: 1g
- Monounsaturated Fat: 3g
- Trans Fat: 0.2g
- Cholesterol: 46mg
- Sodium: 233mg
- Potassium: 100mg
- Fiber: 1g
- Sugar: 19g
- Vitamin A: 222IU
- Calcium: 33mg
- Iron: 1mg
Nutrition information is automatically calculated and should only be used as an approximation.
Additional Info
Course: Cookies & Bars
Cuisine: American
Did you make this recipe?
Mention @lastingredient on Instagram and tag it #lastingredient! We’d love to see your delicious creations!