
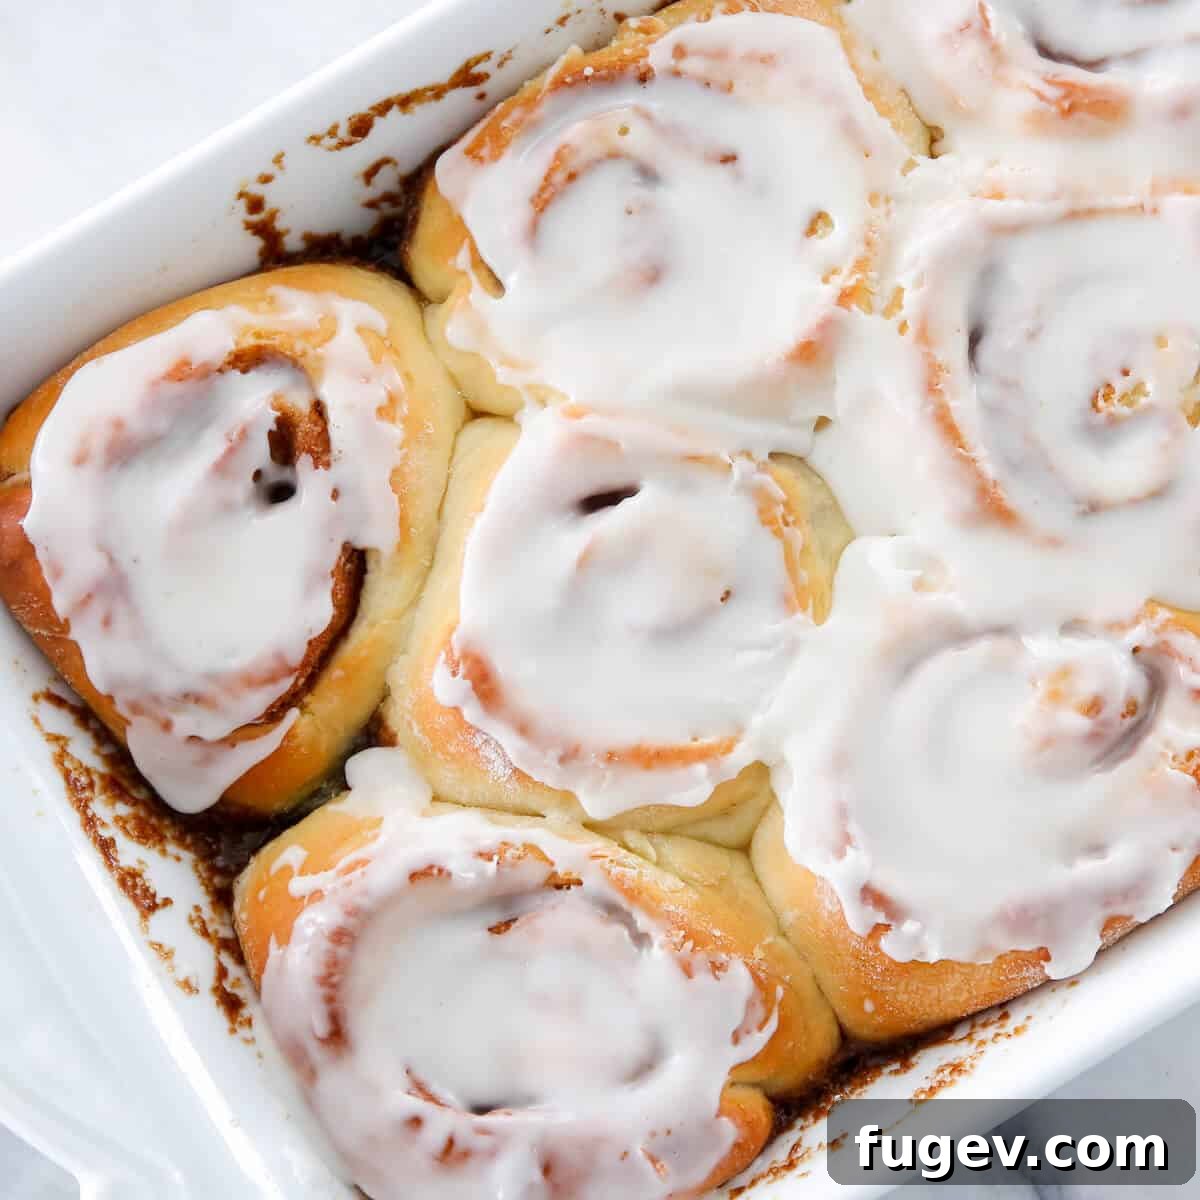
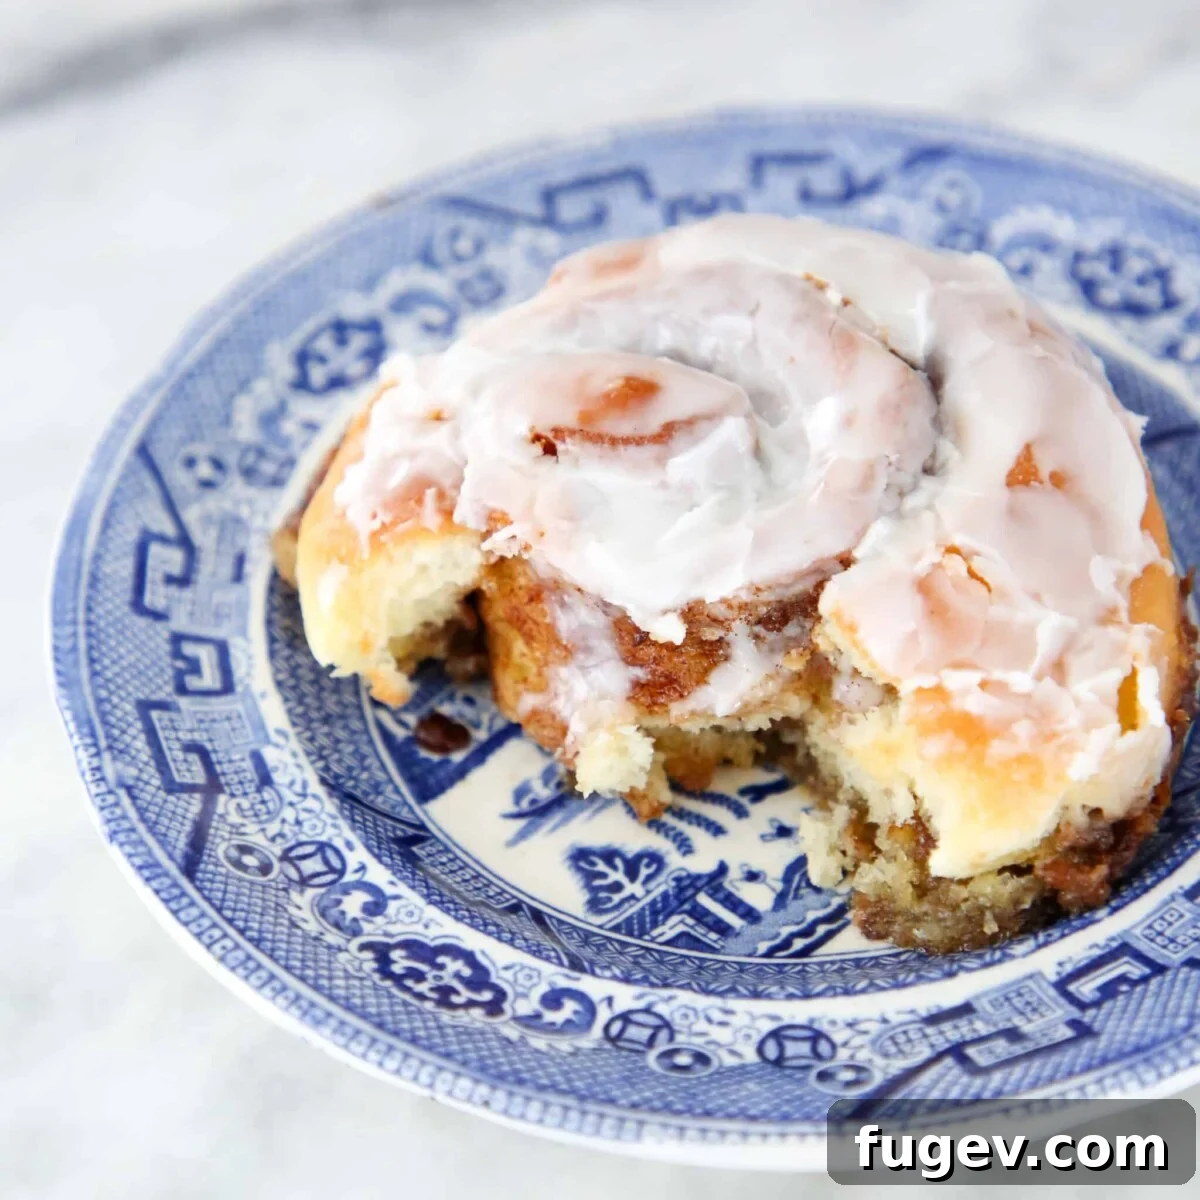
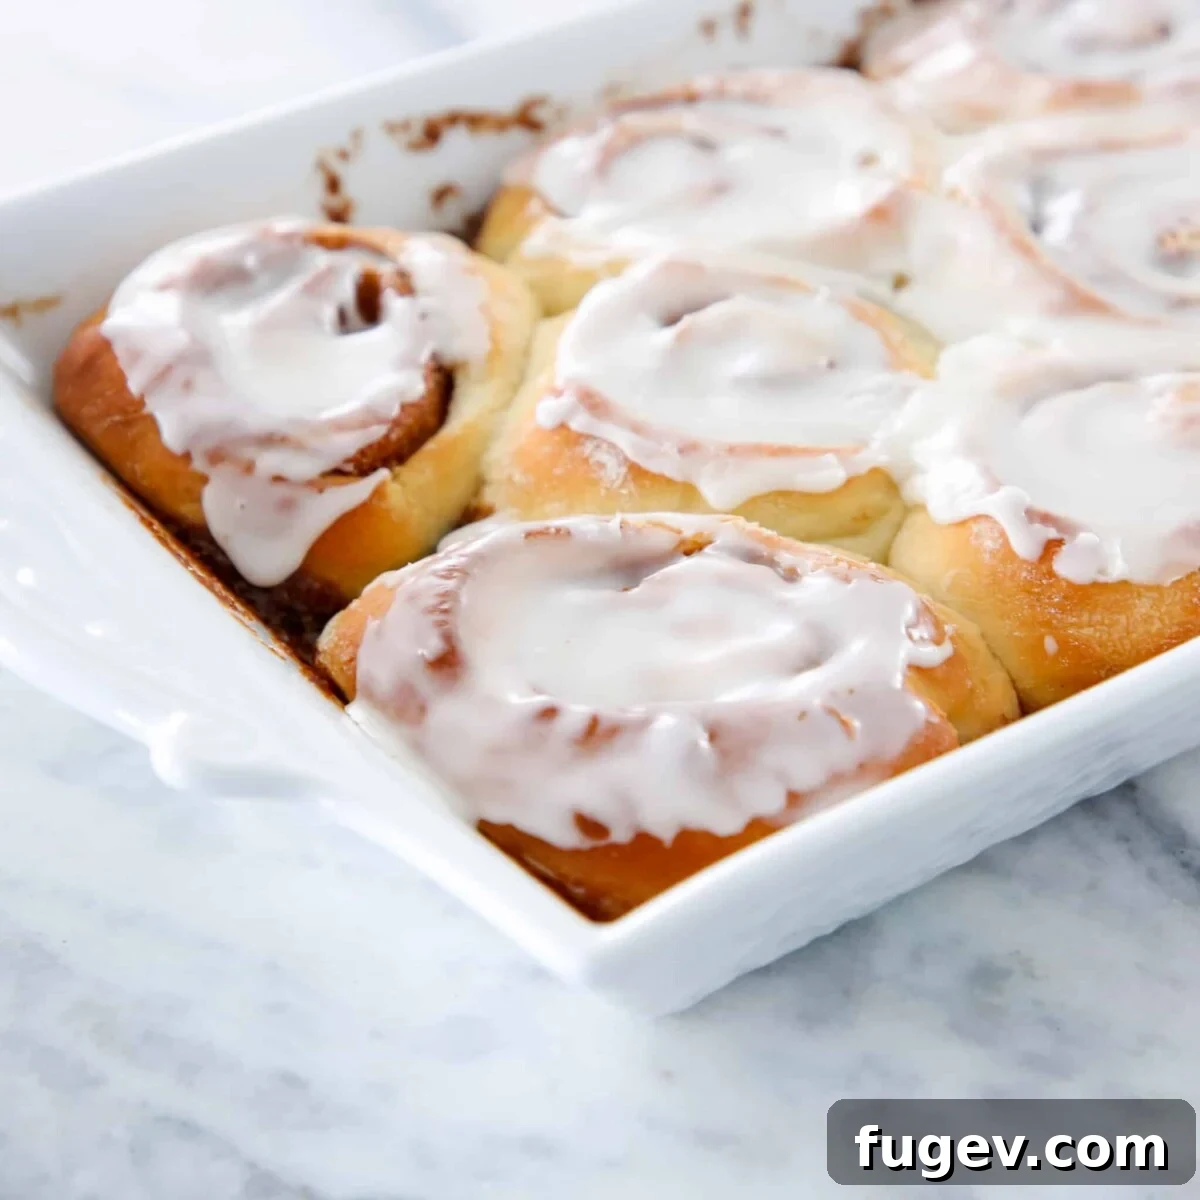
Prepare to embark on a culinary journey that culminates in the creation of the most exquisite sourdough cinnamon rolls you’ve ever tasted. These aren’t just any cinnamon rolls; they are a masterpiece of softness, tenderness, and cinnamon-sugar perfection. Imagine a treat where every single bite feels like you’ve hit the coveted center of the roll – rich, gooey, and utterly divine. After years of meticulous development and countless tests, we are proud to share a recipe that guarantees this unparalleled experience, elevating your baking to a whole new level of deliciousness.
A Quick Look At The Recipe
This is a brief summary of the recipe. Jump to the comprehensive recipe card below for full details.
Jump to Recipe
Prep Time
30 minutes
Cook Time
18 minutes
Proof
50 minutes
Total Time
1 hour 38 minutes
Servings
8 rolls
Difficulty
Intermediate yet easy, featuring a forgiving dough and clear, guided steps, making it accessible for bakers of various skill levels.
Calories *
521 kcal per serving
Technique
Carefully bloom yeast, mix the enriched dough, allow for a critical bulk fermentation, expertly fill, roll, cut, proof again, and bake until beautifully golden brown and irresistibly soft.
Flavor Profile
Experience remarkably soft, tender rolls with a luscious, gooey cinnamon swirl, all enveloped in a rich, buttery dough that perfectly balances sweetness and spice.
* Based on nutrition panel for a single serving. Nutritional information may vary depending on ingredients and preparation methods.
Summarize & Save this content on:
Google AI
Perplexity
Grok
“I have to say these are some of the best cinnamon rolls I’ve ever had. The roll is light and full of flavor, and I love the filling and that it stays in the rolls. I will be making these on repeat for sure!”
Mara ⭐⭐⭐⭐⭐
Why You Will Absolutely Love These Sourdough Cinnamon Rolls
For any baker, whether novice or expert, the quest for the perfect cinnamon roll often feels like an endless journey. However, with this sourdough cinnamon roll recipe, your search finally concludes. Here’s a detailed look at why these rolls stand head and shoulders above the rest, promising an unforgettable baking and eating experience:
- Unrivaled Texture from Sourdough Starter: Unlike many traditional recipes, the sourdough starter in this recipe is not primarily for flavor, but for its transformative effect on the dough’s texture. The natural acids and enzymes present in an active starter work their magic over time, gently breaking down gluten and contributing to an incredibly tender, soft, and remarkably pillowy crumb. This inherent pre-development of gluten means your rolls start with a structural advantage, resulting in a lighter, more delicate texture that simply melts in your mouth with every single bite.
- Years of Perfection Through Rigorous Testing: This recipe is the culmination of years of dedicated testing, countless adjustments, and an unwavering commitment to perfection. Every single ingredient ratio, every proofing duration, and every precise baking temperature has been meticulously fine-tuned. The singular goal throughout this extensive process was to create a cinnamon roll so consistently soft, moist, and gooey that even the outermost edge is as utterly delightful and indulgent as the fabled center. Trust us when we say, this rigorous development process has yielded a recipe that delivers on its promise of perfection, every single time.
- Moist, Gooey, and Flavorful Filling That Stays Put: One of the most common and frustrating disappointments with homemade cinnamon rolls is a dry dough or a filling that leaks out during baking, leaving you with less cinnamon-sugar goodness. Our sourdough cinnamon rolls conquer these challenges effortlessly. The precise ratios in the dough, combined with the strategic addition of heavy cream just before baking, work synergistically to ensure the rolls remain exceptionally moist and tender throughout. This perfect environment allows the rich, buttery cinnamon-sugar filling to mingle harmoniously with the soft dough, staying perfectly contained within each beautiful swirl, guaranteeing a luscious, gooey, and flavor-packed experience in every single bite.
- The Ultimate Special Occasion Breakfast: Elevate any ordinary moment into a truly special occasion with these extraordinary cinnamon rolls. Their impressive appearance, combined with their irresistible aroma that fills your home, makes them a perfect centerpiece for festive breakfasts. Whether it’s the joy of Christmas morning, a cherished birthday celebration, or simply a relaxed Sunday morning gathering with family and friends, these rolls are more than just a treat; they are an experience, creating lasting, delicious memories around the breakfast table.
- Accessible Yet Rewarding Baking Experience: While incorporating sourdough might initially sound intimidating to some, this recipe is meticulously designed to be forgiving and straightforward, even for those new to sourdough baking. With clear, guided steps and detailed instructions, bakers of all levels can confidently achieve professional-quality results. The subtle tang from the sourdough is delicate, enhancing the overall depth of flavor without ever overpowering the comforting, classic cinnamon roll taste, making this a profoundly rewarding bake that you’ll be immensely proud to share.
Table of Contents
- Why You Will Absolutely Love These Sourdough Cinnamon Rolls
- The Art of Sourdough Cinnamon Rolls: A Journey to Perfection
- Essential Ingredients & Thoughtful Substitutions
- Creative Variations for Your Sourdough Cinnamon Rolls
- Professional Tips for Baking Success
- Step-by-Step Guide: How to Make Sourdough Cinnamon Rolls
- Chef Lindsey’s Recipe Tip: Achieving Your Desired Dough
- Recipe FAQs: Your Sourdough Cinnamon Roll Questions Answered
- Recommended Cinnamon Dessert Recipes
- Sourdough Cinnamon Rolls Recipe Card
- Before You Go: Explore More Sourdough Delights
The Art of Sourdough Cinnamon Rolls: A Journey to Perfection
My culinary journey has been punctuated by numerous attempts to perfect classic recipes, and these sourdough cinnamon rolls represent one of the most rewarding challenges. Sometimes, experience allows me to quickly develop a dessert or bread that is nearly flawless from the outset, much like my popular carrot cake roll. Other times, true mastery demands relentless dedication and countless iterations.
This particular cinnamon roll recipe falls into the latter category, standing as a testament to persistence and passion. It rivaled the intense development process of my bergamot molten chocolate cake, which required nearly 30 attempts to achieve absolute perfection. These sourdough cinnamon rolls were a close second in terms of testing, but the effort was unequivocally worth it, resulting in a recipe I am truly proud to share.
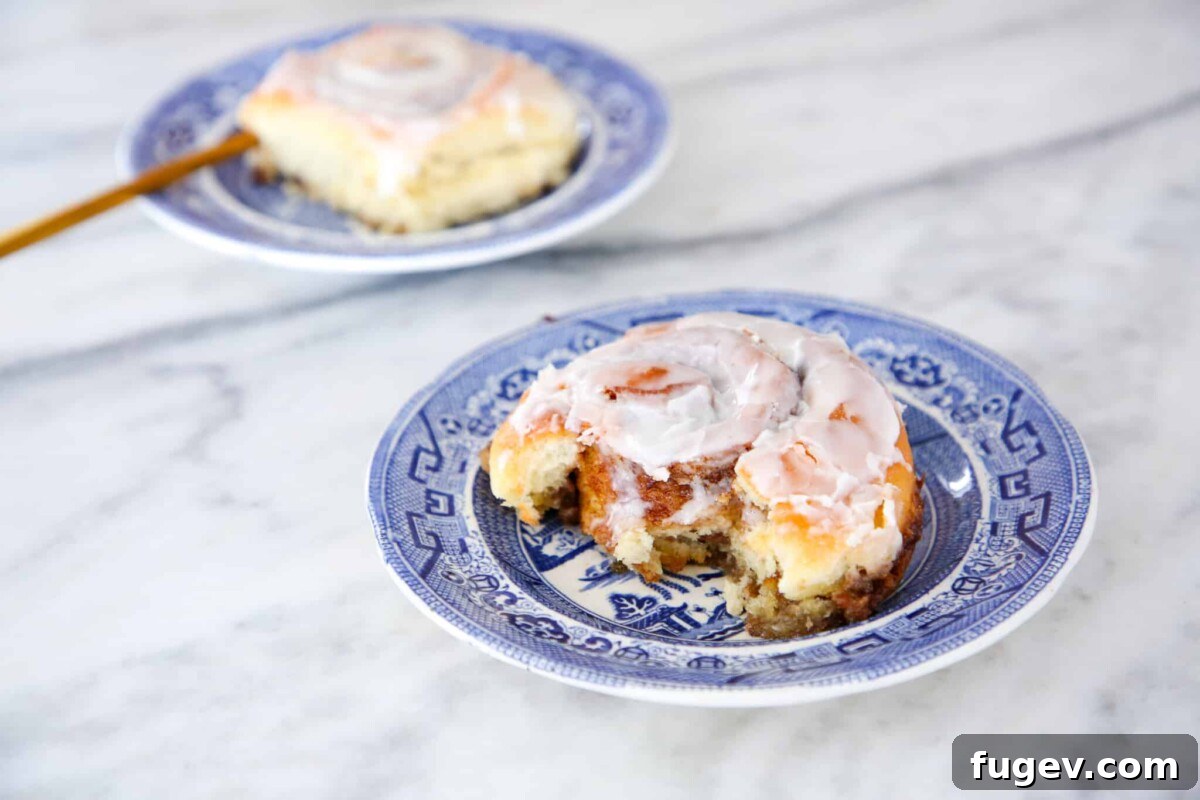
It is with immense confidence and pride that I present to you what I consider to be THE BEST sourdough cinnamon roll recipe. These rolls embody everything you could wish for: they are incredibly tender, astonishingly soft, and boast the ideal balance of a rich cinnamon-sugar filling that truly stays in its place, creating those coveted gooey layers. The dough itself is a marvel – wonderfully pillowy, airy, and delicately flavored, providing a sublime contrast to the sweet, spiced interior.
Should you find yourself craving the comforting flavors of cinnamon rolls but desire a quicker route, my cinnamon chip scones with cream cheese glaze offer all the deliciousness with half the effort and less waiting time. Alternatively, if you’re ready to further expand your cinnamon roll repertoire beyond the classic, be sure to explore my delightful apple cinnamon rolls, which introduce a wonderful fruity twist, or venture into the playfully innovative cereal milk cinnamon rolls from a fellow baker. But for the ultimate experience in soft, gooey, sourdough goodness, this recipe is truly unparalleled and promises to become a beloved staple in your baking collection.
Essential Ingredients & Thoughtful Substitutions
Crafting the perfect sourdough cinnamon roll begins with understanding the role of each ingredient. Here’s a detailed breakdown of what you’ll need and potential substitutions to ensure your baking journey is a smooth one, culminating in truly exceptional rolls:
- Whole Milk: Whole milk is my preferred choice for yeasted breads, especially enriched doughs like cinnamon rolls, due to its higher fat content and lower water content compared to skim milk or many milk alternatives. The added fat contributes significantly to the richness, tenderness, and moisture of the finished rolls, making them truly indulgent and ensuring a soft, pillowy crumb. While whole milk offers the absolute best results in terms of texture and flavor, you can substitute it with any milk alternative (such as almond, oat, or soy milk) if dietary restrictions require it, though be aware the final texture might be slightly different.
- Active Dry Yeast: A small amount of active dry yeast provides a gentle yet effective boost to the sourdough starter, ensuring a consistent and relatively quicker rise. This hybrid approach, also used in my sourdough raisin bread, helps to achieve that desirable fluffy texture within a manageable timeframe. If active dry yeast is unavailable, you can substitute double the weight of fresh yeast. For purists who prefer a purely sourdough rise, the commercial yeast can be omitted entirely; however, be prepared for a significantly longer proofing period for the dough to fully develop and reach the desired volume.
- Large Egg: The inclusion of a large egg is vital for enriching the dough. It adds crucial moisture, helps bind the dough components together, and contributes to a beautiful golden-brown color in the baked rolls. Furthermore, the egg’s proteins provide structure and aid in emulsification, resulting in a more stable, pliable, and ultimately softer crumb.
- Unsalted Butter: Perfectly softened unsalted butter is crucial for both the dough and the filling. In the dough, it imparts a luxurious flavor, adds richness, and contributes significantly to the tender texture. For the filling, using butter that is softened to the right consistency ensures it spreads evenly across the dough and melds beautifully with the cinnamon and sugar. This prevents the filling from leaking during the baking process, keeping all that gooey goodness exactly where it belongs. Ensure your butter is truly softened (pliable but not greasy or melted) for optimal results.
- All-Purpose Flour: I consistently use high-quality all-purpose flour for the majority of my bread recipes, and it’s an ideal choice for these cinnamon rolls. Its protein content strikes a perfect balance, allowing for sufficient gluten development to create a strong, elastic network that can trap gases and create a light texture, while still yielding a wonderfully tender and soft crumb. While bread flour can be used for a slightly chewier roll, I strongly advise against using pastry or cake flour, as their significantly lower protein content will not provide the necessary gluten structure for these enriched rolls, potentially resulting in a dense, crumbly, or overly delicate texture.
- Active Sourdough Starter: The key to the unique depth of flavor and tender texture of these rolls is an active, vigorous, 100% hydration sourdough starter. This means your starter should be bubbly and thriving, ideally fed about 4-12 hours prior to use, and not sourdough discard. The starter works to subtly enhance the dough’s texture, contributing to its elasticity and moistness, and imparts a delicate, nuanced tang that elevates the classic cinnamon roll taste without being overtly sour, providing that signature sourdough chewiness. Refer to my sourdough starter recipe for guidance on maintaining a healthy starter.
- Salt: A crucial ingredient in all baking, salt is not just for seasoning. In this recipe, it balances the sweetness of the dough and filling, enhances the overall flavor profile of the cinnamon and butter, and plays a vital role in regulating yeast activity, controlling the rate of fermentation for a perfectly risen dough. Use kosher salt for best results.
- Granulated Sugar: Beyond simply adding essential sweetness to the dough, granulated sugar performs multiple important functions. It aids significantly in the caramelization of the crust during baking, contributing to that attractive golden-brown finish. More importantly, it serves as a readily accessible food source for both the active dry yeast and the sourdough starter, helping to activate them efficiently and ensure a vigorous, consistent rise.
- Dark Brown Sugar: For the sumptuous filling, dark brown sugar is my go-to choice. Its higher molasses content provides a deeper, more complex caramel-like flavor and a wonderfully moist, gooey texture that truly makes the filling irresistible. However, if dark brown sugar is not available, light brown sugar can be used as a substitute, delivering an equally delightful, albeit slightly milder and less intensely caramelized, cinnamon-sugar experience. Ensure it is packed when measured.
- Ground Cinnamon: The undeniable star of the show! High-quality ground cinnamon is absolutely essential for a fragrant and intensely flavorful filling. Do not skimp on good quality cinnamon, as it makes all the difference. Adjust the amount to your personal preference for intensity – some prefer a bold cinnamon punch, while others like it more subtle.
- Heavy Cream: This is truly a secret weapon for achieving exceptionally tender and moist cinnamon rolls. Poured generously over the rolls just before they go into the oven, the heavy cream creates an incredibly soft, almost custardy bottom and ensures the entire filling remains deliciously gooey and luscious. This step is a game-changer and should not be skipped!
- Confectioner’s Sugar: The foundation of our simple yet utterly decadent icing, confectioner’s sugar (also known as powdered sugar or icing sugar) dissolves beautifully and effortlessly to create a smooth, pourable, or spreadable glaze that perfectly complements the warm rolls.
- Vanilla Extract: A touch of high-quality vanilla extract in the icing adds warmth, depth, and a subtle aromatic complexity that beautifully complements the sweet and spicy notes of the cinnamon rolls, enhancing the overall sensory experience.
Refer to the comprehensive recipe card below for precise measurements and quantities for each of these essential ingredients, ensuring your sourdough cinnamon rolls turn out perfectly every time.
Creative Variations for Your Sourdough Cinnamon Rolls
While the classic sourdough cinnamon roll is a masterpiece in itself, don’t hesitate to get creative and customize your batch with these delightful variations, adding new dimensions of flavor and texture:
- Decadent Caramel Cinnamon Rolls: Transform your standard rolls into an extraordinary treat by drawing inspiration from my incredibly popular pecan sticky buns recipe. The secret lies in adding a layer of luscious caramel to the pan. Before placing your rolled and cut cinnamon buns into the baking pan, generously spoon a layer of rich, homemade salted caramel sauce onto the bottom. As the rolls bake, the caramel will bubble up and envelop the bottoms and sides, creating a sticky, sweet coating that infuses every part of the roll with deep caramel flavor. For an extra touch of indulgence and visual appeal, consider a final drizzle of caramel sauce over the warm, baked rolls before serving, ensuring an explosion of caramel flavor in every single bite.
- Fruity or Nutty Surprises: Infuse your cinnamon rolls with seasonal flavors or a delightful crunch to elevate their character. Taking a cue from delectable strawberry cinnamon rolls, you can swirl in your favorite jam or pie filling. Imagine the vibrant sweetness and slight tartness of a homemade cherry pie filling or the summery, golden notes of an easy peach preserves recipe directly into the cinnamon-sugar mixture before rolling. For a wonderful textural contrast and an earthy flavor, finely chop and roll in your favorite toasted nuts – pecans, walnuts, or almonds – for a delightful crunch that perfectly complements the soft dough and gooey filling.
- Rich Cream Cheese Frosting: While our classic vanilla icing is undeniably wonderful, for those who adore the tangy sweetness and luxurious texture of cream cheese, this is an absolute must-try variation. Top your warm sourdough cinnamon rolls with my incredibly smooth, rich, and perfectly balanced cream cheese buttercream frosting. Its slight tang beautifully cuts through the sweetness of the rolls, adding another layer of complexity and a truly decadent finish. Alternatively, if you prefer a lighter, less intense option, a simple cream cheese glaze, such as the one used on overnight cinnamon rolls, can also be a fantastic choice.
- Perfectly Portioned Individual Cinnamon Buns: For effortless serving, elegant presentation, or simply to ensure everyone gets their own perfectly shaped bun, consider baking your cinnamon rolls in individual portions. Simply place each cut cinnamon roll into a greased muffin tin instead of a large baking dish. This smart arrangement ensures each bun has its own designated space to rise beautifully, leading to perfectly shaped, consistently baked, and charmingly portioned delights that are ideal for brunches, parties, or thoughtful gifting.
Professional Tips for Baking Success
Achieving bakery-quality sourdough cinnamon rolls at home is entirely possible with a few professional insights and techniques. These tips, honed over years in the kitchen, will guide you toward perfection, ensuring your rolls are consistently outstanding:
- Embrace Precision: The Golden Rule of Measurements: In the art and science of baking, precision is absolutely paramount, and it is especially critical for these delicate cinnamon rolls. Every single ingredient, from the flour to the butter and sugar, has been meticulously measured down to the gram. This exacting precision is key to achieving the perfect filling-to-dough ratio, the desired tender texture, and consistent results batch after batch. Resist the common urge to eyeball ingredients, as even small discrepancies can significantly alter the outcome. For the most accurate results, and a truly professional-level outcome, investing in and consistently using a reliable digital kitchen scale is not just recommended, it’s highly advised. This ensures consistency and guarantees the exceptional quality of your rolls.
- Mastering Butter Softness: A Key to a Stable Filling: The state of your butter profoundly impacts the success and integrity of your cinnamon roll filling. There is a significant and crucial difference between melted butter and butter that is perfectly softened, or “tempered.” If your butter is too warm and melted, the cinnamon-sugar mixture will be too loose and runny, making it incredibly difficult to spread evenly across the dough and causing it to leak out of the rolls during the baking process, resulting in a mess and a less flavorful roll. Conversely, if the butter is too cold and hard, it won’t incorporate properly with the sugar and cinnamon, leading to clumps. Aim for butter that is soft enough to easily indent with your finger without resistance, but still holds its shape and isn’t greasy – almost, but not quite, melted. This small act of patience will be richly rewarded with a filling that stays beautifully contained, spreads like a dream, and remains perfectly gooey.
- The Ruler is Your Best Friend for Uniformity: For aesthetically pleasing and consistently baked sourdough cinnamon rolls, uniformity in size and shape is key. A simple yet indispensable kitchen ruler can be your most valuable tool in this endeavor. When rolling out the dough, strive diligently to create a rectangle with sharp, even corners and a consistent thickness throughout. This maximizes the usable dough and ensures each roll will have a similar structure. When it comes to dividing the rolled dough log into individual pieces, a ruler will help you cut precisely 2 ½ inch segments. This careful measurement results in rolls that are uniform in size, bake evenly, brown consistently, and ultimately look professionally made. Consistency in size also directly translates to consistency in taste and texture across your entire batch, so every bite is equally perfect.
Step-by-Step Guide: How to Make Sourdough Cinnamon Rolls
Follow these detailed, easy-to-understand instructions to create the softest, easiest, and most irresistible sourdough cinnamon rolls. Each step is designed for success, ensuring a delightful baking experience and an even more delightful result. For exact measurements and additional crucial notes, please refer to the comprehensive recipe card located further down the page.
Make the Dough: The Foundation of Fluffy Rolls
Building the perfect dough is the first crucial step to achieving these delectable cinnamon rolls. Pay careful attention to ingredient temperatures and mixing techniques for optimal results and a wonderfully pliable dough.
- Step 1: Activate the Yeast. In the bowl of your stand mixer, begin by adding the warm whole milk. The milk should be comfortably warm to the touch, ideally around 105°F (40°C) – think of it as slightly warmer than body temperature, but certainly not hot, which could kill the yeast. Evenly sprinkle the active dry yeast over the surface of the milk. Gently whisk for a few seconds to ensure there are no clumps and the yeast fully contacts the liquid. Allow this mixture to sit undisturbed, or “bloom,” for approximately 10 minutes. You’ll know it’s perfectly ready when the surface becomes visibly bubbly and foamy, indicating that the yeast is active and thriving.
- Step 2: Combine Remaining Dough Ingredients. Once your yeast has successfully bloomed and is active, proceed to add all the remaining ingredients for the dough directly into the stand mixer bowl. This includes your softened unsalted butter, large egg, all-purpose flour, active sourdough starter, kosher salt, and granulated sugar. There’s no need for precise layering here; simply add them all at once into the bowl.
- Step 3: Mix Until Smooth. Fit your stand mixer with the paddle attachment. Begin mixing the ingredients on a low speed to initially incorporate everything, then gradually increase to a medium-low speed. Continue mixing until all the flour is thoroughly incorporated into the wet ingredients and the dough appears uniformly smooth, with no visible lumps or streaks of dry flour. Make sure to stop the mixer and scrape down the sides of the bowl as needed to ensure everything is thoroughly combined and no ingredients are left unmixed at the bottom. This initial mixing helps to bring the dough together into a cohesive mass.
- Step 4: Knead for Gluten Development. After the initial mixing, switch from the paddle attachment to the dough hook attachment on your stand mixer. Continue to mix the dough on medium-low speed for an additional 3-4 minutes. It’s important to note that this is a relatively wet dough, designed for maximum tenderness, and as such, it will not completely pull away cleanly from the sides of the bowl or “climb” the hook as some stiffer bread doughs might. This is perfectly normal and exactly what we’re looking for in this recipe. The mixing action with the dough hook is sufficient to develop the necessary gluten for a soft, pillowy, and tender texture without overworking it.
Bulk Fermentation: The Essential First Rise
This critical step allows the yeast and sourdough starter to work their magic, developing both the incredible flavor and the signature texture of your rolls. Patience here is key!
- Step 5: Allow the Dough to Rise. Lightly oil a large, clean bowl with a neutral cooking spray to prevent sticking. Gently turn the sticky dough out into the prepared bowl, using a bowl scraper or sturdy rubber spatula if necessary to help release it cleanly. Cover the bowl tightly with plastic wrap or a damp kitchen towel to prevent the dough from drying out and forming a skin. Place the covered bowl in a warm, draft-free spot for its bulk proof (first rise) for approximately 30-45 minutes. The dough is perfectly ready for the next stage when it has visibly doubled in size and appears light and airy.
Pro Tip for Proofing: Many modern ovens come equipped with a dedicated “proof” setting, typically maintaining a gentle temperature around 85°F (29°C), which is absolutely ideal for fermentation. If your oven lacks this convenient feature, a warm, draft-free spot in your kitchen will suffice – perhaps near a sunny window or with the oven light on (but the oven off). Alternatively, for greater flexibility in your baking schedule and easier handling, you can choose to “retard” the dough by bulk proofing it in the refrigerator overnight. This slows down the fermentation process significantly, allowing for deeper flavor development, and the chilled dough will be less sticky and much easier to roll out the following day, adding convenience to your morning bake.
Make the Filling: The Heart of the Roll
While your dough is undergoing its first, leisurely rise, you can efficiently prepare the rich and gooey cinnamon-sugar filling that truly makes these rolls so irresistible.
- Step 6: Prepare the Cinnamon-Sugar Paste. While your dough is undergoing its bulk fermentation, turn your attention to creating the star of the show – the filling. In a medium-sized bowl, combine the perfectly softened unsalted butter (remember the earlier tip: soft but not melted!), the packed dark brown sugar, and the fragrant ground cinnamon. Use a sturdy fork or a spoon to thoroughly mix these ingredients together until they are completely combined and form a smooth, uniform paste. This consistency is key for even spreading. Set this aromatic filling aside at room temperature; it will be much easier to spread when the dough is ready for assembly.
Assemble and Second Rise: Shaping Perfection
Now comes the truly satisfying part: transforming your beautifully risen dough into individual, spiraled cinnamon rolls, ready for their final proof before baking.
- Step 7: Prepare Your Work Surface. Once your dough has completed its first rise and has doubled in volume, generously flour your clean work surface. Gently turn the sticky dough out onto the floured counter. A bowl scraper or a sturdy rubber spatula will prove invaluable here, helping you to cleanly release the dough from the bowl, as its wet nature tends to make it quite sticky. After transferring the dough, sprinkle an additional generous amount of flour over the top of the dough and lightly flour your rolling pin to prevent any sticking during the rolling process.
- Step 8: Roll the Dough into a Rectangle. Using your floured rolling pin, gently and evenly roll the dough out into a precise 12-inch-long by 10-inch-high rectangle. Take your time to achieve as perfect a rectangle as possible, aiming for sharp, even corners. While it can be a bit challenging to maintain absolutely perfect corners with a soft dough, striving for them will significantly improve the final shape and consistency of your individual cinnamon rolls, making them more uniform and visually appealing.
- Step 9: Spread the Gooey Filling. Once you have your neatly rolled rectangle of dough, take your prepared cinnamon-sugar mixture and spread it evenly across the entire surface using an offset spatula. Don’t be afraid to use your fingers to help spread the filling and gently hold the dough in place, especially if the dough is particularly soft. This direct contact can ensure an even layer. Crucially, remember to leave a small border (approximately ½ inch) along the top and bottom edges of the rectangle. This un-filled border will play a vital role in helping to securely seal the roll later and prevent the delectable filling from oozing out during the baking process, ensuring all that gooey goodness stays inside.
- Step 10: Shape and Cut the Rolls. Starting from the bottom 12-inch edge of the rectangle, begin to tightly roll the dough away from you, working slowly and evenly to create a snug, compact log. Once fully rolled, gently pinch and seal the top edge seam to secure the log firmly. Now, using a very sharp knife (or a bench scraper, if you prefer for clean cuts), carefully cut the log into approximately 2 ½-inch-thick pieces. This precise measurement should yield 8 beautifully sized and consistently shaped cinnamon rolls.
Professional Cutting Tip: A very sharp, non-serrated knife is highly recommended when cutting cinnamon rolls. This ensures clean, precise cuts that prevent the filling from being pushed out and maintains the integrity of each swirl. If you only have a serrated knife, ensure it’s equally sharp and use a gentle sawing motion. For an alternative, incredibly clean method, many bakers swear by the dental floss technique: simply loop a piece of unflavored dental floss under the log, cross it over the top where you want to cut, and pull to slice. Remember, unflavored is key – we don’t want minty cinnamon rolls!
- Step 11: Arrange for Second Proof. Lightly spray a 9” x 11” baking dish (or a similar sized rectangular pan, roughly 23×28 cm) with cooking spray. Carefully place the cut cinnamon rolls into the prepared dish, ensuring they are spaced about 2 inches apart from each other. I find that offsetting them – perhaps placing two in a row, followed by one centered between the next two, then another row of two, and so on – provides optimal spacing. This strategic arrangement allows them ample room to expand generously during their second proof and subsequent baking without crowding, promoting beautifully even rising and browning.
- Step 12: Second Proof (Final Rise) and Preheat Oven. Cover the baking dish loosely but completely with plastic wrap or a damp kitchen towel to create a humid environment. Return the rolls to your warm spot (or a proofing oven) for an additional 20-40 minutes for their second proof, or until they appear noticeably puffy and have grown significantly. While the rolls are undergoing this final proof, take this opportunity to preheat your oven to 350°F (175°C), ensuring it’s at the correct temperature when your rolls are ready to bake.
Chef’s Note on Proofing & Baking Timing: In my kitchen, I typically proof my rolls for about 20 minutes in a warm environment. Then, I carefully remove the dish from the warm spot and immediately begin preheating my oven to 350°F using the convection setting. The short ambient proof that occurs while the oven preheats provides just enough extra lift and relaxation for the dough without leading to overproofing. If your oven has a convection setting, it can significantly help achieve beautifully even browning and a consistent bake, though a standard bake is perfectly fine and will still yield delicious results.
Baking: Achieving Golden Perfection
The moment of truth arrives! Watch as your patiently prepared rolls transform into golden, fragrant masterpieces, filling your home with an irresistible aroma.
- Step 13: Add the Secret Ingredient (Heavy Cream). Just before placing the rolls into the preheated oven, carefully remove the plastic wrap or damp towel covering the baking dish. Now, pour the reserved 1 ½ tablespoons of heavy cream evenly over the tops of all the rolls. This seemingly simple step is absolutely crucial for maintaining the rolls’ exceptional moisture, ensuring a wonderfully gooey center, and creating those irresistibly soft, almost custardy bottoms that truly make these rolls stand out. Do not skip this!
- Step 14: Bake Until Golden. Place the baking dish into your preheated 350°F (175°C) oven. Bake for approximately 15-20 minutes. Please note that actual baking times can vary slightly depending on the calibration and efficiency of your individual oven, so it’s always wise to keep a close eye on them. The rolls are perfectly done when they are beautifully golden brown around the edges and slightly lighter golden on top, and when a gentle press on the center no longer feels doughy or raw. In my oven, they typically achieve this perfect state in precisely 18 minutes.
Make the Icing: The Sweet Finale
No cinnamon roll is truly complete without a luscious, sweet icing to drizzle or spread generously on top. This simple yet decadent recipe comes together quickly while your rolls cool slightly.
- Step 15: Allow Rolls to Cool Slightly. While the temptation to ice them immediately might be overwhelming, resist the urge for just a few minutes! Allow the baked sourdough cinnamon rolls to cool in the pan for about 10-15 minutes before you begin applying the icing. This slight cooling period is essential as it helps the rolls to set their structure and, more importantly, prevents the icing from melting completely into a puddle at the bottom of the pan, ensuring it maintains its beautiful consistency and adheres perfectly on top of each roll.
- Step 16: Whisk the Icing to Perfection. In a small mixing bowl, whisk together all the ingredients for the icing: the confectioner’s sugar, vanilla extract, and the initial 2 tablespoons of milk. Start with the minimum amount of milk and add more gradually, a teaspoon at a time, continuing to whisk until you achieve your desired consistency. I personally prefer my icing a bit thicker so that it can be beautifully spreadable and opaque over the still-warm cinnamon rolls from the oven, creating a generous, inviting layer. A generous swirl of this sweet, vanilla-infused icing truly is a little bit of heaven on earth and the perfect finishing touch!
Chef Lindsey’s Recipe Tip: Achieving Your Desired Dough Consistency
Through extensive testing and valuable feedback from my wonderful community of bakers, I’ve made a key adjustment to the all-purpose flour quantity in this recipe. My original recipe called for 207g of all-purpose flour, yielding an incredibly light, almost ethereal cinnamon roll that I personally adore for its delicate texture. However, to make this recipe more accessible, forgiving, and easier to handle for bakers of all experience levels, I have increased the flour to 257g. This adjustment results in a dough that is slightly firmer and less sticky, making it more akin to the dough found in my classic cinnamon roll recipe with cream cheese icing. If you’re an adventurous baker seeking that ultimate light-as-air texture and are comfortable with a softer dough, I wholeheartedly encourage you to try the original 207g flour quantity – it’s a delightful challenge that yields a truly unique and memorably delicate result!
Recipe FAQs: Your Sourdough Cinnamon Roll Questions Answered
To maintain their delightful freshness and soft texture, sourdough cinnamon rolls are best stored tightly wrapped in an airtight container at room temperature. Under these conditions, they will remain delicious for up to 3 days. While they can also be refrigerated for up to a week, be aware that over time they may gradually lose some moisture and become slightly drier. For the absolute best flavor and unparalleled softness, I highly recommend enjoying them on the same day they are baked.
Absolutely! This recipe is wonderfully suited for overnight preparation, offering great convenience. If you plan to bake them the next day, I recommend omitting the dry active yeast from the dough ingredients, relying solely on your sourdough starter for leavening. Proceed with making the dough, allowing it to complete its bulk proof as directed (Step 5), then assemble the rolls and arrange them in your baking dish (Step 11). Instead of the second proof, cover them tightly with plastic wrap and “retard” them in the refrigerator overnight. The slow, cold fermentation will develop deeper, more complex flavors. The following morning, simply take them straight from the fridge to the preheated oven (after pouring over the heavy cream in Step 13). They may require a few extra minutes to bake as they start cold, but the resulting convenience and enhanced flavor are well worth the wait.
Yes, freezing is a fantastic option for these cinnamon rolls, allowing you to enjoy fresh-baked goodness whenever a craving strikes! You can assemble the rolls up to the point of the second proof (Step 11), then instead of proofing, carefully cover them tightly with plastic wrap and place them in the freezer. They will keep well in the freezer for up to a week. When you’re ready to bake, you have two options: you can either bake them straight from the freezer (after adding the heavy cream), adding an extra 5-10 minutes to the baking time until golden brown and cooked through, or you can allow them to thaw and proof at room temperature for an hour or two before baking for optimal fluffiness.
An active, bubbly sourdough starter is crucial for the best texture and rise in these rolls. If your starter seems sluggish or less vigorous than usual, it’s best to feed it 4-6 hours before you plan to mix the dough. Ensure it’s at its peak activity – bubbly, rising, and showing signs of life – before incorporating it into the recipe. If it’s still not performing optimally, consider adding a little extra active dry yeast (perhaps an additional ½ teaspoon) to ensure a good rise. Alternatively, use this as an opportunity to revive and strengthen your starter with consistent feeding over a few days.
This recipe is specifically formulated for an active, fed sourdough starter to contribute significantly to the dough’s structure and rise, working in conjunction with the commercial yeast. While sourdough discard can certainly add a subtle flavor, it typically lacks the robust leavening power needed for this recipe’s desired light and fluffy texture, especially when paired with a shorter proofing time. For recipes specifically designed to utilize sourdough discard, I highly recommend exploring those, such as my sourdough pizza dough recipe, which is formulated to work with discard over a longer fermentation period to achieve its best results.
Recommended Cinnamon Dessert Recipes
If you’ve fallen in love with the comforting warmth of cinnamon and its versatile appeal, I invite you to explore more delightful recipes from my collection:
Breakfast Pastry Recipes
Classic Cinnamon Rolls with Cream Cheese Icing
Apple Recipes
Delightful Apple Cinnamon Rolls
Breakfast Pastry Recipes
Irresistible Pecan Sticky Buns
Cookie Recipes
Simple Cinnamon Sugar Cookies
If you tried this recipe and loved it, please leave a 🌟 star rating and let me know how it goes in the comments below. I love hearing from you; your comments truly make my day!
⭐
⭐
⭐
⭐
Sourdough Cinnamon Rolls
Chef Lindsey
30
18
50
1
38
8
rolls
Pin Recipe
Comment
Print Recipe
Ingredients
For the Dough:
- ½ cup warm milk (a little warmer than body temperature, ideally 105°F / 40°C)
- 1 ¼ teaspoon active dry yeast
- 1 large egg
- ½ stick unsalted butter (softened)
- 1 ⅔ cups all-purpose flour
- ⅓ cup 100% hydration active sourdough starter (fed 4-12 hours prior, not discard)
- ½ teaspoon kosher salt
- 3 ½ tablespoons granulated sugar
For the Cinnamon Sugar Filling:
- 1 stick unsalted butter (very soft, almost melted, easily spreadable)
- ¾ cup dark brown sugar (packed)
- 1 tablespoon ground cinnamon
- 1 ½ tablespoons heavy cream (reserved for right before baking)
For the Icing:
- 2 cups confectioner’s sugar
- ½ teaspoon vanilla extract
- 2 tablespoons milk (or more, as needed to achieve desired consistency)
Instructions
Make the Dough:
-
In the bowl of a stand mixer, add the warm milk (around 105°F / 40°C), then sprinkle the active dry yeast over the surface. Whisk gently to break up any clumps. Allow the yeast to bloom for 10 minutes until the mixture is visibly bubbly and foamy.
-
Add all remaining ingredients for the dough (softened butter, large egg, all-purpose flour, active sourdough starter, kosher salt, and granulated sugar) to the bowl.
-
Fit the mixer with the paddle attachment and mix on low to medium-low speed until all the flour is thoroughly incorporated and no lumps remain. Scrape down the sides of the bowl as needed.
-
Switch to the dough hook attachment. Mix on medium-low speed for 3-4 minutes. The dough is intentionally wet and will not completely pull away from the sides of the bowl or climb the hook; this is perfectly normal for achieving a tender roll.
Bulk Fermentation (First Rise):
-
Lightly oil a large bowl with cooking spray. Turn the dough into the bowl, cover tightly with plastic wrap, and let it bulk proof in a warm spot (ideally 85°F / 29°C) for 30-45 minutes, or until doubled in size.
Make the Filling:
-
While the dough proofs, prepare the filling. In a medium bowl, combine the very soft unsalted butter, packed dark brown sugar, and ground cinnamon. Mix thoroughly until a smooth, uniform paste forms. Set aside at room temperature.
Assemble and Second Proof:
-
Generously flour your work surface and turn the dough out onto it (a bowl scraper helps with sticky dough). Sprinkle additional flour on top of the dough and lightly flour your rolling pin.
-
Roll the dough into a 12-inch long by 10-inch high rectangle. Aim to keep the corners as sharp and even as possible.
-
Using an offset spatula (and your fingers, if needed), spread the cinnamon-sugar filling evenly over the rolled dough, leaving a small border along the top and bottom edges.
-
Starting from the bottom 12-inch edge, tightly roll the dough away from you into a log. Pinch and seal the top edge seam to secure. Cut the log into approximately 2 ½-inch thick pieces using a sharp knife or bench scraper, yielding 8 rolls.
-
Spray a 9” x 11” baking dish with cooking spray. Arrange the cinnamon rolls in the dish about 2 inches apart, offsetting them (e.g., two in a row, then one in the center, etc.) to allow for expansion.
-
Cover the dish loosely with plastic wrap and return to a warm spot for a second proof for an additional 20-40 minutes, or until noticeably puffy. Preheat your oven to 350°F (175°C) during this time.
Baking:
-
Just before baking, remove the plastic wrap and pour the 1 ½ tablespoons of heavy cream evenly over the tops of the rolls in the dish.
-
Bake at 350°F (175°C) for approximately 15-20 minutes, or until the rolls are golden brown around the edges and on top, and the centers no longer feel doughy. (My oven bakes them perfectly in 18 minutes).
Make the Icing:
-
Allow the baked cinnamon rolls to cool in the pan for about 10-15 minutes before applying the icing.
-
In a small bowl, whisk together the confectioner’s sugar, vanilla extract, and 2 tablespoons of milk. Add more milk gradually, if needed, to achieve your desired consistency. I prefer a slightly thicker icing for spreading on warm rolls.
Video Tutorial
Chef’s Notes & Tips
Presentation Perfect – For the most appealing and visually stunning presentation, allow your freshly baked rolls to cool in the pan for approximately 10-15 minutes before you begin spreading the icing. This crucial cooling period permits the rolls to firm up slightly and, most importantly, helps the icing maintain its luxurious, beautiful layer on top of each roll, rather than melting excessively and running down between them. Remember, a slightly thicker icing will also adhere better and create a more professional finish.
Flavor Enhancer: Don’t Skip the Heavy Cream! – This is truly my secret weapon for achieving incredibly moist, tender, and intensely flavorful cinnamon rolls. The small but mighty amount of heavy cream poured evenly over the rolls just before baking creates a steamy, rich environment within the pan. This ensures the filling remains wonderfully smooth and gooey, and the bottoms of the rolls develop an irresistibly soft, almost custardy texture that is simply divine. This clever trick, inspired by my friends at Taste of Lizzy T, guarantees a superior result every single time.
Sourdough Starter Technique – To achieve the intended light, fluffy, and tender results of this recipe, it’s absolutely vital to use an active, fed sourdough starter. Avoid using old “discard” that has been languishing in the back of your refrigerator for months, as it will lack the necessary leavening power. Ensure your starter is bubbly, vigorous, and ideally fed 4-12 hours before you plan to mix the dough. For recipes specifically designed for sourdough discard, like my sourdough pizza dough recipe, a longer fermentation period (often 2-3 days before baking) is typically required to allow the discard to still contribute flavor and some rise.
Optimal Storage – While sourdough cinnamon rolls are undeniably at their peak perfection and softest texture the very day they are baked, any delightful leftovers can be stored effectively. Keep them tightly wrapped in an airtight container at room temperature for up to 3 days, maintaining much of their freshness. Alternatively, you can refrigerate them for up to a week. Be aware that over time, regardless of storage method, the rolls will slowly begin to dry out. A quick warm-up in the microwave or oven can help restore much of their original softness and gooeyness.
Nutrition Facts (Per Serving)
Carbohydrates: 86g |
Protein: 5g |
Fat: 19g |
Saturated Fat: 11g |
Polyunsaturated Fat: 1g |
Monounsaturated Fat: 5g |
Trans Fat: 1g |
Cholesterol: 68mg |
Sodium: 297mg |
Potassium: 133mg |
Fiber: 3g |
Sugar: 60g |
Vitamin A: 600IU |
Vitamin C: 1mg |
Calcium: 83mg |
Iron: 2mg
Breakfast, Dessert, Brunch
American, European
521
Like this recipe? Leave a comment below!
Your feedback and star ratings are incredibly valuable to me!
Before You Go: Explore More Sourdough Delights
Thank you for joining me on this delightful baking adventure. I truly hope you enjoyed preparing and, more importantly, savoring these ultimate sourdough cinnamon rolls. The world of sourdough baking is vast, rewarding, and offers a unique depth of flavor and texture that can transform countless baked goods.
If you’re eager to continue your sourdough journey and explore more incredible recipes, be sure to check out our other sourdough bread recipes. You might discover new favorites like the wonderfully aromatic rosemary sourdough rolls, which are perfect for accompanying dinner, or the uniquely flavored cherry pecan sourdough bread, which makes for an exquisite breakfast or snack. Happy baking, and enjoy the wonderful creations that come from your active sourdough starter!