
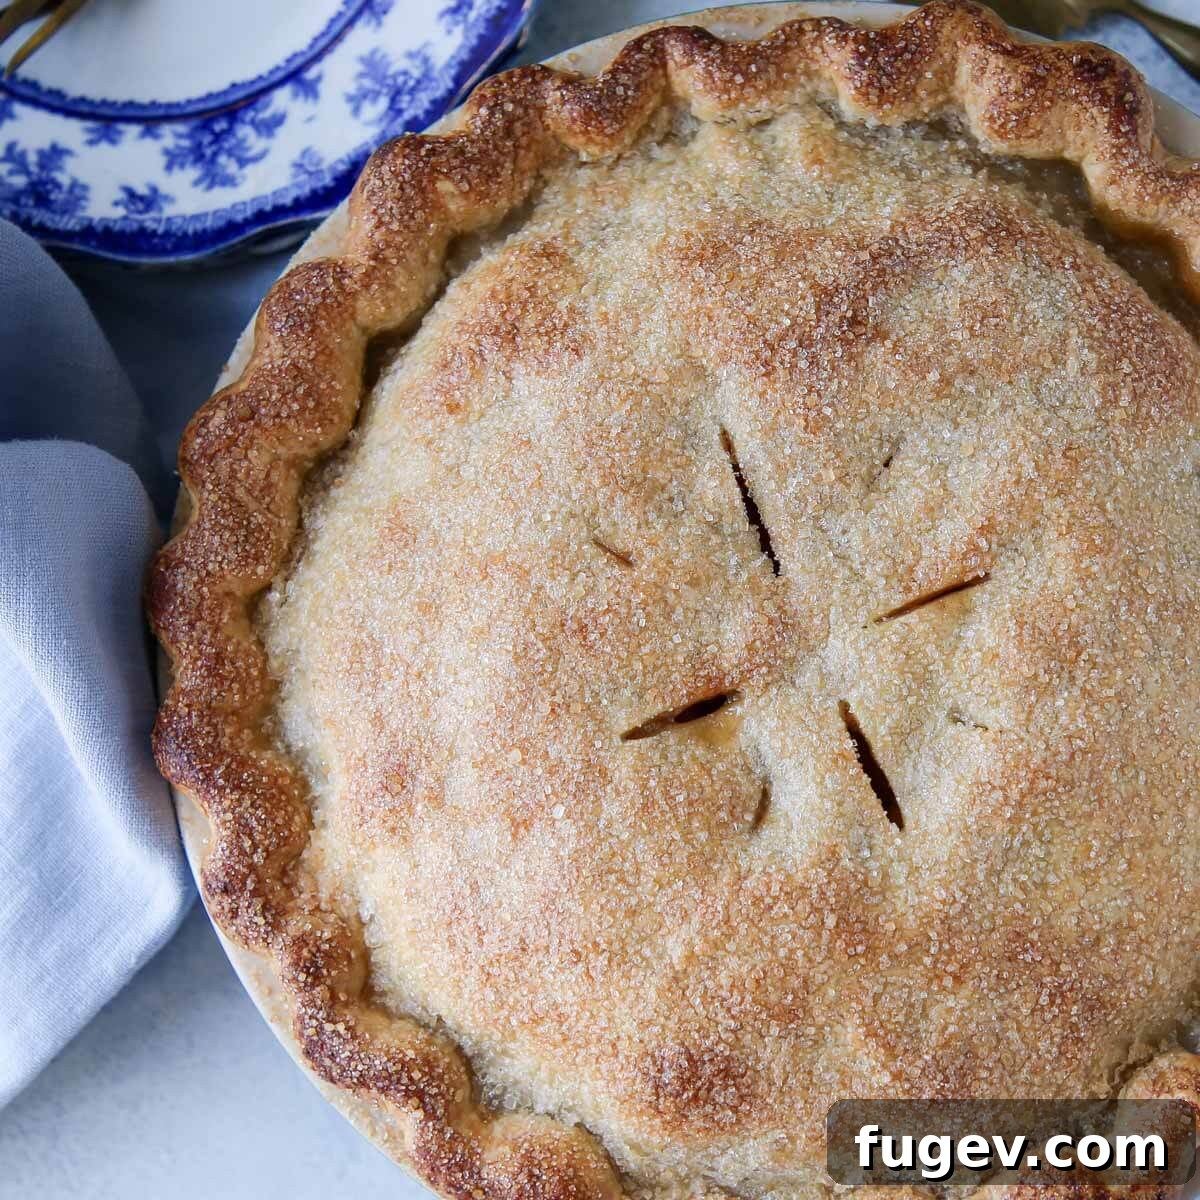
Welcome to the ultimate guide for crafting the most exquisite all-butter pie crust – a recipe renowned for its flaky layers, rich buttery flavor, and exceptional tenderness. This foolproof method ensures your pie crust won’t shrink, providing a perfect foundation for any pie or tart. Loved by over 240,000 viewers on YouTube, this recipe demonstrates how to achieve professional-quality pie dough in as little as 4 minutes!
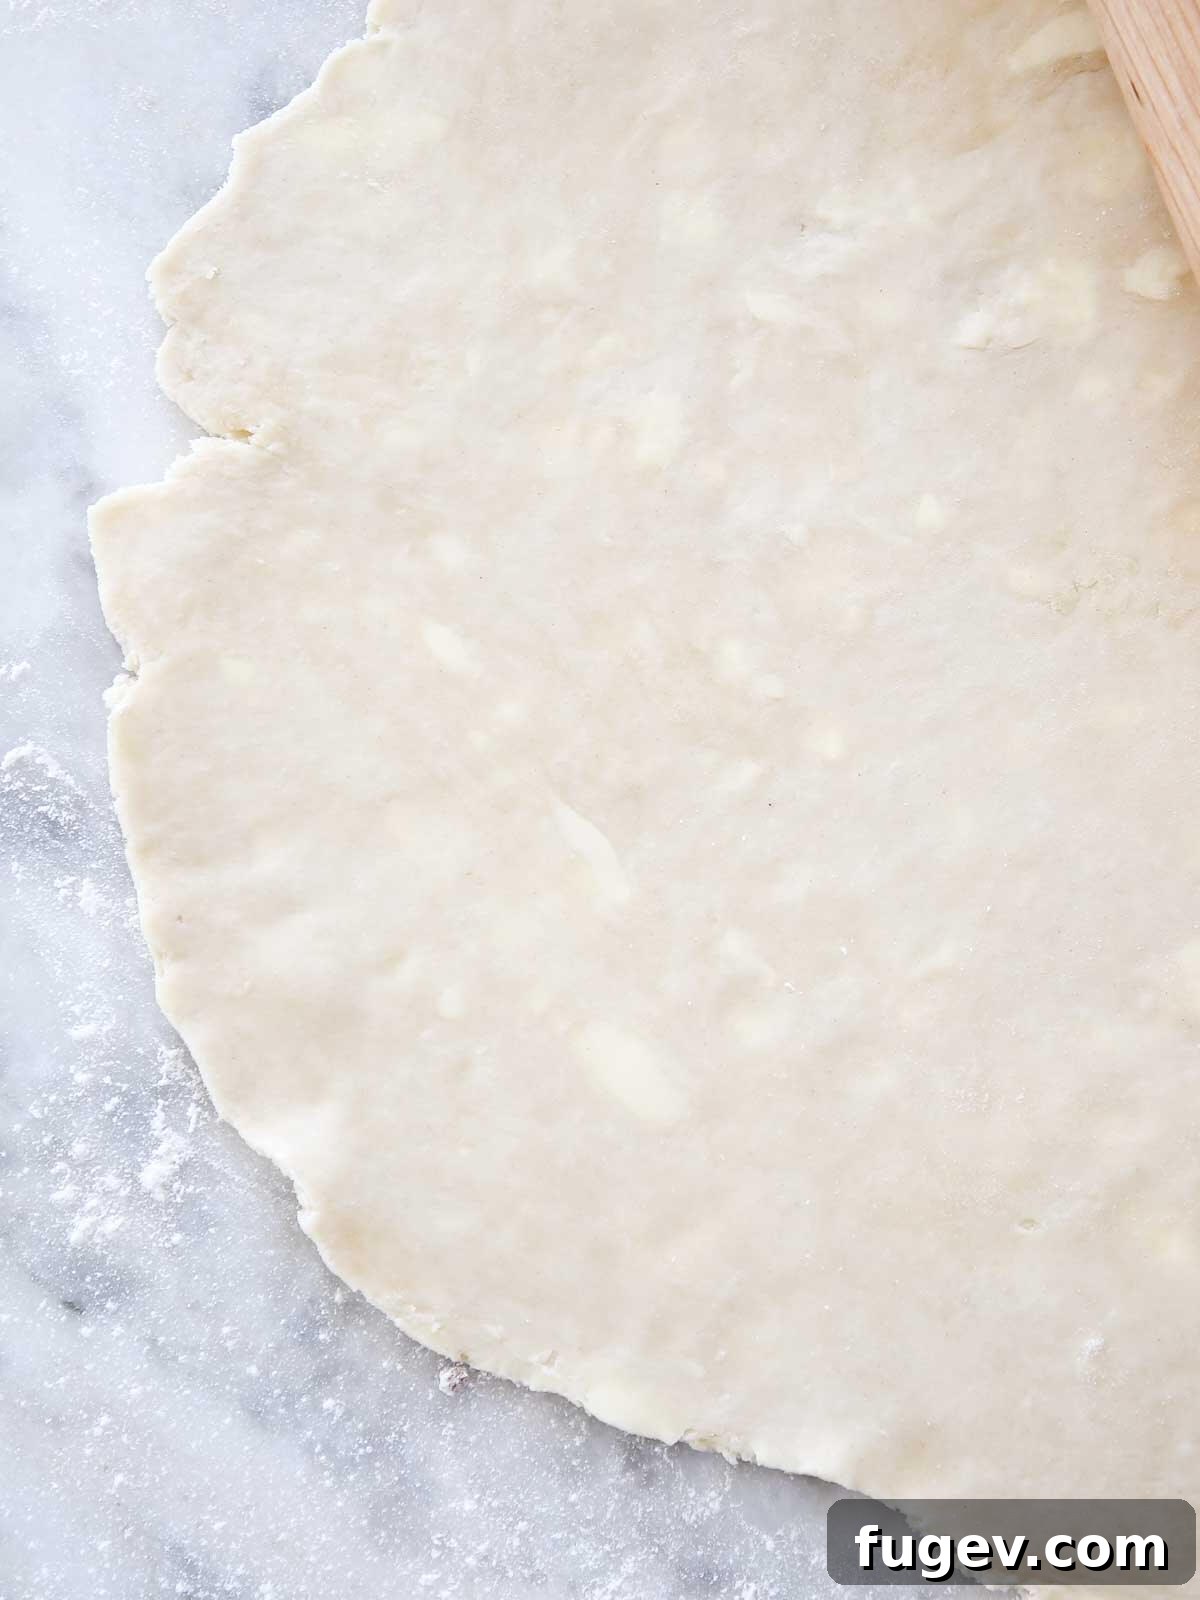
This esteemed all-butter pie crust, also known in French pastry as pâte brisée, is a fundamental recipe for any baker. It’s an incredibly simple yet profoundly rewarding dough made exclusively with butter, resulting in a crust that is both exquisitely buttery and wonderfully flaky. Its versatility makes it suitable for a wide array of culinary creations, from classic sweet pies like pumpkin pie and banana cream pie, to savory quiches, tarts, and galettes. Mastering this dough will elevate all your baking endeavors.
To cater to every baker’s preference and kitchen setup, I’ve developed and demonstrated five distinct methods for preparing this exact recipe. Whether you’re a seasoned pro or a novice, you’ll find a technique that suits you perfectly. The most efficient method, utilizing a food processor, can have you ready in a mere 4 minutes. For those who prefer a hands-on approach, I also detail three different manual techniques, ensuring everyone can achieve a perfect crust.
If you’re short on time or prefer a recipe with a different fat profile, consider exploring alternative crusts. For a blend of butter and shortening, try this easy pie crust recipe. Alternatively, for a purely shortening-based option, my 100% Crisco pie crust recipe offers a distinct texture and flavor profile.
Table of Contents
- Why You Will Love This All-Butter Pie Crust
- Professional Tips for Making Pâte Brisée
- Essential Ingredients for Your Pie Crust
- 5 Masterful Methods for Homemade Pie Crust
- Preventing Pie Crust Shrinkage: Expert Techniques
- Step-by-Step: How to Make All-Butter Pie Crust
- Chef Lindsey’s Recipe Tip
- Frequently Asked Questions About Pie Crust
- All-Butter Pie Crust Recipe Card
- Before You Go
Why You Will Love This All-Butter Pie Crust
Creating homemade pie crust can seem daunting, but with this recipe, you’ll discover why it’s truly a game-changer for your baking:
- Achieve a No-Shrink, Professional-Quality Crust: One of the most frustrating aspects of pie making is a shrinking crust. This recipe incorporates all my professional pastry chef tips and tricks specifically designed to prevent shrinkage, ensuring your beautifully shaped crust holds its form perfectly during baking. Say goodbye to sad, slumped edges!
- Explore 5 Diverse Methods for Dough Preparation: Understanding that every kitchen and baker is unique, I’ve created detailed video tutorials for five distinct preparation methods using this exact recipe. Whether you prefer the speed of a food processor, the control of a bench scraper, or the tactile experience of mixing by hand, you’ll find a technique that resonates with your style and available equipment. This flexibility empowers you to make perfect pie crust anytime, anywhere.
- Experience Unrivaled Buttery, Rich, and Flaky Texture: This all-butter pâte brisée is a culinary delight. It delivers an incredibly rich, buttery taste that perfectly complements both sweet pie fillings and savory bases. The carefully balanced ingredients and techniques result in a tender crust that shatters into delicate flakes with every bite, rivaling the flakiness of even classic puff pastry. It’s the ideal texture for an unforgettable pie experience.
Professional Tips for Making Pâte Brisée
To master the art of pâte brisée and ensure consistently spectacular results, adhere to these fundamental professional guidelines:
- Maintain Optimal Coldness Throughout the Process: From the moment you measure your ingredients to the second your pie enters the oven, keeping everything—ingredients, tools, and dough—as cold as possible is paramount. This crucial step serves multiple purposes: it significantly minimizes gluten development, which can lead to a tough crust, and it prevents the butter from melting prematurely. Cold butter creates steam pockets during baking, resulting in those coveted flaky layers.
- Prioritize Accuracy with Ingredient Scaling: For the most consistent and superior baking results, always weigh your ingredients using a digital kitchen scale. Measuring flour, in particular, by volume (cups) can vary wildly by as much as half a cup depending on how it’s scooped and packed. Weighing ensures precise ratios, eliminating guesswork and dramatically improving consistency. As an added bonus, it’s often much faster than volume measuring!
- Handle the Dough Gently but Work Efficiently: This might sound like a paradox, but it’s a golden rule in pastry. Treat your dough with a light, tender touch to minimize gluten development. Overworking the dough activates gluten, leading to a tough, elastic crust instead of a delicate, tender one. Simultaneously, work quickly to keep the dough from warming up. The love and gentle care you put into handling the dough will directly translate into a light, flaky, and buttery final product.
- Embrace the Magic of a Cold Pastry Meeting a Hot Oven: This is where the science of a flaky crust truly shines. When a well-chilled dough, embedded with tiny pockets and thin sheets of cold butter, is introduced into a screaming hot oven, two key reactions occur. The cold water in the dough rapidly evaporates, creating steam that lifts and separates the dough layers. Simultaneously, the cold butter melts and lubricates these layers, preventing them from sticking together. This combined effect produces the glorious, airy, and flaky texture characteristic of a perfect pie crust.
Essential Ingredients for Your Pie Crust
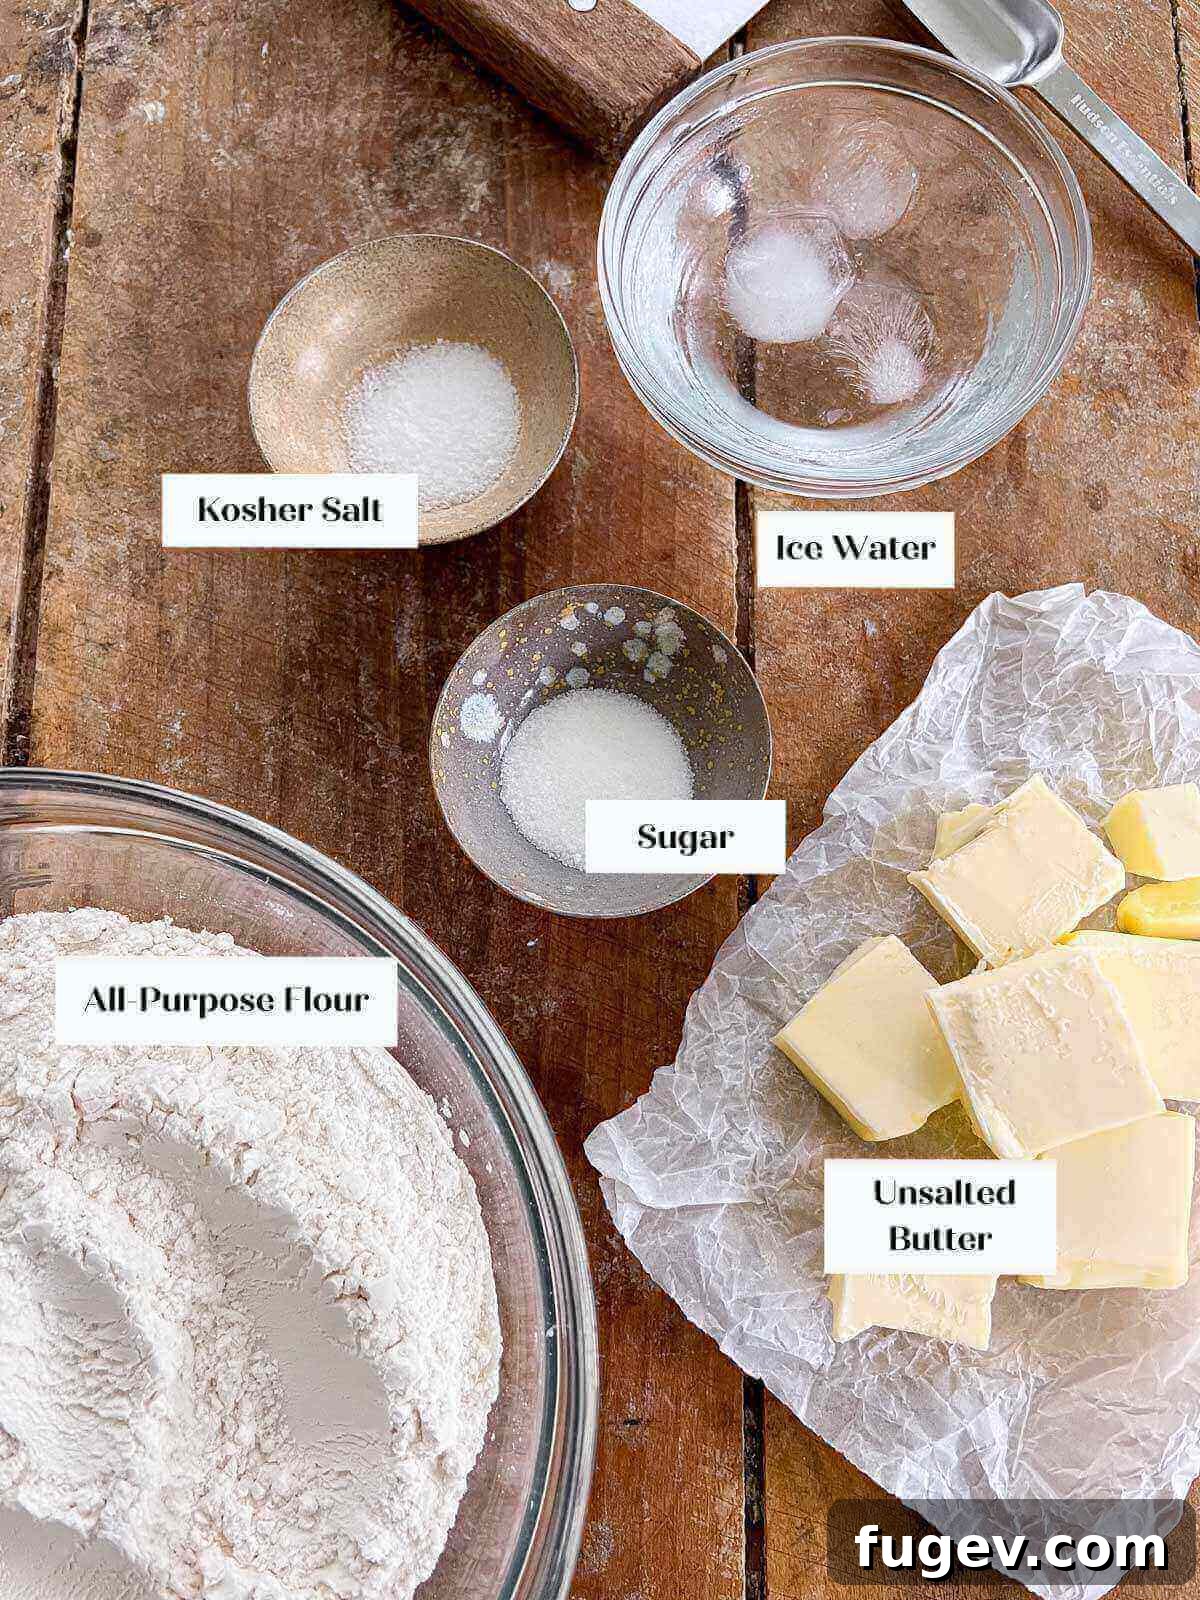
A perfect pie crust relies on a few simple, high-quality ingredients. Here’s a breakdown of what you’ll need and why each component is vital:
- All-Purpose Flour: My go-to for pie crusts is all-purpose flour, primarily because it’s a staple in every kitchen. While pastry flour, with its slightly lower protein content, can yield an even more delicate crust, the handling of the dough is ultimately more critical than the specific flour type. The key is to avoid high-gluten flours like bread flour, which will result in a tough crust.
- Kosher Salt: Salt plays a crucial dual role in pie crust. Firstly, it’s a flavor enhancer, balancing the richness of the butter and adding depth. Secondly, and equally important, salt helps to inhibit gluten formation, contributing to a tender crust. I prefer kosher salt for its larger crystal size and less intense saltiness per teaspoon compared to fine table salt.
- Granulated Sugar: Just a touch of granulated sugar in your pie crust makes a significant difference. It subtly enhances the overall flavor, promotes a beautiful golden-brown caramelization during baking, and further aids in inhibiting gluten development, ensuring a tender bite.
- Unsalted Butter: The star of our “all-butter” show! I opt for unsalted butter with approximately 40% milkfat, but other good quality unsalted butters will yield similar excellent results. It’s imperative that the butter is cubed and thoroughly cold, but not frozen solid. The coldness is key to creating those desirable flaky layers.
- Ice Water: This is a non-negotiable component for successful pie dough. Keep your water in the refrigerator with ice cubes right up until you’re ready to use it. The frigid temperature of the water is essential for two reasons: it further inhibits gluten formation, and it keeps the butter pieces solid and distinct within the dough. This cold environment is what ultimately contributes to an exceptionally flaky and tender crust. Always remove any unmelted ice cubes before measuring and adding to the dough.
5 Masterful Methods for Homemade Pie Crust
One of the beauties of this all-butter pie crust recipe is its adaptability. You can achieve a perfect dough using various tools and techniques, ensuring success no matter your kitchen setup. The “best” method is truly the one that feels most comfortable and efficient for you. I’ve created detailed video tutorials for each method, linked below, to guide you every step of the way.
- Bench Scraper Method: This technique involves using a sturdy metal bench scraper or a pastry blender to cut the cold butter into the flour mixture. It offers the highest level of control over the size of your butter pieces, which is excellent for developing specific flaky textures. It requires a bit more physical effort and a steady hand, but the precision is unmatched. Hands-on time: approximately 10 minutes. Bench Scraper YouTube Tutorial.
- Pastry Blender (or Pastry Knife) Method: A pastry blender, often resembling a bear claw with multiple metal blades, is specifically designed for cutting fat into flour. Tools like the OXO pastry blender are renowned for their comfortable grip and efficiency. This method is generally faster than the bench scraper while still providing excellent control over the butter incorporation. It’s a fantastic tool for consistent results. Hands-on time: approximately 7 minutes. Pastry Blender YouTube Tutorial.
- Two-Knives Method: This is an old-school, “emergency” method that proves you don’t need fancy equipment to make a great pie crust. By using two ordinary knives, you can effectively cross-cut the butter into the flour. While it can be a bit more time-consuming and might cramp your hands, it’s a perfectly viable option if you’re lacking specialized tools. It’s a testament to the fact that resourcefulness in the kitchen always pays off. Hands-on time: approximately 12 minutes. Two Knives Method YouTube Tutorial.
- Stand Mixer Method: For bakers who frequently make pie dough, or when preparing larger batches, the stand mixer becomes an invaluable ally. Fitted with the paddle attachment, it handles the initial heavy lifting of cutting the butter into the flour efficiently. However, it’s crucial to finish the dough by hand. If the dough fully comes together in the mixer bowl, it’s highly likely it has been overworked or too much water was added, which will lead to a tough, less flaky crust. The mixer speeds up the initial process, but a gentle hand finish is key. Total time: approximately 7 minutes. Stand Mixer YouTube Tutorial.
- Food Processor Method: Without a doubt, the food processor is the fastest method for making pie crust, often taking as little as 4 minutes of active time. Its speed is also its biggest challenge, as it’s very easy to over-process the butter or add too much water. The trick is to use short pulses to cut the butter, aiming for slightly larger pieces than you might for other methods, and always finishing the dough by hand. This method is excellent for keeping ingredients cold due to its rapid action, contributing to superior flakiness. Total time: approximately 4 minutes. Food Processor YouTube Tutorial.
Preventing Pie Crust Shrinkage: Expert Techniques
A perfectly formed pie crust is the dream of every baker, but shrinking can turn that dream into a frustrating reality. Here’s how to ensure your pie crust maintains its shape and size:
- Keep Your Dough Consistently Cold: This is the golden rule for preventing shrinkage. Cold temperatures inhibit the development of gluten, the protein network that gives dough elasticity. Gluten needs both moisture and agitation (like kneading) to form strong bonds. If the dough gets warm, the gluten relaxes, causing it to contract when baked. By keeping your dough cold at every stage, you prevent excessive gluten formation, resulting in a tender, stable crust.
- Embrace Refrigeration After Every Handling: This step might seem excessive, but it makes a world of difference. Chill your dough after mixing, after rolling it out, and crucially, after lining your pie dish but before adding any filling. Each period of chilling allows the gluten to relax and the butter to firm up again. In a professional bakery setting, we often freeze rolled pie dough overnight before lining and baking to ensure maximum stability and prevent any shrinking whatsoever. This extra refrigeration time is a small investment for a perfectly shaped pie.
- Select the Right Pie Dish: The material of your pie dish plays a significant role in preventing shrinkage and achieving an evenly baked crust. Metal pie tins and glass pie dishes are superior conductors of heat compared to ceramic dishes. While beautiful, ceramic dishes don’t conduct heat as efficiently, leading to a crust that bakes unevenly and is more prone to slipping down the sides, even with a filling. Good heat conduction from the dish helps set the crust quickly, locking its shape in place. If you prefer the aesthetic of non-glass bakeware, opt for vintage metal pie plates, like those I used for my strawberry rhubarb pie or cherry pie. They can often be found on Etsy or at antique shops and offer both charm and functionality.
Step-by-Step: How to Make All-Butter Pie Crust
While this recipe can be adapted to any of the five methods discussed above, I’ll walk you through the stand mixer method here, as it’s a popular choice for its balance of efficiency and control. For visual guidance on all methods, explore my comprehensive YouTube Pie Crust Tutorial Playlist. Detailed measurements can be found in the recipe card below.
Making the Pie Dough:
Step 1: Combine Dry Ingredients and Butter. In the bowl of a stand mixer equipped with the paddle attachment, combine your all-purpose flour, kosher salt, granulated sugar, and the cold, cubed unsalted butter. Begin mixing on low speed. The goal here is to cut the butter into the flour mixture until most of the butter has been incorporated, but you still have some larger, pea-sized pieces remaining. As the butter mixes, you’ll notice the flour mixture changing color, appearing slightly darker and more textured. This indicates the butter is dispersing evenly.
Step 2: Gradually Add Ice Water. Stop the mixer briefly and remove any unmelted ice cubes from your cold water supply. With the mixer set back to low speed, slowly and gradually pour the measured ice water over the mixing dough. Continue mixing just until the flour appears hydrated and moistened, but crucially, before a fully cohesive dough ball forms. The mixture should still look somewhat loose and crumbly.
At this stage, your dough will appear “shaggy” – a perfect texture characterized by visible shards or strands of dough interspersed with some unincorporated dry flour. This is precisely what you want, indicating minimal gluten development and ideal butter distribution.
Step 3: Hand-Form the Dough. Turn the entire contents of the mixer bowl out onto a clean countertop. Gently gather the mixture and press it together with the heel of your hand, working it just enough until a cohesive dough starts to form. If you encounter any remaining dry patches, sprinkle a tiny bit more ice water directly onto those areas. The key is to work the dough minimally, just coaxing it into a unified mass, typically forming a rough log shape. Remember, gentle handling prevents tough crusts!
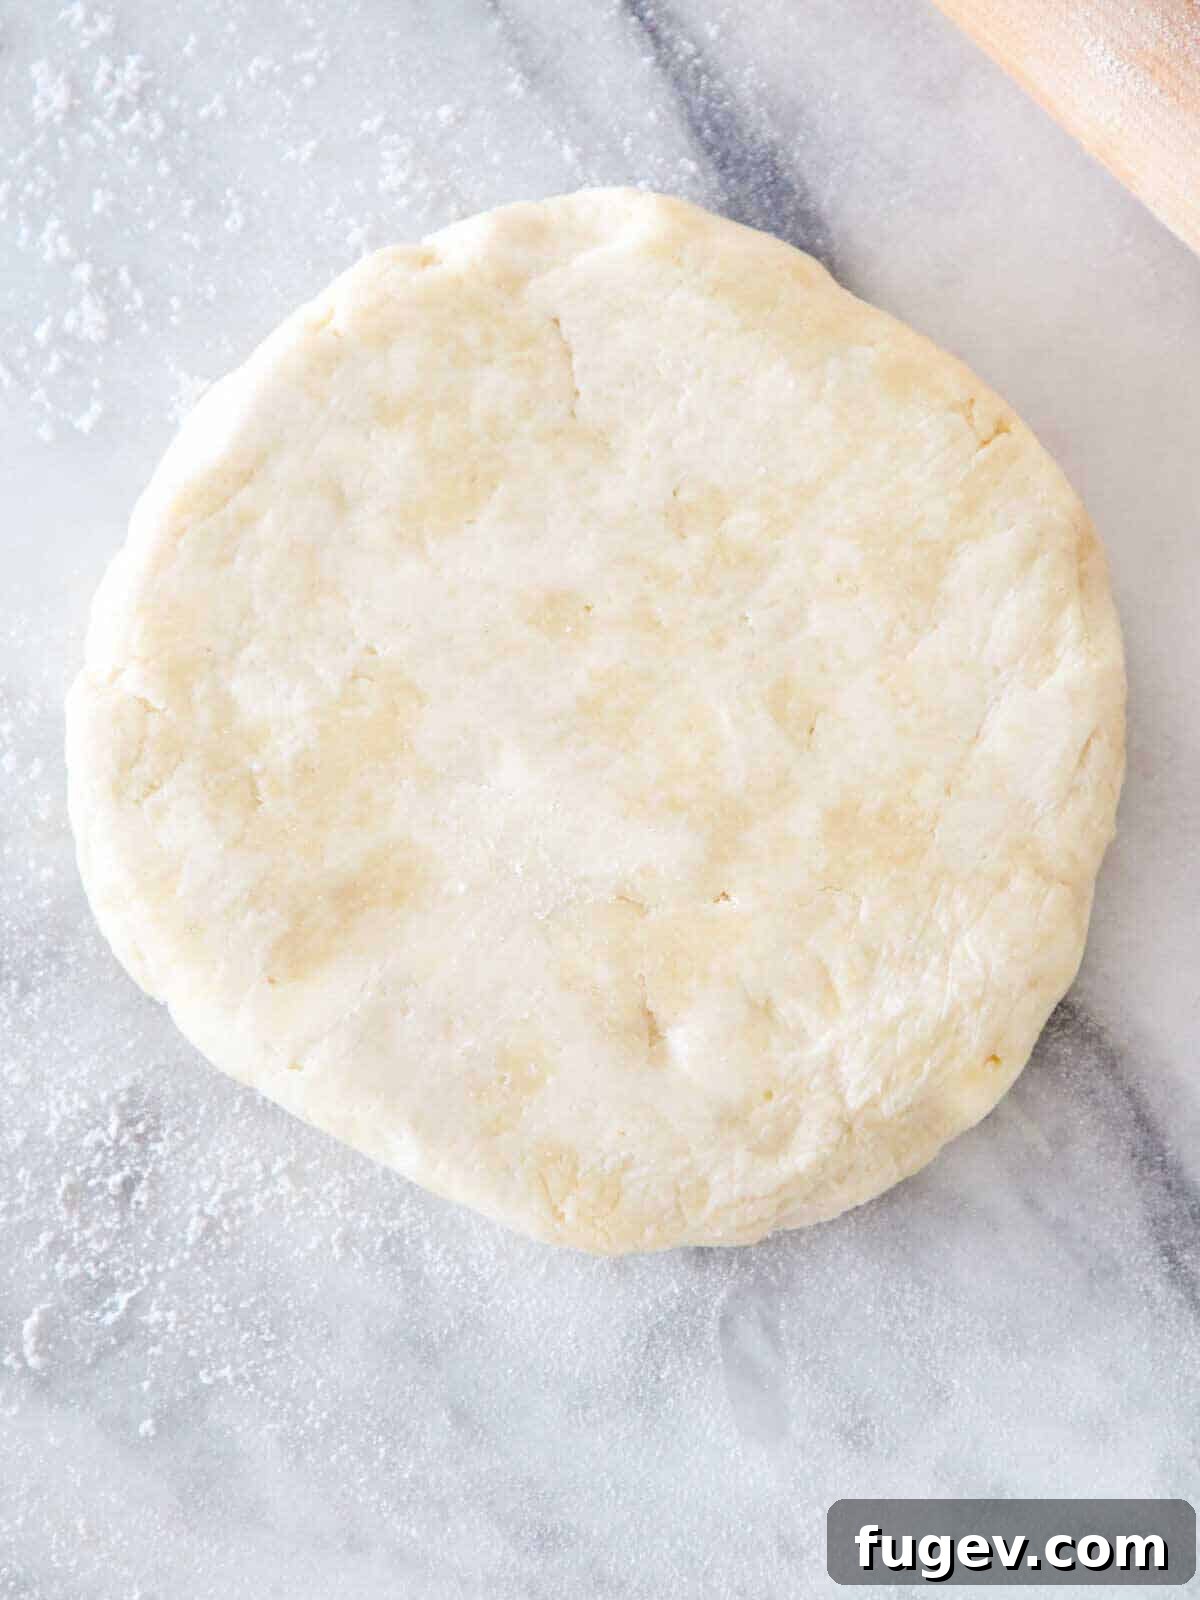
Step 4: Divide and Shape. Carefully divide the newly formed dough in half. Take each half and gently press it into a disk shape, approximately 1 ½ inches thick. This disk shape makes it much easier to roll out later. Individually wrap each disk tightly in plastic wrap.
Step 5: Chill the Dough. Place the wrapped dough disks in the refrigerator to chill thoroughly. A minimum of 2 hours is recommended, but you can refrigerate them for up to 3 days. For longer storage, the dough can be frozen for up to 2 months. If frozen, be sure to thaw it completely in the refrigerator before proceeding with rolling.
Rolling Out the Pie Dough:
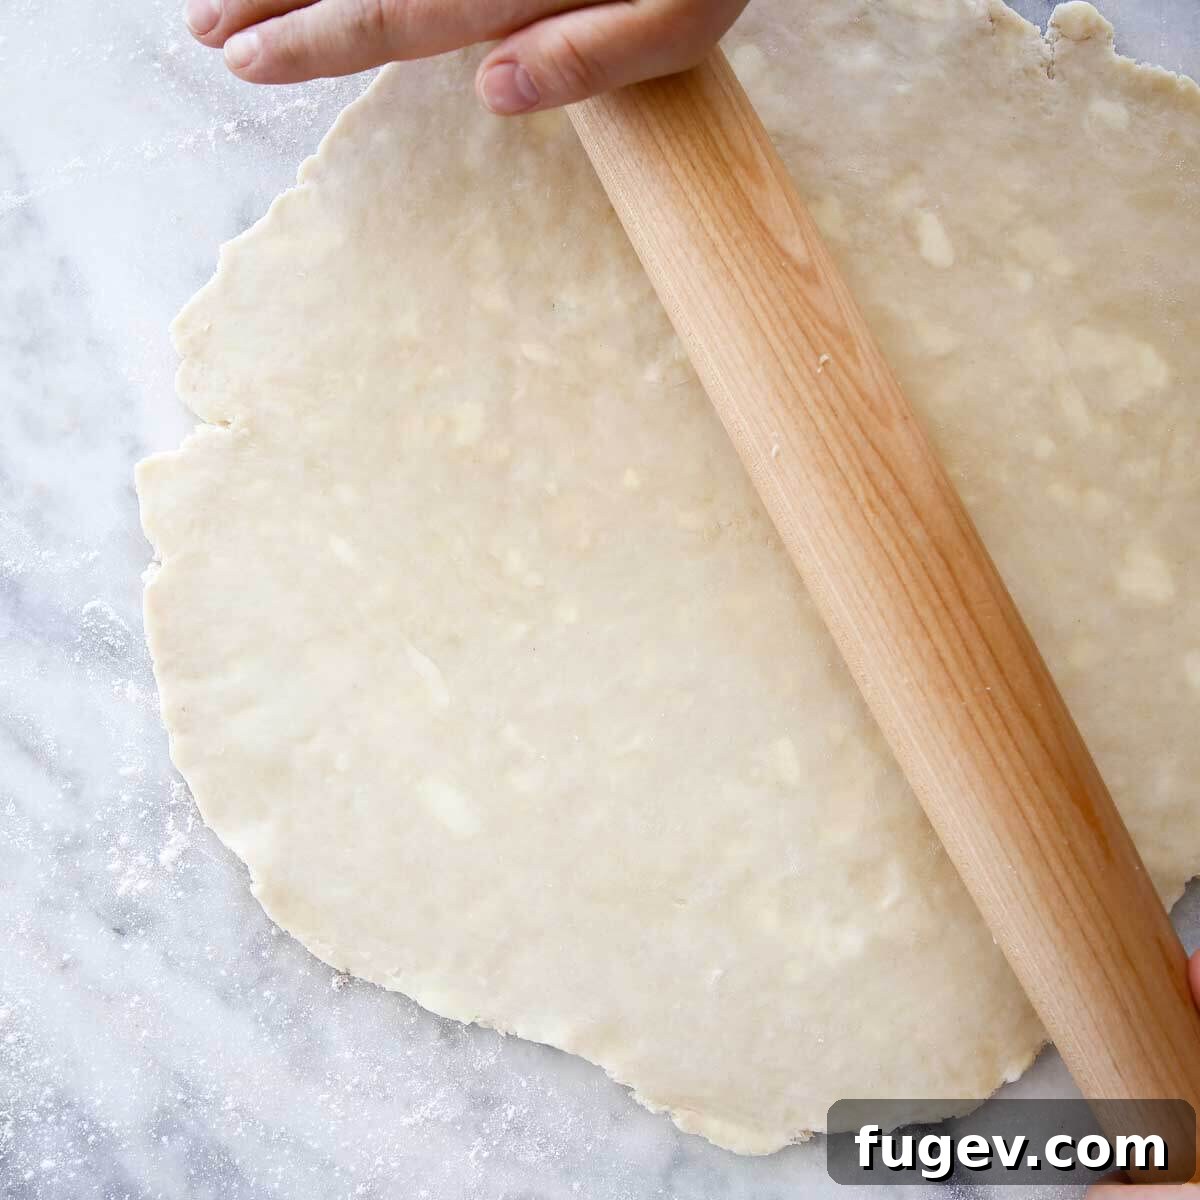
Step 6: Prepare Your Work Surface. Lightly dust a smooth, clean work surface (like a marble slab or a large cutting board) with all-purpose flour. Place one chilled dough disk onto the floured surface, and lightly dust the top of the dough and your rolling pin with flour as well.
For optimal control and even pressure distribution, I highly recommend using either a French rolling pin or a straight wooden rolling pin. These types allow you to feel the dough better than those with handles. If your dough cracks excessively during the initial rolling, it’s likely still too cold; let it rest at room temperature for an additional 5 minutes, then try again.
Step 7: Roll with Precision. Working quickly and efficiently, apply firm but even pressure with your rolling pin. Start rolling from the center of the dough, pushing away from you, then roll back towards you. As you roll, add more flour underneath or on top of the dough as needed to prevent sticking. Regularly rotate the dough a quarter turn to maintain an even thickness and prevent it from sticking to the surface. Continue this process until the dough reaches a uniform thickness of 1/8th inch or slightly thinner.
If, at any point during rolling, your dough starts to resist and shrink back, it means the butter is warming up and the gluten is becoming active. Don’t force it! Gently transfer the dough onto a parchment paper-lined baking sheet, cover it with another sheet of parchment to prevent drying, and refrigerate it for 15-30 minutes to allow it to firm up and relax before continuing.
Step 8: Final Chill Before Use. Once rolled to the desired thickness, carefully transfer the dough onto a parchment-lined baking sheet and refrigerate it for another 30 minutes. This final chill is crucial for setting the butter and relaxing the gluten, which significantly helps prevent shrinkage during baking.
For even longer-term storage and ultimate convenience, you can refrigerate the rolled-out dough, then wrap and freeze it between sheets of parchment paper. This allows you to have homemade pie dough ready to go, just like store-bought, whenever the craving strikes!
Step 9: Ready to Bake! Your perfectly chilled and rolled pie dough is now ready to line a pie tin, tart mold, or be used for any other pastry application of your choice! This recipe yields enough dough for two single-crust pies or one double-crust pie.
Chef Lindsey’s Recipe Tip
Having personally prepared thousands of pie crusts and overseen the production of countless more, I can assure you of this: very few mistakes in pie dough are irreversible. The final outcome might be slightly impacted, but a homemade pie crust, even with minor imperfections, will almost always be more delicious than anything store-bought. The two most critical rules are simple: work with a light, gentle hand and maintain cold temperatures. Follow these, and you’ll consistently achieve delightful results!
Frequently Asked Questions About Pie Crust
Prepared and tightly wrapped pie dough can be stored in the refrigerator for up to 3 days. For longer storage, it can be frozen for up to 2 months. For ultimate convenience, you can even roll out the dough, then freeze it flat between sheets of parchment paper, making it as easy to use as commercial frozen dough. Alternatively, you can blind bake or par-bake your crust, cool it completely, wrap it well, and freeze the baked shells for up to 3 months. This is perfect for make-ahead meal prep.
Absolutely! You can easily increase the quantities to make a larger batch, limited only by the capacity of your equipment. For larger volumes, a stand mixer is highly recommended to handle the increased amount of ingredients efficiently. Remember, when working with larger batches, it’s often beneficial to work in smaller sub-batches to ensure the dough remains consistently cold and workable, maintaining its quality throughout the process.
This versatile all-butter pie crust is your ticket to a vast world of sweet and savory treats. It’s the ideal base for classic fruit pies, creamy custard pies, and elegant tarts. Beyond that, consider using it for savory quiches, galettes, or even charming hand pies like these apple hand pies. You can also cut out decorative shapes with cookie cutters to adorn cupcakes or pies, or even use it as a rich, flaky topping for cobblers or savory pot pies.
A tough pie crust is usually a result of overworking the dough or using water that isn’t cold enough. When dough is overworked, the gluten proteins develop too much, leading to an elastic, chewy texture instead of a tender, flaky one. Warm water also encourages gluten development and melts the butter prematurely, preventing the formation of those desirable steam pockets that create flakiness. Always ensure your ingredients are cold, handle the dough gently and quickly, and stop mixing as soon as the dough just comes together.
If you tried this wonderful recipe and loved it, please consider leaving a 🌟 star rating and sharing your experience in the comments section below. I genuinely love hearing from you, and your feedback truly brightens my day!
All-Butter Pie Crust
Chef Lindsey
5 mins
5 mins
2 Crusts (12 Slices)
Comment
Print Recipe
Ingredients
- 2 cups all-purpose flour (measured by fluffing and spooning into cup)
- 1 teaspoon kosher salt
- 1 teaspoon granulated sugar
- 9 tablespoons unsalted butter (cold, cut into 1/2 inch cubes)
- 2 ½ oz cold water (or as much/little as needed)
Instructions
-
In a large bowl (or stand mixer bowl), whisk together the all-purpose flour, salt, and sugar until well combined. Add the cold, cubed butter to the dry ingredients. Using your preferred method (bench scraper, pastry blender, knives, stand mixer, or food processor), cut the butter into the flour mixture until it resembles coarse meal with some pea-sized pieces of butter still visible.
-
If using a bench scraper, pastry blender, or two knives, use an up-and-down chopping motion, periodically pushing the flour mixture back into the center. For a stand mixer or food processor, pulse the butter into the flour; aim for slightly larger pieces than you might instinctively, and watch carefully to avoid over-processing. The key is to keep the butter cold and distinct.
-
Remove any ice cubes from your cold water. Slowly begin to add the ice water, one tablespoon at a time, incorporating it into the flour mixture. If mixing by hand, pour the water into the center and gently toss the flour into the water with your tool (bench scraper, knife, or fork) until a crumbly, shaggy mixture forms. At this point, be very cautious with additional water; the dough will only need a few more teaspoons at most.
-
Once your dough reaches the “shaggy” stage (looking like strands or small shards of pastry with some loose flour), turn it out from your mixer or food processor onto a clean countertop. Gently gather the dough and, using the heel of your hand, press it away from you, then gather it back. Repeat this motion JUST until the dough barely comes together into a cohesive mass. If it feels too crumbly, dip your hand in a tiny bit of ice water and pat it onto the dry spots of the dough. Remember to work quickly and gently to avoid over-developing the gluten.
-
Divide the dough in half. Press each half into a flat disk, about 1 ½ inches thick, and wrap tightly in plastic wrap. Refrigerate the dough for at least 2 hours, or preferably overnight, to allow the butter to firm up and the gluten to relax. If chilled overnight, let it rest at room temperature for 10-15 minutes before rolling to prevent cracking.
-
Once properly chilled and rested, lightly flour your work surface and rolling pin. Roll out the dough to your desired thickness (typically 1/8th inch for pies) and use it for your favorite sweet or savory creations. Enjoy your gorgeous, buttery, and flaky homemade pie crust!
Video Tutorial
Notes
Technique Essentials: Always work quickly to keep the dough and ingredients cold, and ensure you refrigerate the dough between each major handling step to prevent shrinkage and maintain flakiness.
Flavor Variations: For an easy and delicious twist, consider adding citrus zest (lemon, orange, or lime) or a pinch of your favorite spices (cinnamon, nutmeg, ginger) to the dry ingredients.
Storage: Unused dough, tightly wrapped, can be stored in the refrigerator for up to 3 days or frozen for up to 2 months. Thaw frozen dough in the refrigerator before use.
Substitutions: Pastry flour can be substituted for all-purpose flour for an even more tender crust. However, avoid using cake flour or bread flour, as they will negatively impact the texture.
Prep Time by Method (approximate active time):
Food Processor: 4 minutes
Stand Mixer: 7 minutes
Pastry Blender: 7 minutes
Bench Scraper: 10 minutes
Two Knives: 12 minutes
Nutrition (per slice)
Carbohydrates: 16g |
Protein: 2g |
Fat: 9g |
Saturated Fat: 5g |
Polyunsaturated Fat: 0.4g |
Monounsaturated Fat: 2g |
Trans Fat: 0.3g |
Cholesterol: 23mg |
Sodium: 196mg |
Potassium: 25mg |
Fiber: 1g |
Sugar: 0.4g |
Vitamin A: 262IU |
Calcium: 6mg |
Iron: 1mg
Enjoyed this recipe? Leave a comment below!
Before You Go
I sincerely hope you found this professional chef-tested recipe for all-butter pie crust both inspiring and helpful. Crafting your own pastry is a rewarding experience, and with these tips, you’re well on your way to pie perfection. Don’t stop here! Explore our other delicious, chef-developed pie crust recipes to expand your repertoire, or find your next favorite dessert in our extensive pie recipes catalogue, featuring classics like cinnamon apple pie. Happy baking!