
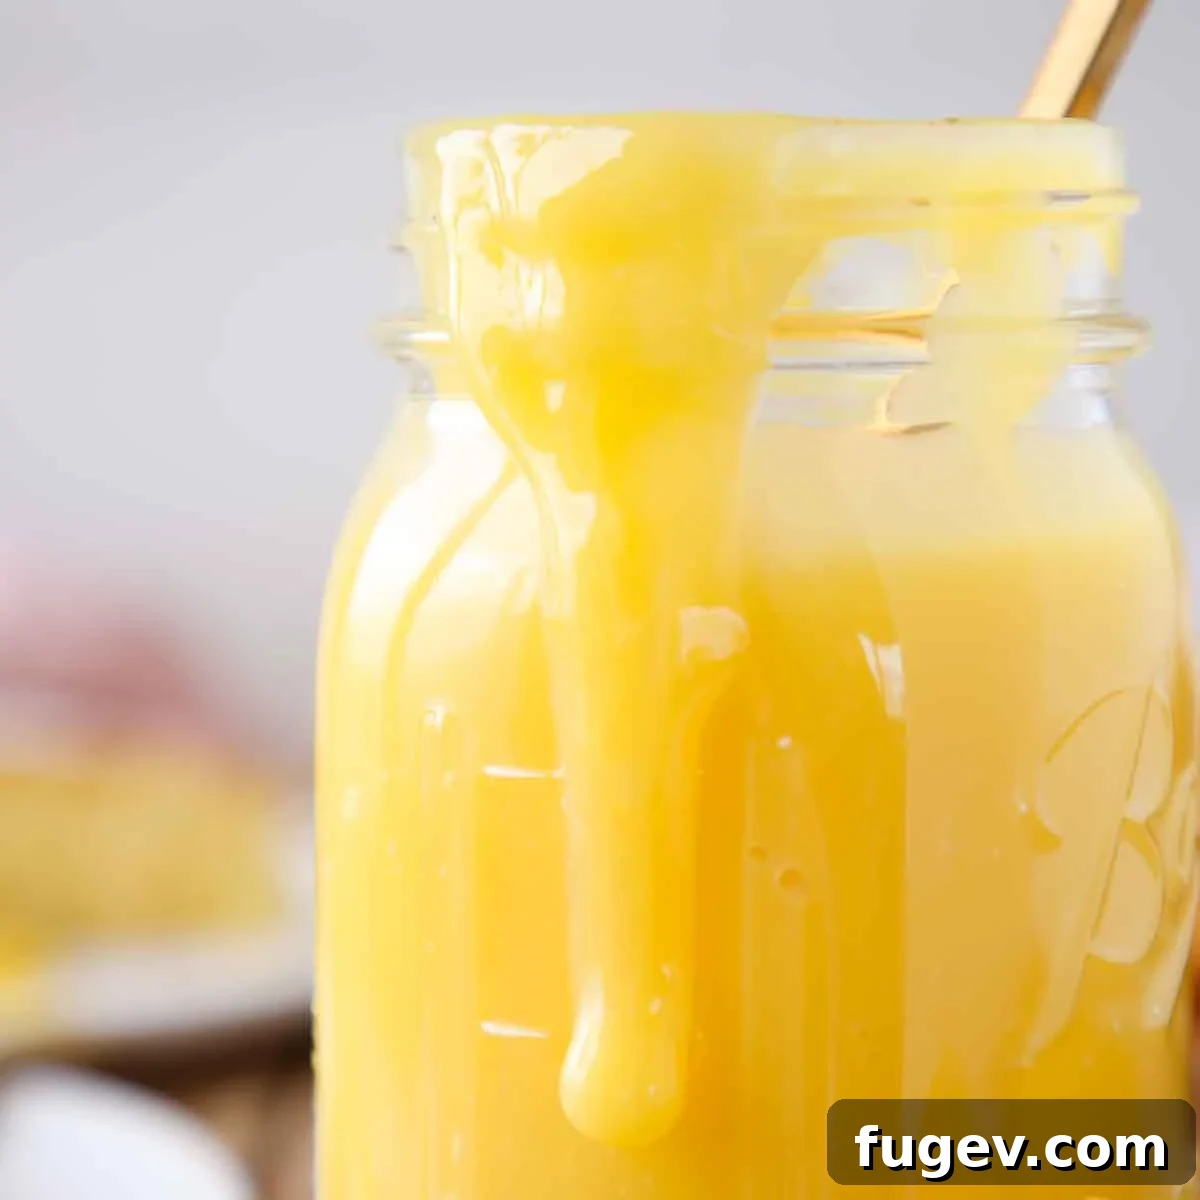
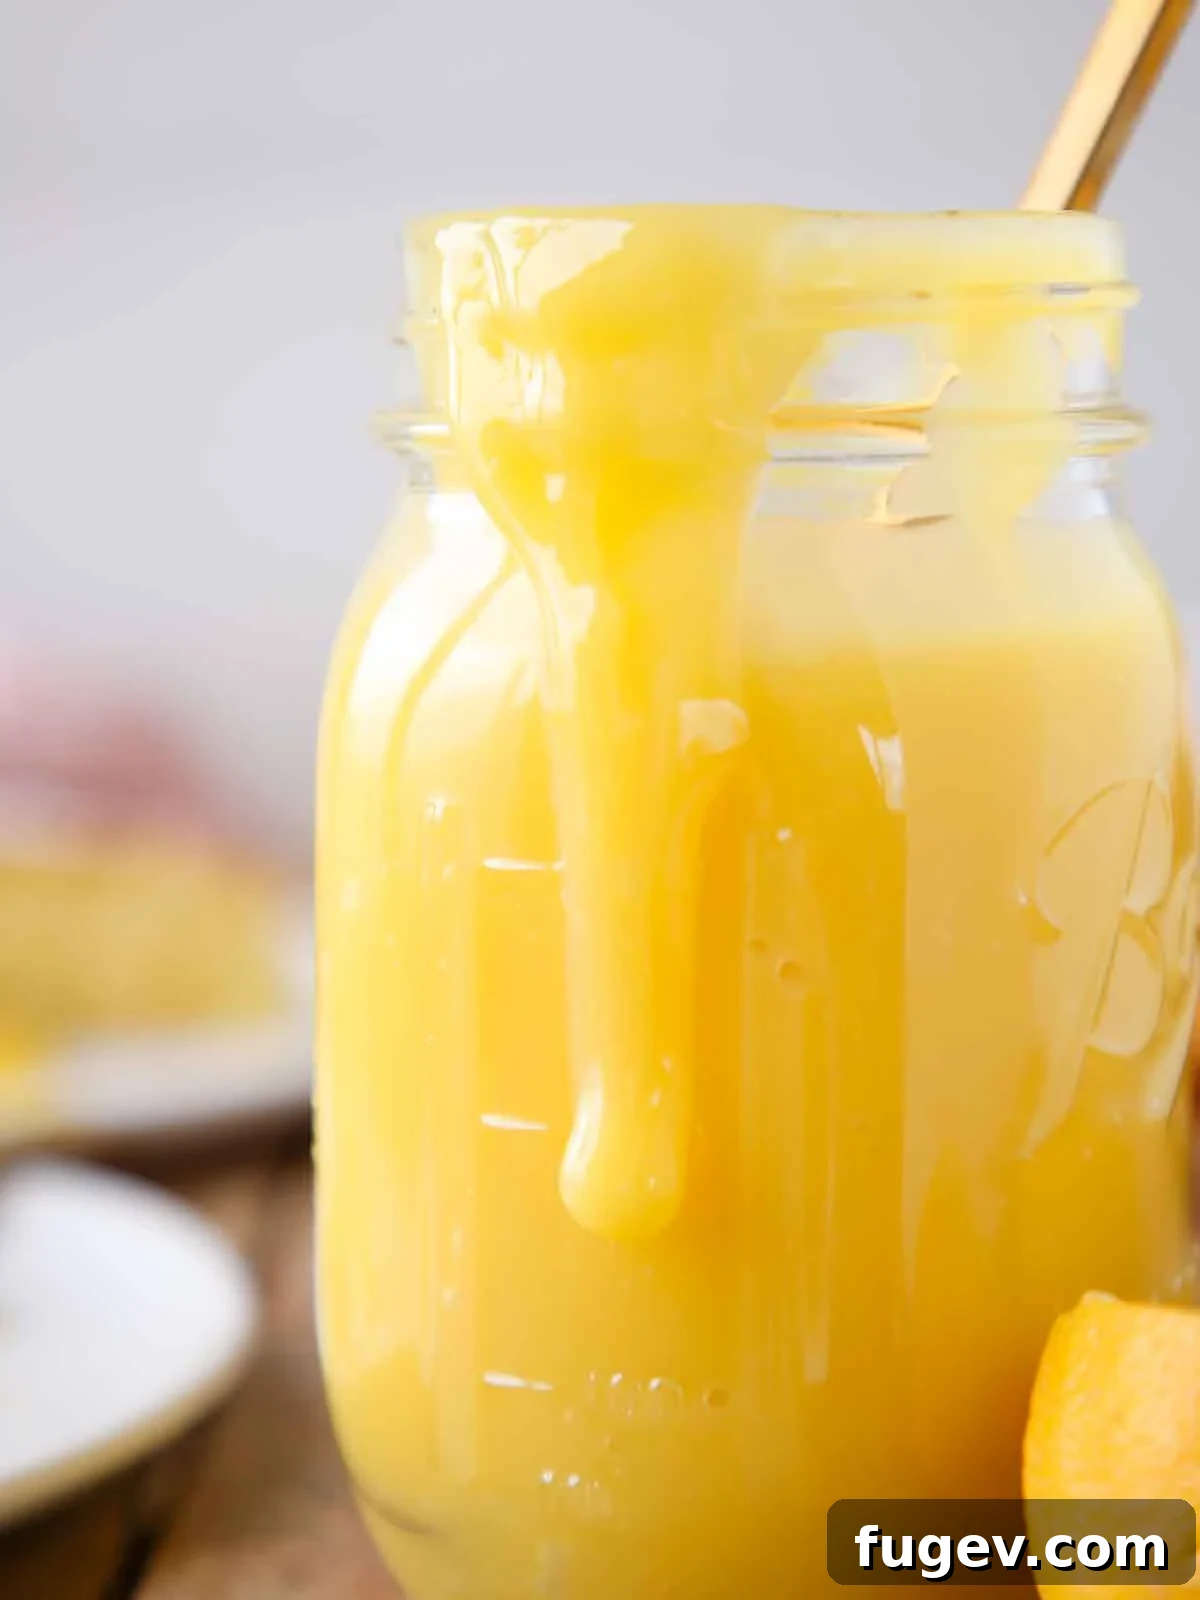
This incredibly **smooth, easy lemon curd** offers a delightful burst of refreshing tartness beautifully balanced with just a hint of sweetness. Crafted with only 5 essential ingredients and cooked on the stovetop, it’s finished with butter for an irresistibly rich and silky texture that truly elevates any dessert. Imagine using this luscious lemon curd as a vibrant filling for cupcakes, a sophisticated accompaniment to a slice of cake, or as a bright flavoring for everything from buttercream to creamy puddings!
A Quick Look At The Recipe
This is a brief summary of the recipe. Jump to the full recipe for detailed instructions and measurements.
Jump to Recipe
Prep Time
20 minutes
Cook Time
20 minutes
Chill Time
30 minutes
Total Time
1 hour 10 minutes
Servings
15 people
Difficulty
Easy
Calories *
308 kcal per serving
Technique
Whisk eggs, sugar, and salt; add lemon juice; cook to nappant; incorporate butter; then cool.
Flavor Profile
A perfectly balanced, tart, and sweet lemon curd!
* Based on nutrition panel
Summarize & Save this content on
google ai
perplexity
grok
This Perfect Lemon Curd is an absolute delight, perfectly capturing the refreshing tang of lemons within a velvety, creamy texture. It’s a true culinary masterpiece that will leave you yearning for more. ⭐⭐⭐⭐⭐
Jane
Why This is the Best Homemade Lemon Curd Recipe
- Authentic, Refreshing Tart Flavor: Unlike many lemon curd recipes that can be overly sweet and one-dimensional, this recipe delivers a genuinely refreshing tartness that evokes the bright, invigorating taste of freshly squeezed lemonade. Sugar is crucial for thickening lemon curd and balancing the lemon’s acidity, but here, it’s used expertly to accentuate, not overwhelm, the vibrant citrus notes.
- Silky Smooth Texture with a Hint of Richness: A carefully measured pinch of salt works wonders to heighten the lemon flavor without adding any extra sweetness, making the overall profile more dynamic. The final addition of butter is a professional pastry chef’s secret, transforming the curd into a satiny, luxurious delight with just the right amount of richness. This technique is similar to how a touch of butter finishes my butterscotch pudding, ensuring an irresistible mouthfeel.
- Proven Excellence from a Professional Pastry Chef: This isn’t just another recipe; it’s a meticulously developed formula, perfected in a professional kitchen by a seasoned pastry chef. It has successfully stood the test of time, proving its deliciousness and reliability since its debut on the pastry menu at Restaurant Marc Forgione in 2016. You can trust this recipe to deliver consistent, outstanding results every single time.
Table of Contents
- Why This is the Best Homemade Lemon Curd Recipe
- The Versatility of Lemon Curd
- Essential Ingredients & Smart Substitutions
- Professional Tips for Making Perfect Lemon Curd
- Creative Ways to Use Lemon Curd
- Step-by-Step Guide: How to Make Homemade Lemon Curd
- Chef Lindsey’s Advanced Recipe Tip
- Lemon Curd Recipe FAQs
- More Recommended Lemon Curd Recipes
- Easy Lemon Curd Recipe Card
- Before You Go
The Undeniable Versatility of Homemade Lemon Curd
The true magic of crafting the perfect lemon curd lies in achieving that exquisite balance: the ideal ratio between bright, fresh lemons, just enough sugar to temper their puckering tartness, and a strategic hint of butter to enhance its luxurious texture. My signature lemon curd is meticulously balanced to ensure it possesses sufficient sweetness to complement the lemon’s intense acidity, yet never so much that it becomes cloyingly sugary. The goal is simple: for your lemon curd to taste precisely like, you guessed it, intensely fresh lemons!
While lemon curd may not always be the flashiest star in the vast universe of pastry, its incredible versatility makes it an indispensable component for any home baker or professional. Its bright flavor and smooth texture open up a world of culinary possibilities. You can effortlessly transform it into a vibrant filling for delightful lemon coconut cupcakes, or use it as a natural, intense flavoring for rich Italian Meringue buttercream, replacing artificial extracts. Imagine spooning it as a gleaming sauce over a slice of decadent easy chocolate cake or complementing the flaky crust of fruit tarts. For an elegant dessert, pair it with fresh berries and clouds of whipped cream atop a majestic pavlova cake. And for a simpler, semi-healthy treat, just stir a dollop into your morning yogurt. Furthermore, by incorporating a touch of gelatin, it transforms into a stable, sliceable filling ideal for layer cakes or the classic lemon bars. Explore even more inspiring ideas on how to incorporate this golden delight into your culinary repertoire below!
Essential Ingredients & Smart Substitutions for Perfect Lemon Curd
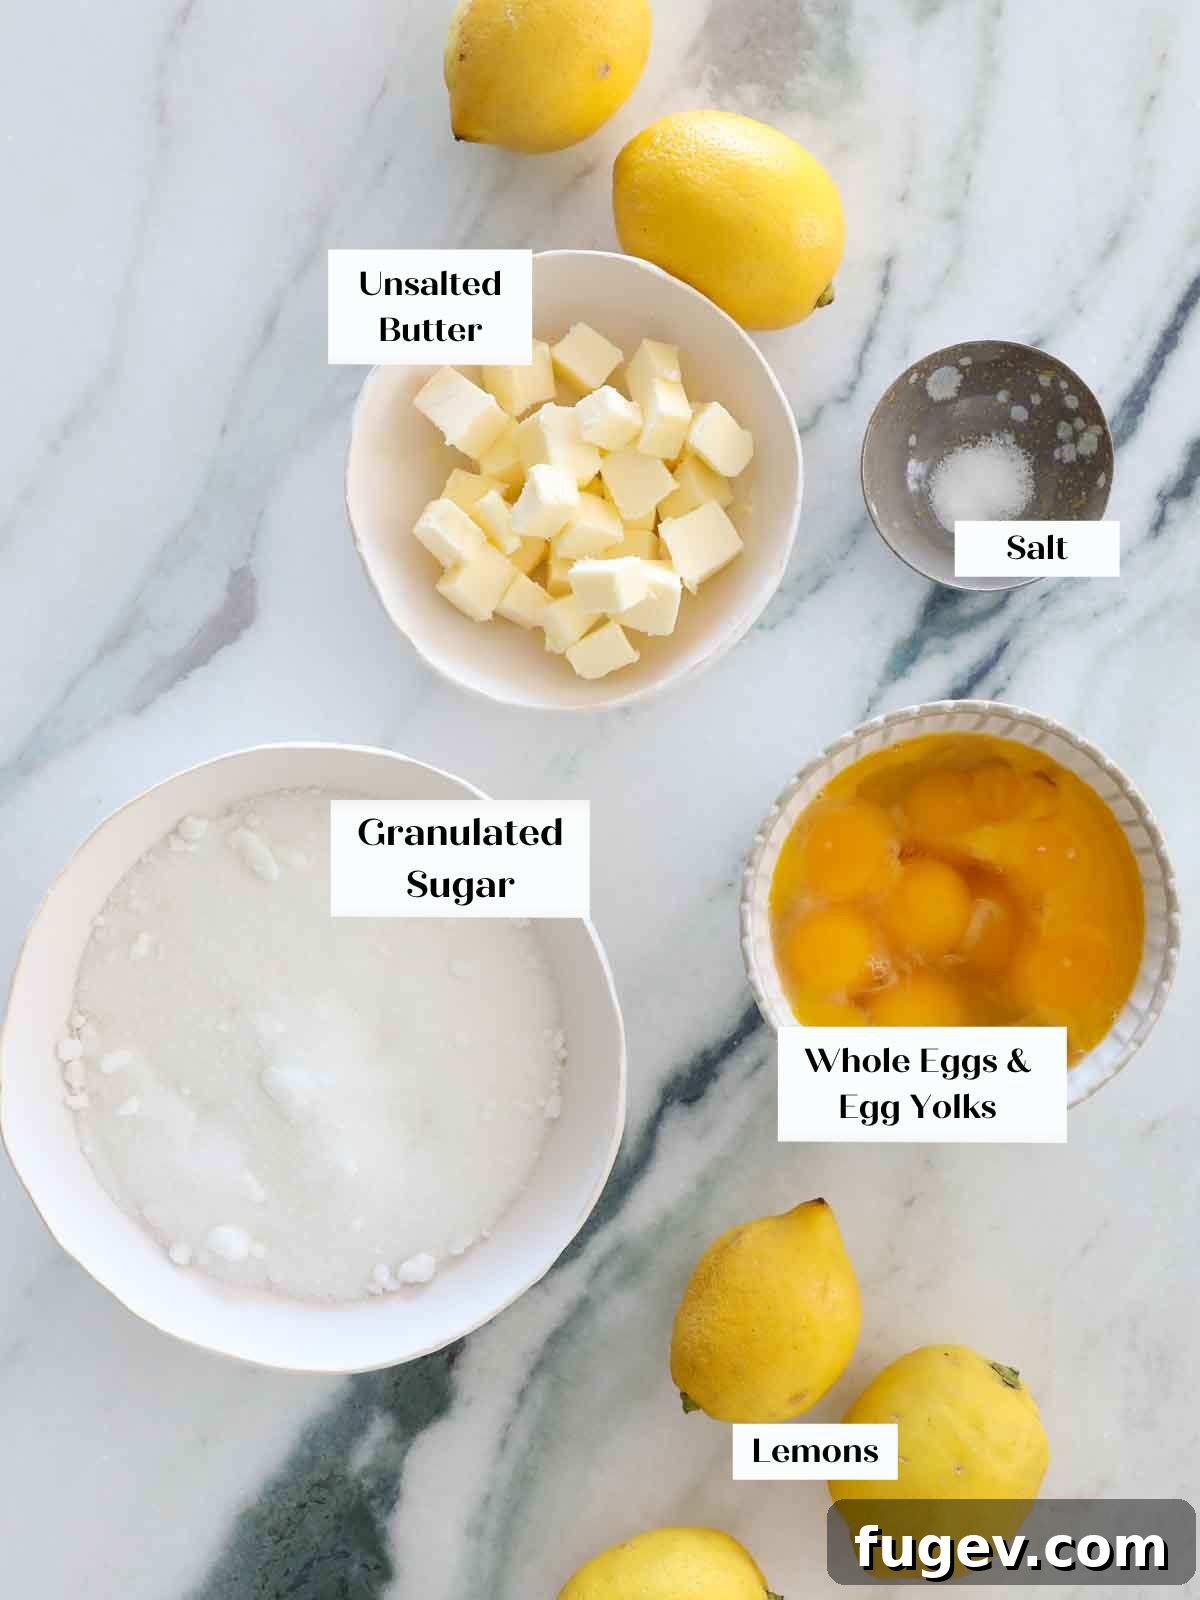
- Large Eggs & Egg Yolks: The combination of whole eggs and extra egg yolks is fundamental to achieving the rich, creamy consistency of lemon curd. When these egg proteins interact with sugar and the acidic lemon juice, and are then gently heated, they thicken to form a luxurious custard. Lemon curd is essentially a stirred custard, much like vanilla pudding, classic vanilla pastry cream, delicate crème anglaise, or even the base for homemade chocolate ice cream! Always opt for large eggs for consistent results, as the yolks in extra large eggs can sometimes be disproportionately larger, affecting the overall balance.
- Granulated Sugar: Sugar plays a dual, critical role in this recipe. Beyond providing sweetness, it is absolutely essential for the successful thickening of the egg proteins when combined with the acidic lemon juice. It helps “curd” the eggs, creating the desired texture. While I’ve meticulously balanced the flavor and function, you can typically reduce the sugar content safely to about ¾ cup if you prefer an even more intensely tart flavor profile.
- Fresh Lemon Juice: This is where the magic happens! It is unequivocally worth the effort to squeeze fresh lemons for this recipe. Fresh lemon juice boasts a vibrant brightness and delicate floral notes that simply cannot be replicated by bottled varieties, which often taste dull and flat. The acidity of fresh lemon juice is also vital for the curd’s thickening properties. For exciting variations, you can substitute an equal amount of a high-acid fruit puree, such as passionfruit puree for a stunning passionfruit curd, or a harmonious blend of orange juice and lemon juice for a delightful orange curd. Grapefruit juice can also work, though ruby red grapefruits might impart a color that some find less appealing. I intentionally omit lemon zest from the cooking process to ensure a perfectly smooth curd, eliminating the need for straining later.
- Kosher Salt: A small but mighty ingredient, kosher salt is added not for flavor, but to enhance and deepen the natural lemon notes without introducing additional sweetness. It subtly rounds out the flavors, making the curd taste more vibrant and balanced.
- Unsalted Butter: The unsalted butter is incorporated at the end to lend a beautiful richness and an incredibly silky, luxurious mouthfeel to the finished curd. While it significantly enhances the texture, if you are looking for a dairy-free alternative, you can certainly omit the butter entirely. The lemon curd will still be wonderfully delicious and smooth, though it will have a slightly lighter consistency.
For complete details on specific quantities and full ingredient information, please refer to the comprehensive recipe card below.
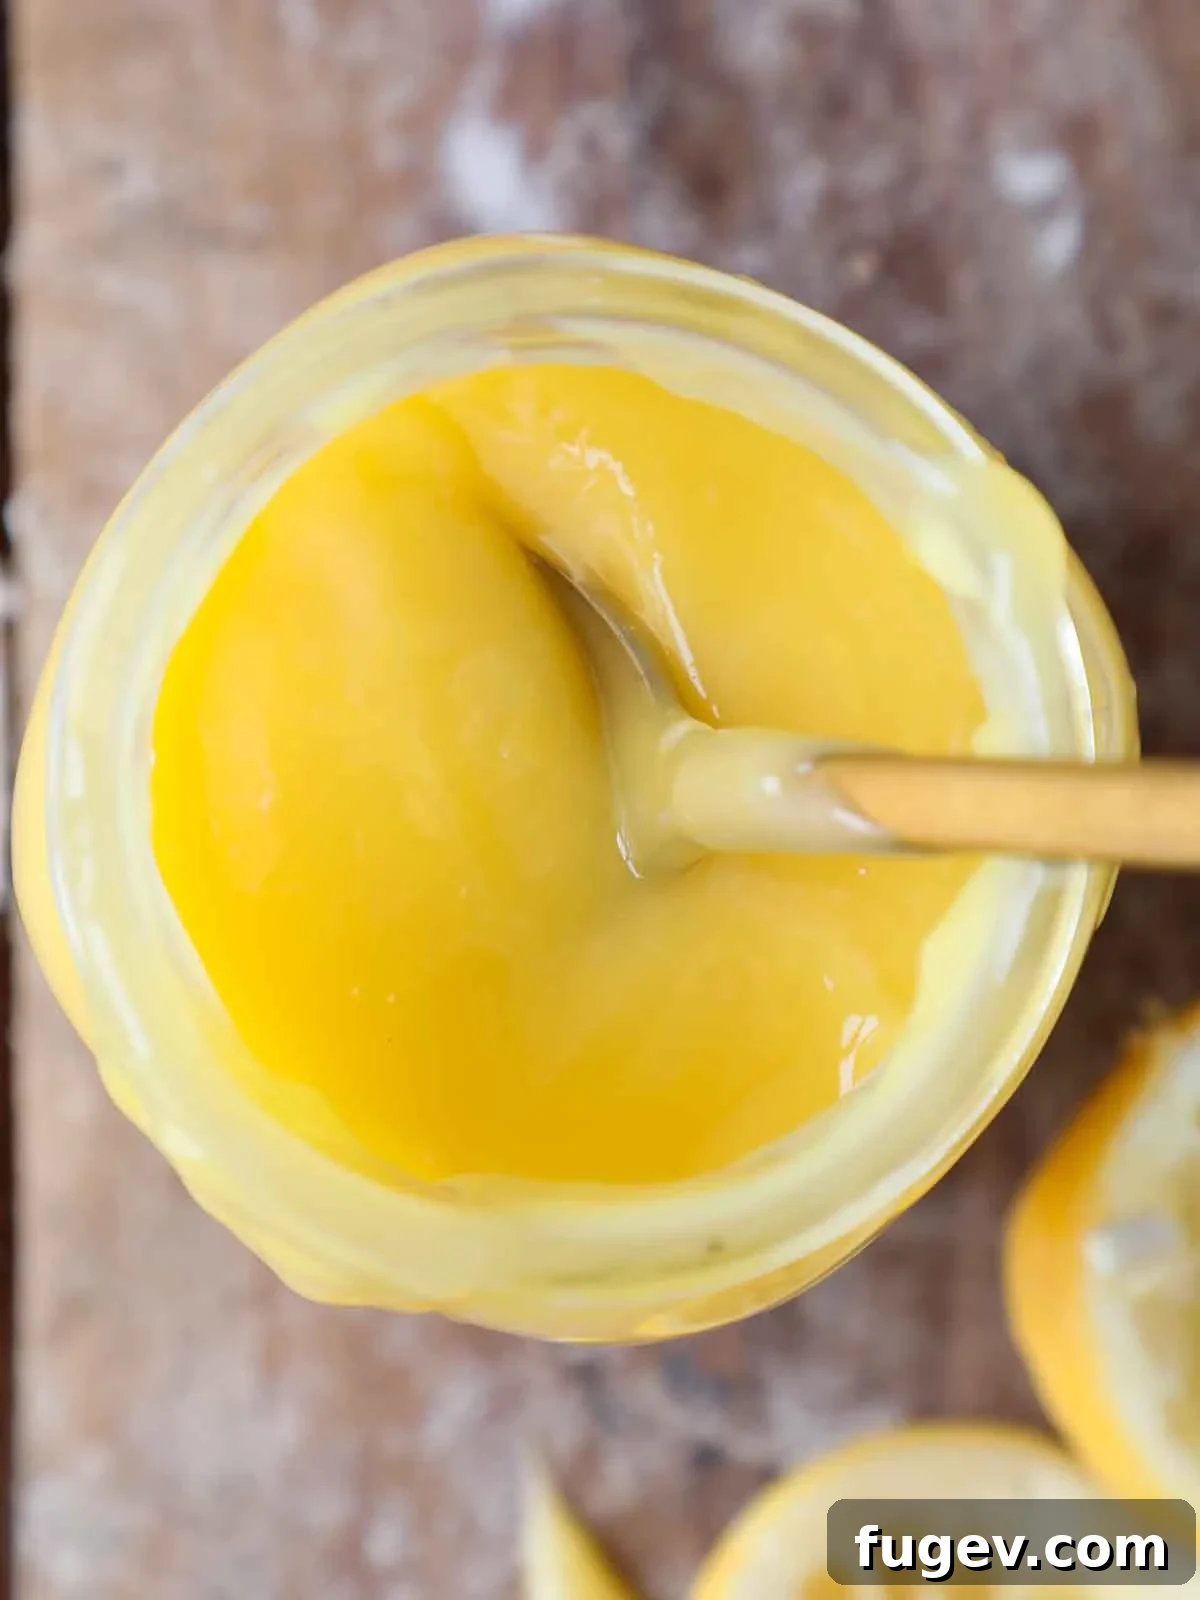
Professional Tips for Making Perfectly Smooth Lemon Curd
- Whisk Eggs Thoroughly Before Adding Other Ingredients: This seemingly small step is crucial for a lump-free lemon curd. By whisking the whole eggs and egg yolks until they are completely smooth and homogenous *before* introducing sugar or lemon juice, you effectively break down the egg white proteins. This protective layer prevents the delicate egg yolks from denaturing too quickly when they come into contact with the sugar and acid, which can cause tiny lumps. Then, whisk in the sugar vigorously, which further safeguards the eggs against the intensity of the lemon juice. This methodical approach ensures a consistently smooth and velvety lemon curd.
- Maintain Constant Stirring and Reach Every Corner: To prevent any part of the curd from overcooking and forming lumps, never stop stirring, especially once it’s on the heat. I employ a very specific, almost meditative stirring pattern for both lemon curd and creamy custards like chocolate pudding. Make a zigzag motion across the entire bottom of the pot, ensuring your spatula touches every part. Follow this by a complete circle around the outside edge of the pot with your silicone spatula. Repeat this pattern. This continuous and comprehensive stirring motion ensures even cooking and prevents any hot spots or coagulation along the edges or bottom. You’ll find it surprisingly soothing!
- Transition to a Whisk When Thickening Begins: Don’t be alarmed if you notice tiny curds starting to form as the mixture heats up and begins to thicken – this is a normal part of the process! At this stage, swiftly switch from your spatula to a wire whisk. The whisk is far more effective at breaking up these initial clumps and actively promoting a smooth, consistent thickening throughout the custard. However, even with a whisk, remember to keep it moving and continue to reach into those often-neglected corners of the saucepan.
- Consider the Bain-Marie (Water Bath) Method for a Hands-Off Approach: If you’re multitasking in the kitchen or prefer a gentler, more forgiving cooking method, consider preparing your lemon curd over a double boiler (bain-marie). While this method will extend the cooking time by approximately three times, it significantly reduces the need for constant, vigilant stirring. You’ll only need an occasional stir until it begins to thicken, at which point you can switch to a whisk. I frequently utilized this method in the restaurant when managing numerous other hands-on preparations, as it frees up valuable time and attention.
Creative & Delicious Ways to Use Homemade Lemon Curd
Lemon curd is a true culinary chameleon, capable of transforming simple dishes into extraordinary desserts. Its bright, tangy profile and silky texture make it incredibly versatile for both flavoring and filling.
- As a Flavoring Powerhouse: Infuse a vibrant lemon twist into your favorite creamy bases. Stir lemon curd into homemade vanilla pudding, classic crème brûlée, rich vanilla ice cream, or silky pastry cream for an instant upgrade. It’s also an exceptional way to flavor buttercreams: try it with a light Swiss meringue buttercream, as seen on my American Flag Cake, or an elegant Italian meringue buttercream. You can even heighten the natural lemon flavor in an easy lemon buttercream. For a lighter touch, gently fold it into freshly whipped cream to create a delightful lemon curd whipped cream!
- Exquisite Fillings for Baked Goods: Lemon curd makes a spectacular filling. Use it between layers of a celebration cake (creating a sturdy dam of frosting around the edge to hold it in place). It’s a fantastic surprise filling for cupcakes, like these unexpectedly delicious lemon chocolate cupcakes, tropical coconut cupcakes, or my signature lemon cupcakes. It also shines as a key component in a layered berry trifle. Don’t forget its charm as a sweet center for classic thumbprint cookies or their richer counterparts, chocolate thumbprints!
- A Simple Spoonful for Dessert or Breakfast: Sometimes, the simplest pleasures are the best. Lemon curd is utterly delightful swirled into creamy Greek yogurt or alongside a silky lemon posset. Confession: I often find myself enjoying a generous spoonful straight from the jar while photographing! Elevate your breakfast or brunch by serving it with warm strawberry scones, fresh blueberry scones, fluffy muffins, classic English muffins, homemade buttermilk biscuits, toast, or even a slice of moist banana bread! It also makes a brilliant topping for pancakes or waffles.
- The Ultimate Dessert Sauce or Garnish: As an Executive Pastry Chef in Manhattan, lemon curd was one of my go-to dessert garnishes. Its vibrant color, complementary tart flavor, and smooth consistency perfectly balance a wide array of desserts. It can provide a wonderful smooth contrast to crunchy elements like a nutty streusel! Try it drizzled over delicate angel food cake, a summery strawberry cake, a pristine classic white cake, creamy buttermilk panna cotta, or a fragrant lemon olive oil cake. For a delightful surprise, serve it with this easy one-bowl carrot cake or any of my other enticing cake recipes.
- Stabilize with Gelatin for Firmer Applications: For applications requiring a firmer set, such as the filling for lemon bars, a more stable lemon curd whipped cream, a traditional lemon meringue pie filling, or a robust cake filling, you can easily add gelatin. Incorporate 2 sheets of silver gelatin or 1 tablespoon (equivalent to 1 packet) of powdered gelatin. Both forms require blooming in cold water first, then adding the bloomed gelatin to the hot lemon curd immediately after incorporating the butter.
- Fill a Tart Shell for a Classic Dessert: A beautifully baked tart shell provides the perfect vessel for lemon curd. You can use lemon curd with or without gelatin, depending on your desired texture. Without stabilization, it will be softer and won’t hold a firm slice quite like a lemon meringue pie. Simply blind bake a tart shell using my reliable pâte sucrée recipe or my versatile all-butter pie crust recipe, then fill it generously with the chilled lemon curd. Garnish with fresh fruit and a cloud of homemade whipped cream for an elegant presentation.
- Explore More Curated Ideas: For an extensive collection of inspiring ways to use your homemade lemon curd, don’t miss my comprehensive list of Recipes with Lemon Curd!
Step-by-Step Guide: How to Make Silky Homemade Lemon Curd
Follow these detailed instructions to achieve consistently silky, smooth, and perfectly tart lemon curd every single time. More precise measurements and ingredient quantities can be found in the comprehensive recipe card at the end of this article.
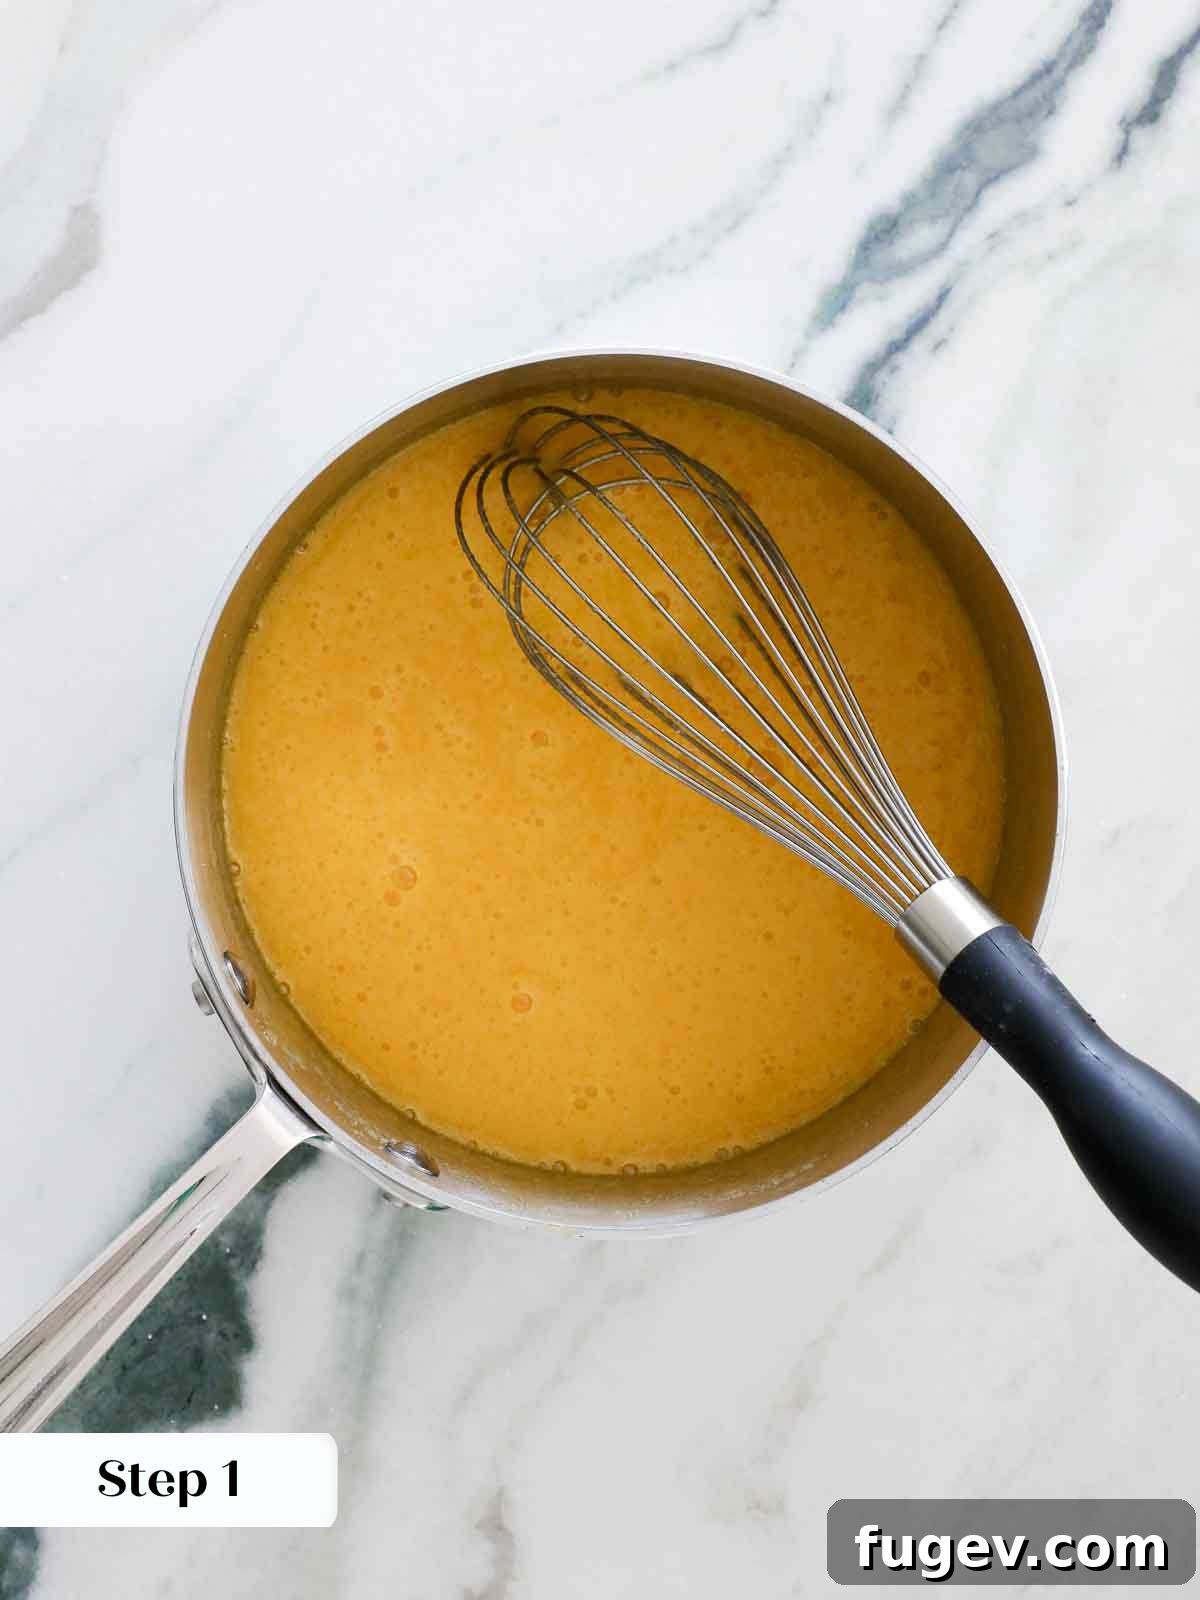
Step 1: Prepare the Eggs. In a large, heavy-bottomed saucepan, begin by vigorously whisking together the whole eggs and extra egg yolks until the mixture is completely smooth and homogenous. It’s crucial that there are no visible streaks of egg whites remaining, indicating a fully incorporated and uniform base.
Step 2: Incorporate Sugar and Salt. Next, add the granulated sugar and kosher salt to the egg mixture. Whisk these ingredients in very thoroughly until they are fully dissolved and evenly distributed. This step further protects the egg proteins from the acid, ensuring a smooth curd.
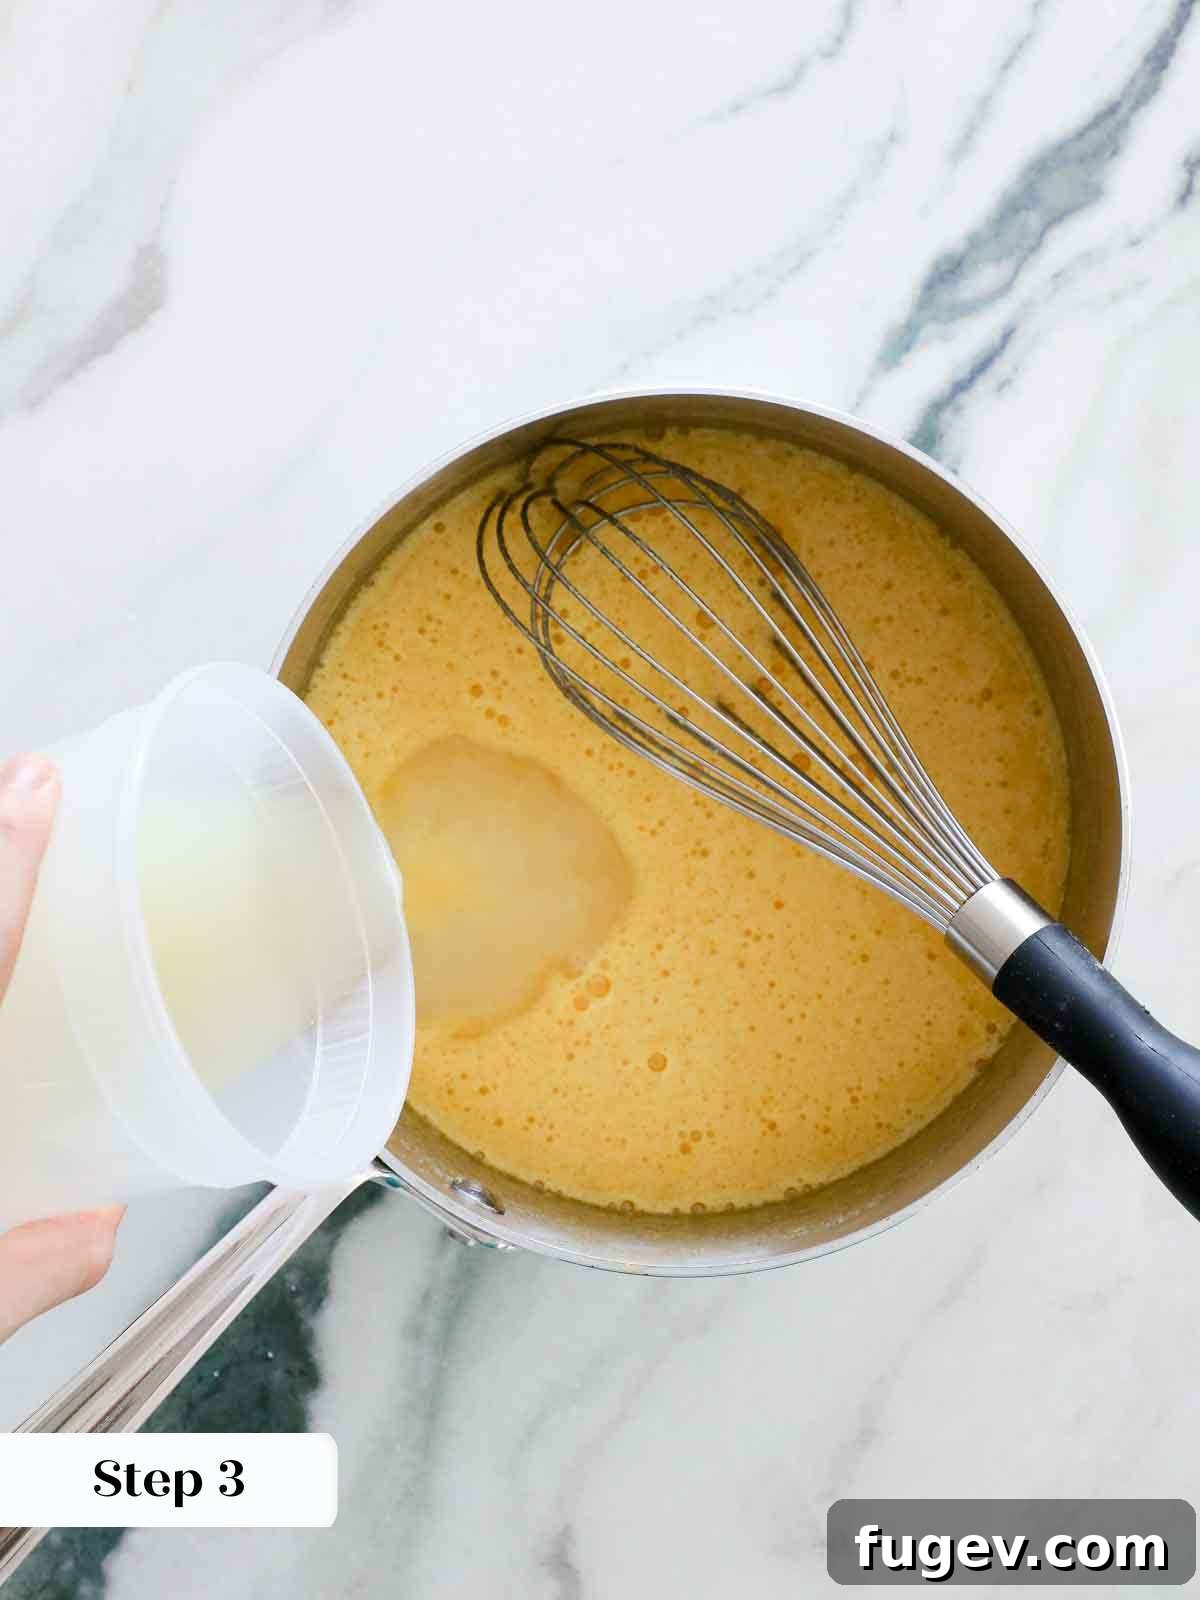
Step 3: Add Lemon Juice Slowly. Gradually and slowly whisk in the fresh lemon juice. This slow addition helps temper the eggs and prevents them from scrambling or curdling prematurely due to the sudden introduction of acid.
The **order of incorporation** is paramount here for achieving a smooth lemon curd. Whisking the eggs thoroughly first helps to break apart and denature the egg proteins in a controlled manner, separating the yolks. This process effectively shields the delicate yolks from premature coagulation (denaturing) when they subsequently come into contact with concentrated sugar or highly acidic lemon juice. Adding the sugar next provides an additional layer of protection for the eggs when the lemon juice is introduced. Neglecting this crucial order can lead to **denatured egg proteins creating tiny, undesirable lumps** that are incredibly difficult to remove, often requiring a very fine mesh sieve to salvage the curd.
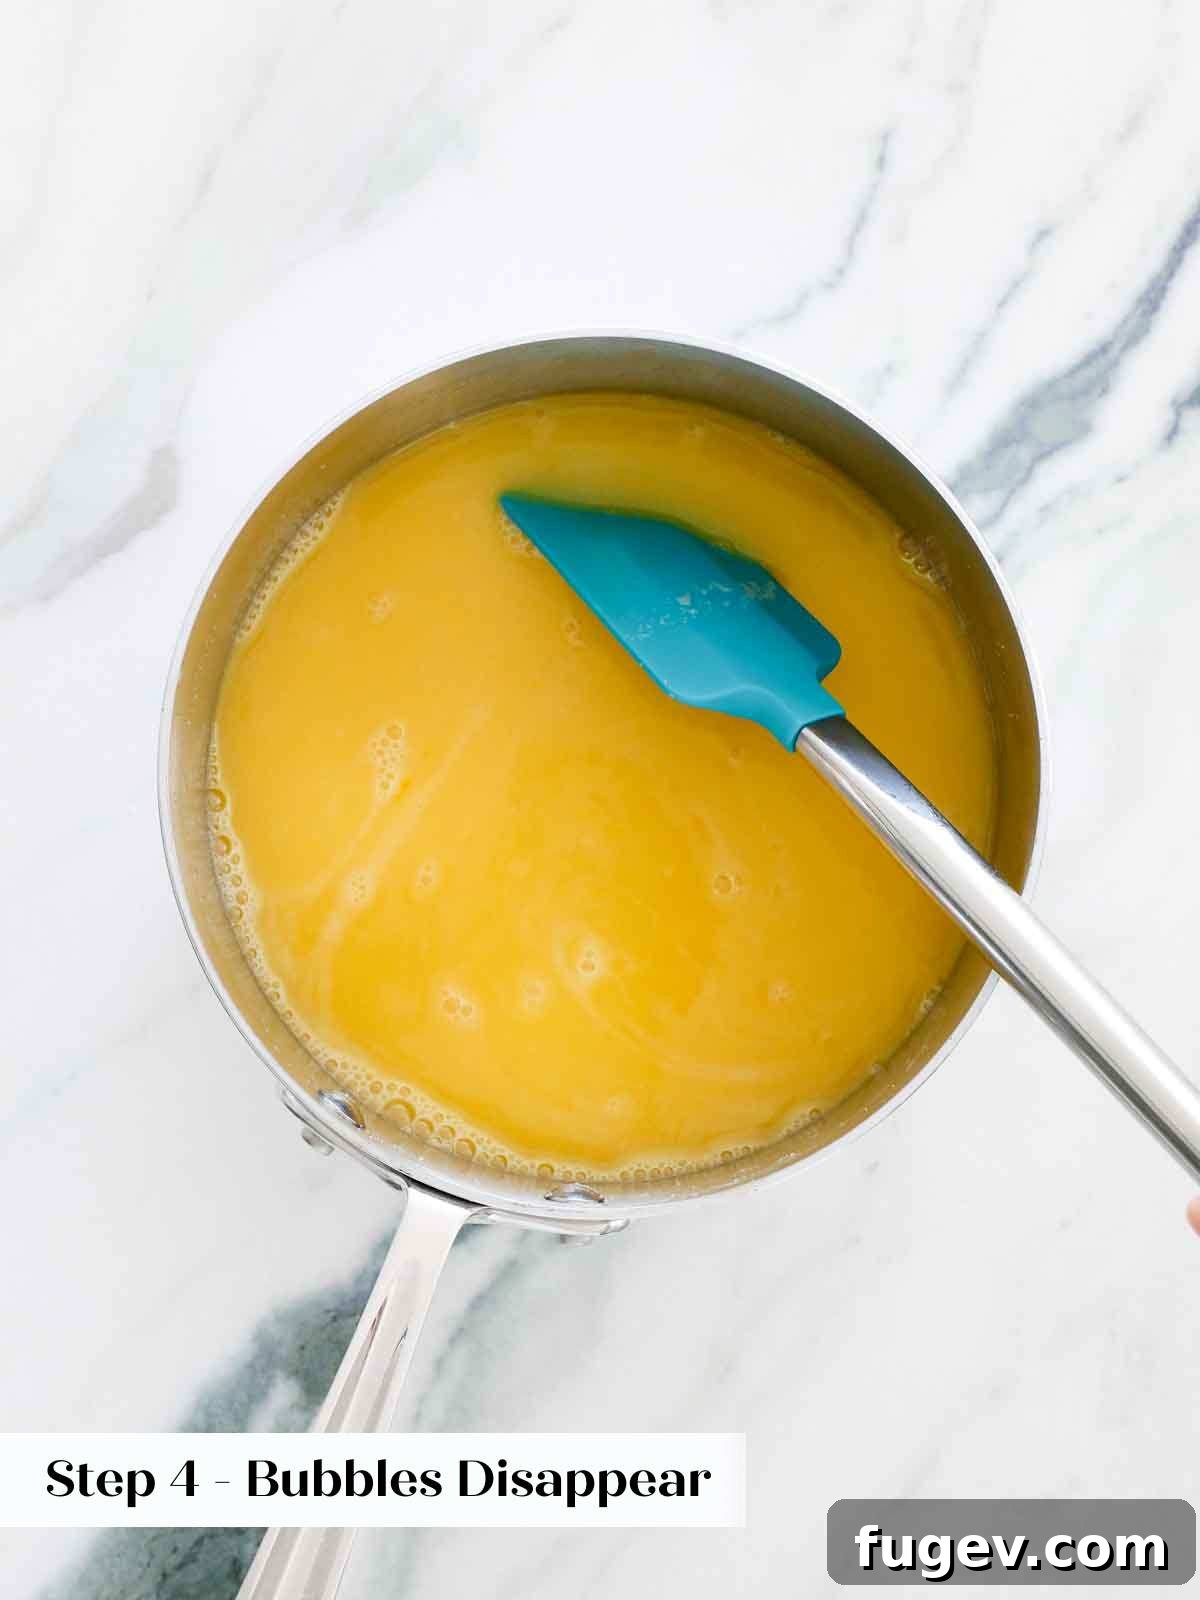
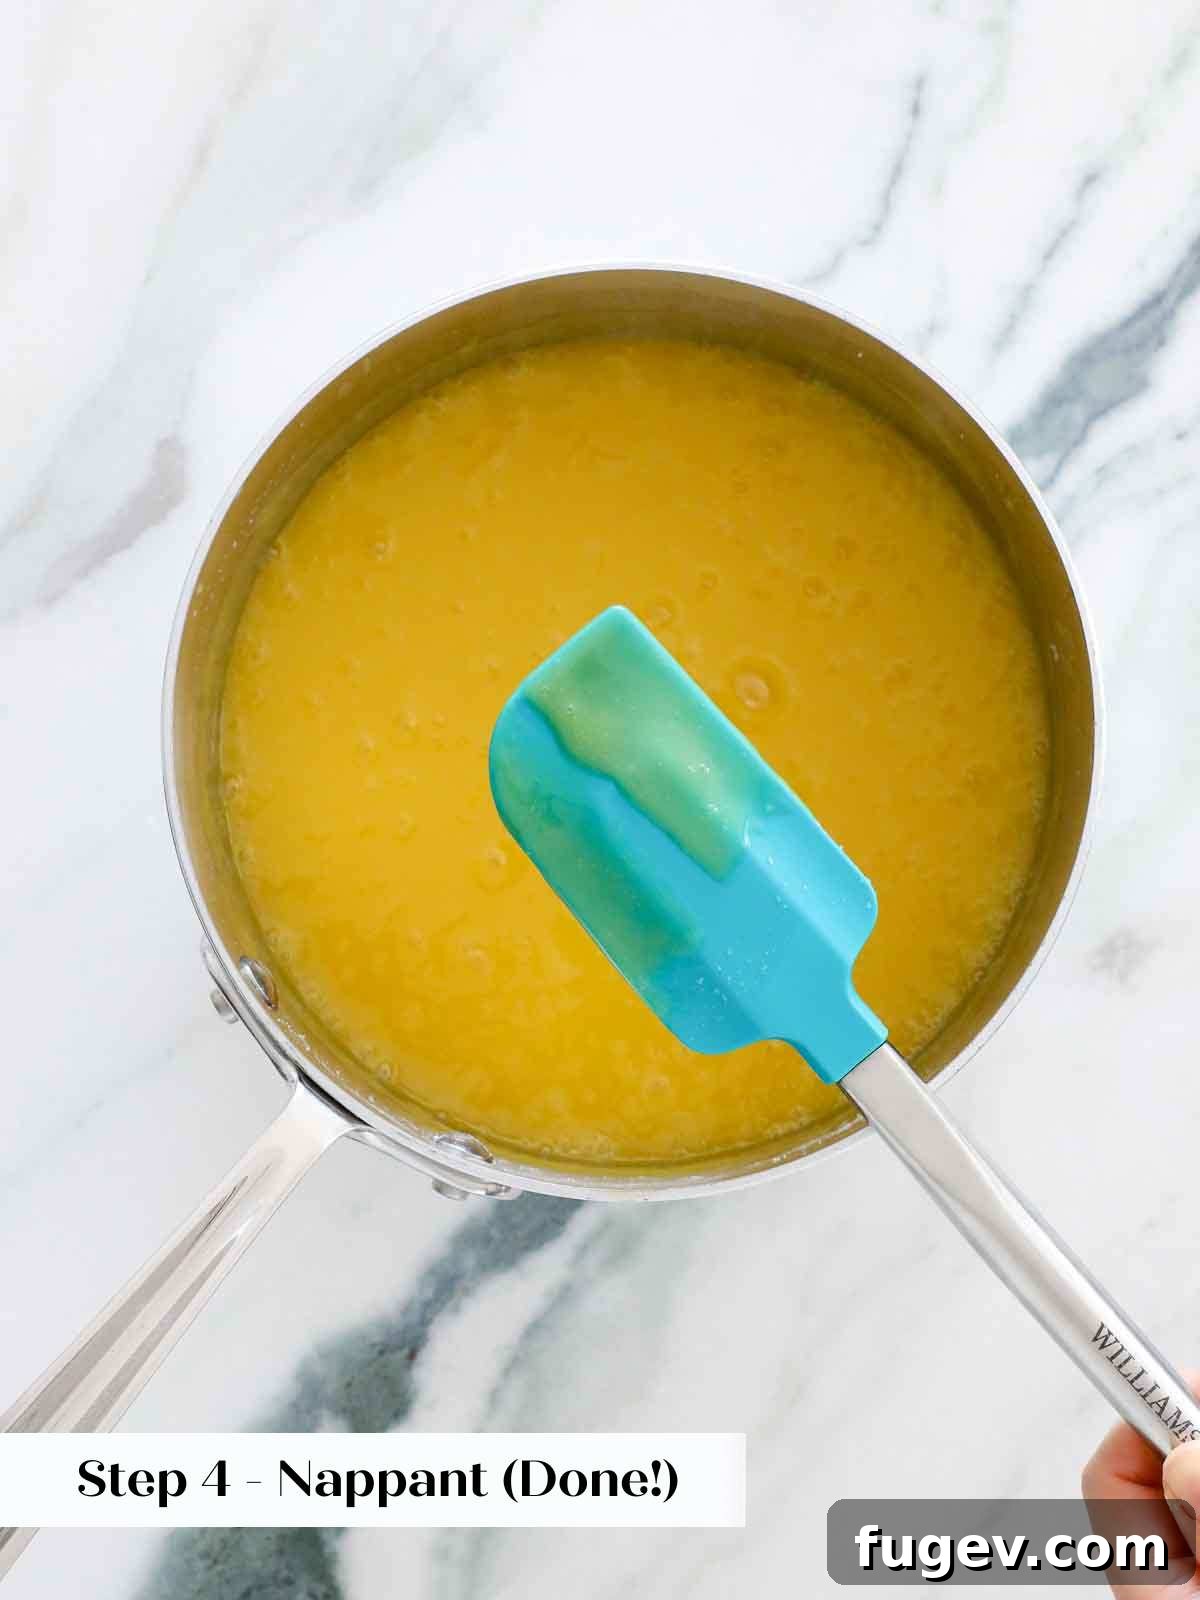
Step 4: Cook to Nappant Stage. Place the saucepan over medium-low heat. Cook the mixture, stirring constantly and thoroughly with a heat-resistant silicone spatula, making sure to scrape the bottom and corners of the pot. Initially, you’ll notice all the tiny bubbles on the surface will disappear. Then, the mixture will begin to visibly thicken. The goal is to cook it until it reaches the “nappant” stage – this is when the custard coats the back of a spoon (or your spatula) and will hold a clear line drawn through it with your finger, without the custard running back into the line. As the lemon curd starts to thicken and form initial “curds,” don’t panic! Briefly switch to a wire whisk at this point. The whisk will help break up any small clumps and encourage the custard to remain smooth as it reaches the desired pudding-like consistency. Remember to continue scraping the corners, even with the whisk!
***Nappant*** is a classic French pastry term used to describe the ideal final stage of a stirred custard. You know your custard has reached *nappant* when you can dip a spoon or spatula into the mixture, lift it out, and then draw a clean line across the back of the coated utensil with your finger. If the custard is perfectly cooked, the line will hold distinctly, and the custard will not run or drip down into the drawn path, indicating it has achieved the correct thickness and consistency.
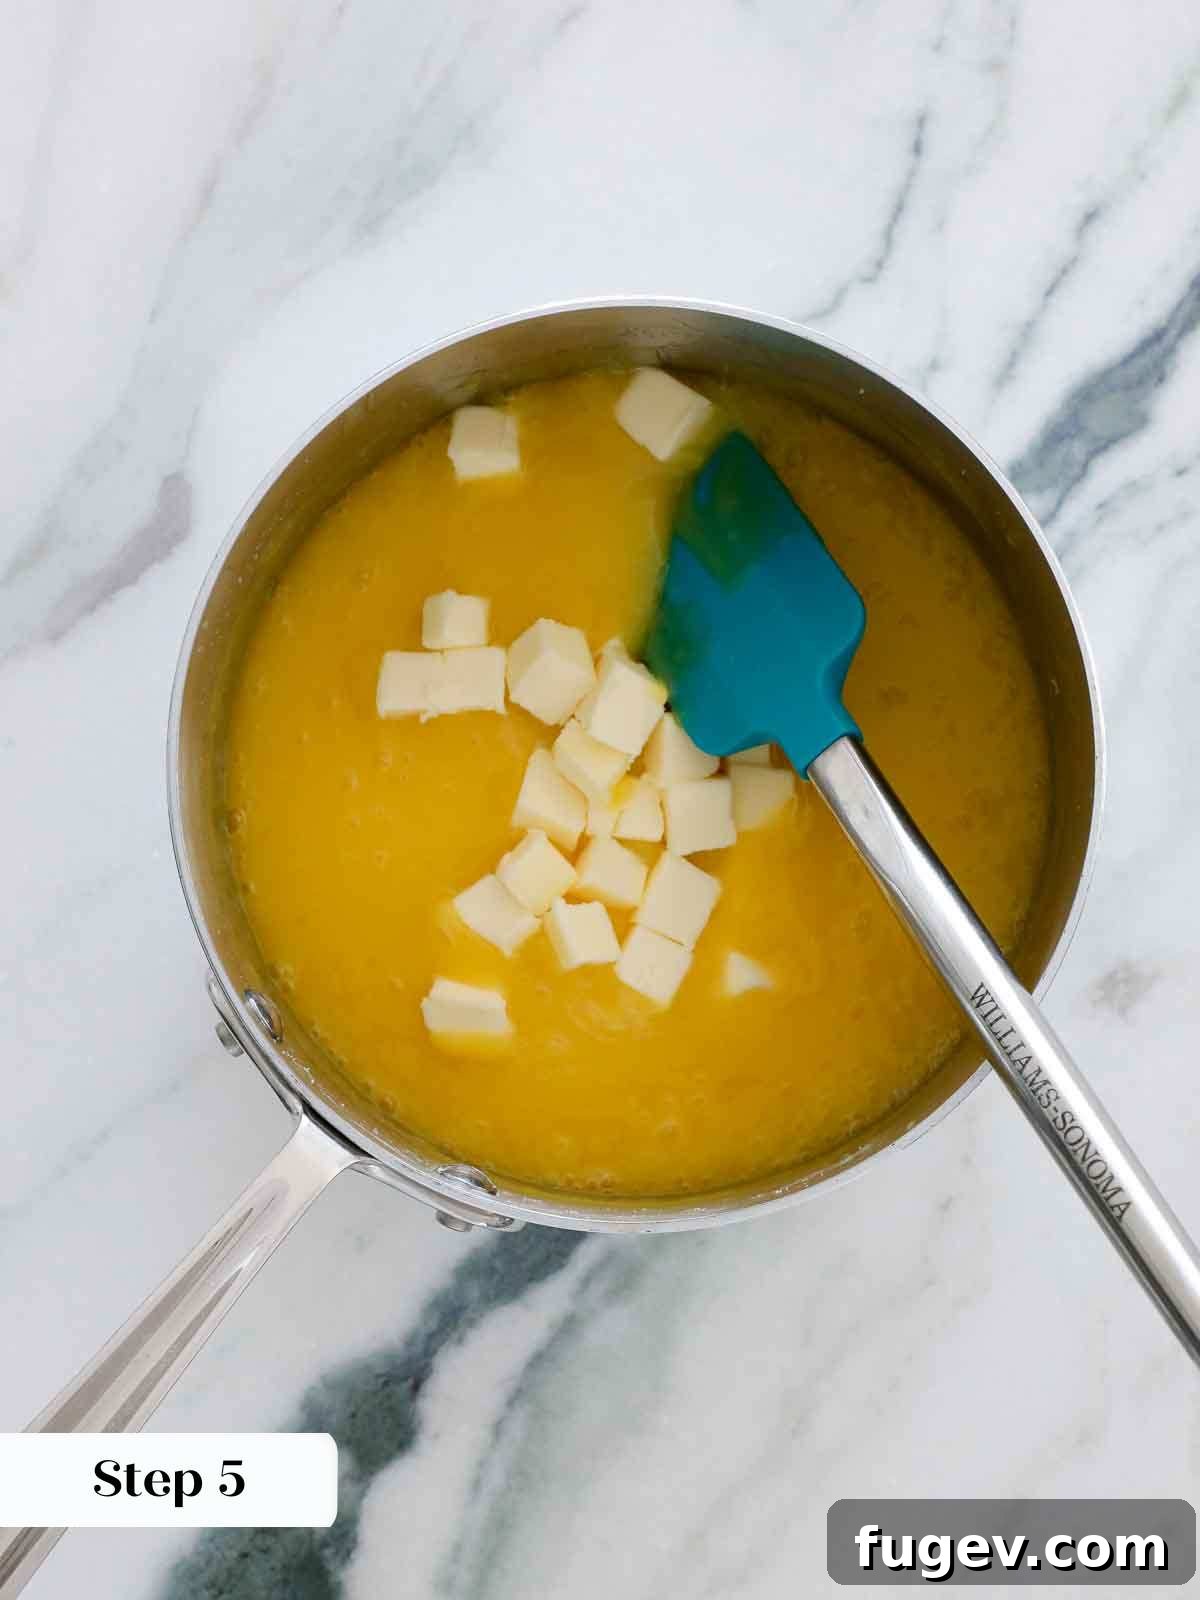
Step 5: Finish with Butter. Once the curd has reached the nappant stage, immediately remove it from the heat. Add the cubed unsalted butter and stir or whisk vigorously until the butter is completely melted and fully incorporated, imparting a luxurious sheen and silken texture to the curd.
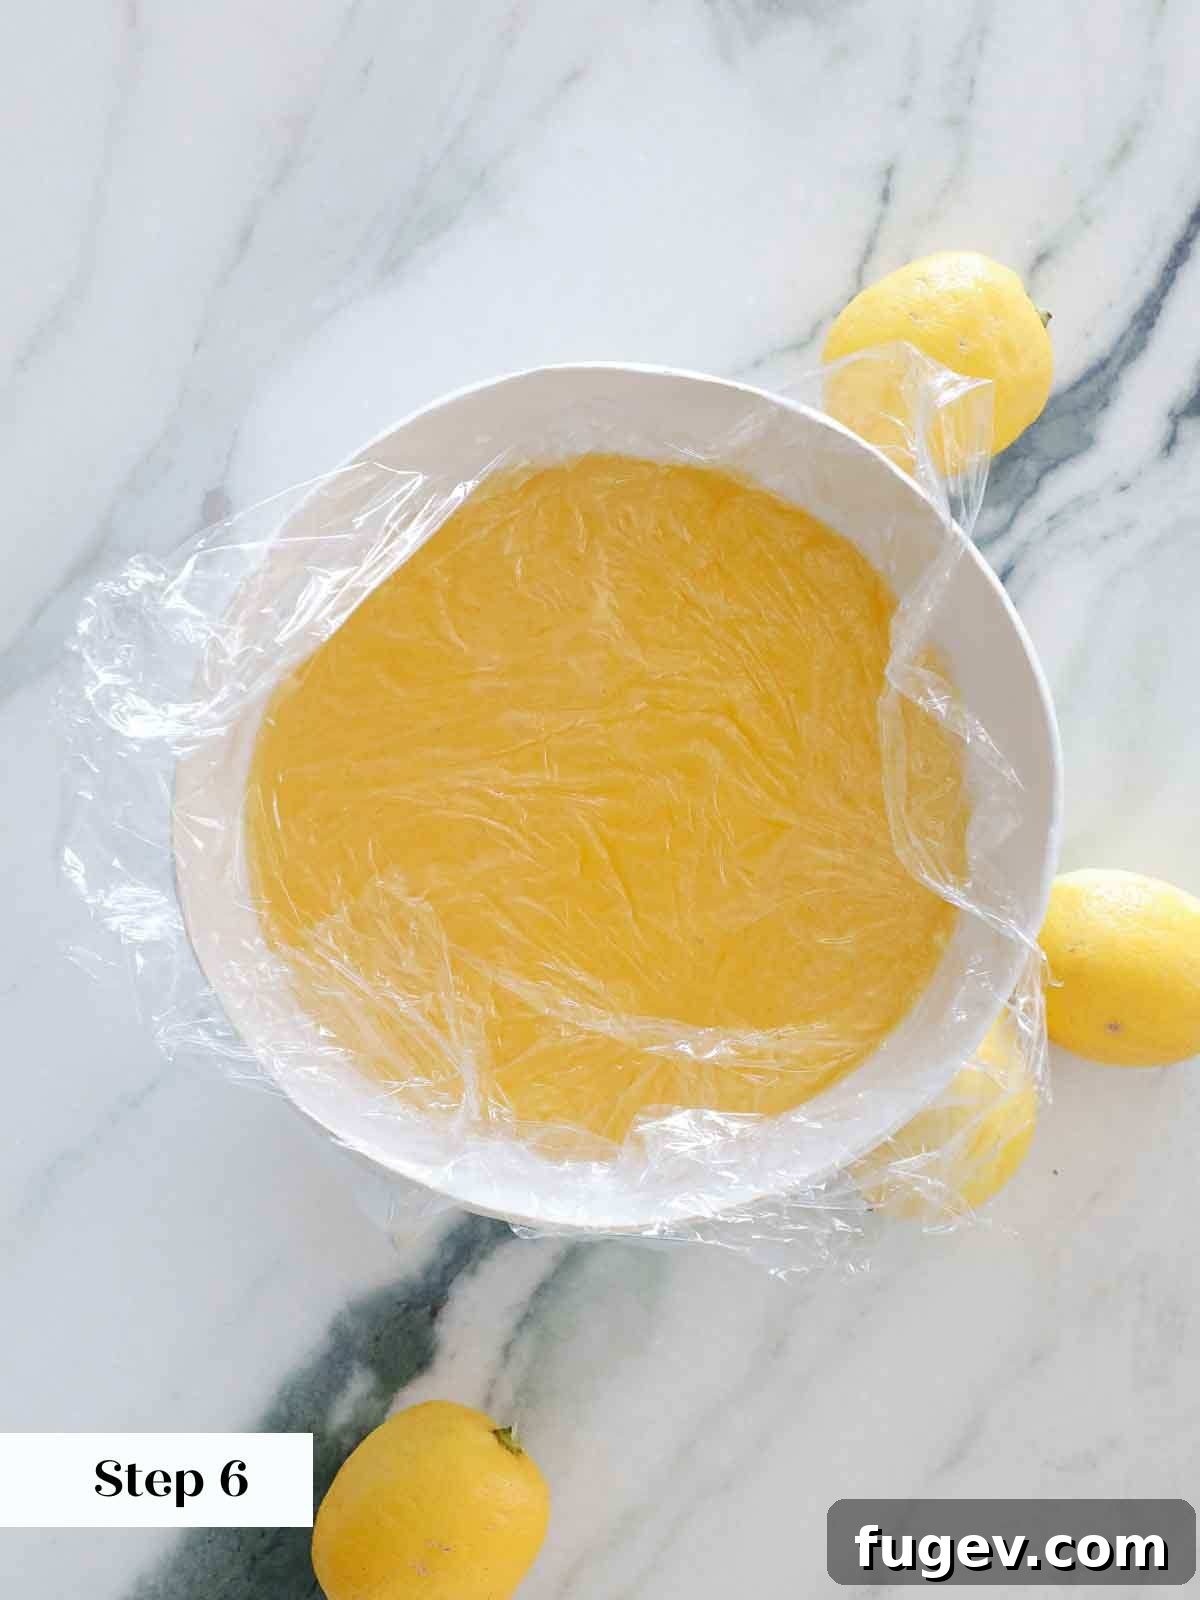
Step 6: Cool and Chill. To cool, either pour the hot lemon curd into a large, clean bowl or spread it thinly onto a baking sheet lined with plastic wrap. Immediately cover the surface of the hot curd directly with another piece of plastic wrap, pressing it down so it makes full contact with the curd. This prevents a skin from forming. Poke a few small holes in the plastic wrap to allow steam to escape. Refrigerate the curd until it is thoroughly cold and set, which typically takes at least 30 minutes to an hour.
You generally **do not need to strain** your homemade lemon curd if you’ve followed the whisking and stirring instructions carefully. However, if despite your best efforts you notice any small lumps, don’t stress! Simply strain the hot lemon curd through a very fine mesh sieve immediately after cooking and before cooling. It’s significantly easier to strain when hot than when cold and thickened!
Step 7: Store for Later Use. Once completely chilled, transfer the smooth lemon curd to a clean glass mason jar or any other airtight container for storage.
Chef Lindsey’s Advanced Recipe Tip: Stabilizing Lemon Curd with Gelatin
For a lemon curd that will not only set beautifully soft but also firm enough to be cleanly sliced when cold – ideal for tart fillings, layered cakes, or lemon bars – consider adding gelatin to this recipe. You can incorporate either 2 sheets of silver gelatin or 1 tablespoon (equivalent to 1 packet) of powdered gelatin. Regardless of the form, both gelatin sheets and powdered gelatin must first be “bloomed” in cold water. To do this, simply soak the sheets in a bowl of cold water until pliable, or sprinkle powdered gelatin over cold water and let it sit for 5 minutes until it swells. Once bloomed, gently squeeze out any excess water from the gelatin sheets, or stir the bloomed powdered gelatin, then add the bloomed gelatin directly to the hot lemon curd *after* you have incorporated the butter. Stir until completely dissolved. This simple step will give your curd enhanced stability and a more defined structure when chilled.
Lemon Curd Recipe FAQs
Once your lemon curd has cooled completely, transfer it to a clean glass mason jar or any other airtight container. It can be stored safely in the refrigerator for up to 1 month, or frozen for longer-term storage of up to 3 months. Always ensure it’s well-sealed to maintain freshness.
Yes, lemon curd freezes beautifully! Curd that has been stabilized with gelatin (as per my advanced tip) tends to thaw with a slightly better structure. To thaw frozen lemon curd, place it in a bowl set over a pot of simmering water (a double boiler setup). Stir frequently to ensure even melting and to prevent it from overheating. Once thawed, give it a good whisk to restore its smooth, creamy consistency. If your lemon curd does not contain gelatin, be extra careful not to heat it too intensely during thawing; just enough to melt it, then whisk well to recombine any separated elements.
Absolutely! This lemon curd recipe scales up very well. I have personally made this recipe in batches as large as 12 quarts in professional kitchens. Your only real limitations will be the size of your saucepan or pot, and your patience for the stirring process. Just ensure your stirring is consistent and thorough across the larger volume to prevent scorching or uneven thickening.
Lumps in lemon curd are typically caused by uneven heating or insufficient whisking. This can happen if the eggs are added to the heat without being properly whisked with sugar first, or if the curd isn’t stirred constantly, allowing parts of the egg to cook too quickly at the bottom or sides of the pan. Overcooking can also lead to a grainy texture. While prevention is key (follow my “Professional Tips” carefully!), if you end up with lumps, simply strain the hot curd through a fine-mesh sieve before chilling to achieve a smoother consistency.
Making this lemon curd dairy-free is quite simple! The unsalted butter is added at the end for richness and a silky mouthfeel. You can easily omit the butter entirely. The curd will still be wonderfully delicious and smooth, though it will have a slightly lighter texture and less richness. If you still want a bit of richness, you could experiment with a high-quality plant-based butter alternative, but ensure it has a neutral flavor that won’t interfere with the bright lemon.
More Recommended Lemon Curd Recipes & Uses
Recipe Roundups
Recipes with Lemon Curd
Summer Dessert Recipes
Lemon Curd Whipped Cream Recipe
Summer Dessert Recipes
Amazing Lemon Bars
Summer Dessert Recipes
Berry Trifle
If you tried this recipe and loved it, please leave a 🌟 star rating and let me know how it goes in the comments below. I love hearing from you; your comments truly make my day!
Easy Lemon Curd
Chef Lindsey
20 minutes
20 minutes
30 minutes
1 hour
10 minutes
15
people
Saved
Pin Recipe
Comment
Print Recipe
Ingredients
- 4 large eggs
- 5 egg yolks
- 1 ⅓ cups granulated sugar
- 1 ¼ cup lemon juice from about 6 large lemons
- ¼ teaspoon kosher salt
- 7 tablespoons unsalted butter cubed
Instructions
-
In a large sauce pot, whisk together eggs and yolks until smooth and homogenous.
-
Whisk in sugar and salt very well.
-
Slowly whisk in the lemon juice.
-
Cook over medium heat, stirring constantly until nappant. Nappant is when you can dip a spoon or spatula into the custard and draw a line across it with your finger and the custard does not run down the spoon into the line.
-
Remove from heat and stir in butter.
-
Strain into a bowl or a plastic wrap lined baking sheet. Cover with plastic wrap, poke a few holes and refrigerate until cold.
Video
Notes
Yield – Approximately 3 cups of delicious lemon curd.
Flavor Tips – For the most vibrant and authentic lemon flavor, always use freshly squeezed lemon juice. Bottled juice simply won’t compare!
Variations – Feel free to experiment with other citrus! You can use lime, key lime, or even grapefruit juice. Be aware that these might produce a less vibrant, somewhat unappealing color once cooked, so a tiny bit of food coloring (optional) might be desired. Passionfruit puree is another excellent substitution, yielding a beautiful, naturally colored passionfruit curd without any need for artificial coloring.
Storage – Store your cooled homemade lemon curd in a tightly sealed glass mason jar or other airtight container in the refrigerator for up to 1 month. For longer storage, it can be frozen for up to 3 months.
Nutrition
Carbohydrates: 40g |
Protein: 5g |
Fat: 15g |
Saturated Fat: 8g |
Polyunsaturated Fat: 1g |
Monounsaturated Fat: 5g |
Trans Fat: 1g |
Cholesterol: 230mg |
Sodium: 190mg |
Potassium: 76mg |
Fiber: 1g |
Sugar: 38g |
Vitamin A: 595IU |
Vitamin C: 11mg |
Calcium: 32mg |
Iron: 1mg
Condiments
British
308
Like this? Leave a comment below!
Before You Go…
I sincerely hope you enjoyed creating and tasting this professional chef-tested lemon curd recipe! Its bright, tart flavor and incredibly smooth texture are truly a delight. If you’re passionate about more luscious custards, explore our collection of custard recipes, or dive deeper into the world of citrus with more lemon recipes. For an extra special treat, try serving your freshly made lemon curd alongside a slice of my tender lemon pound cake – it’s a match made in heaven!