
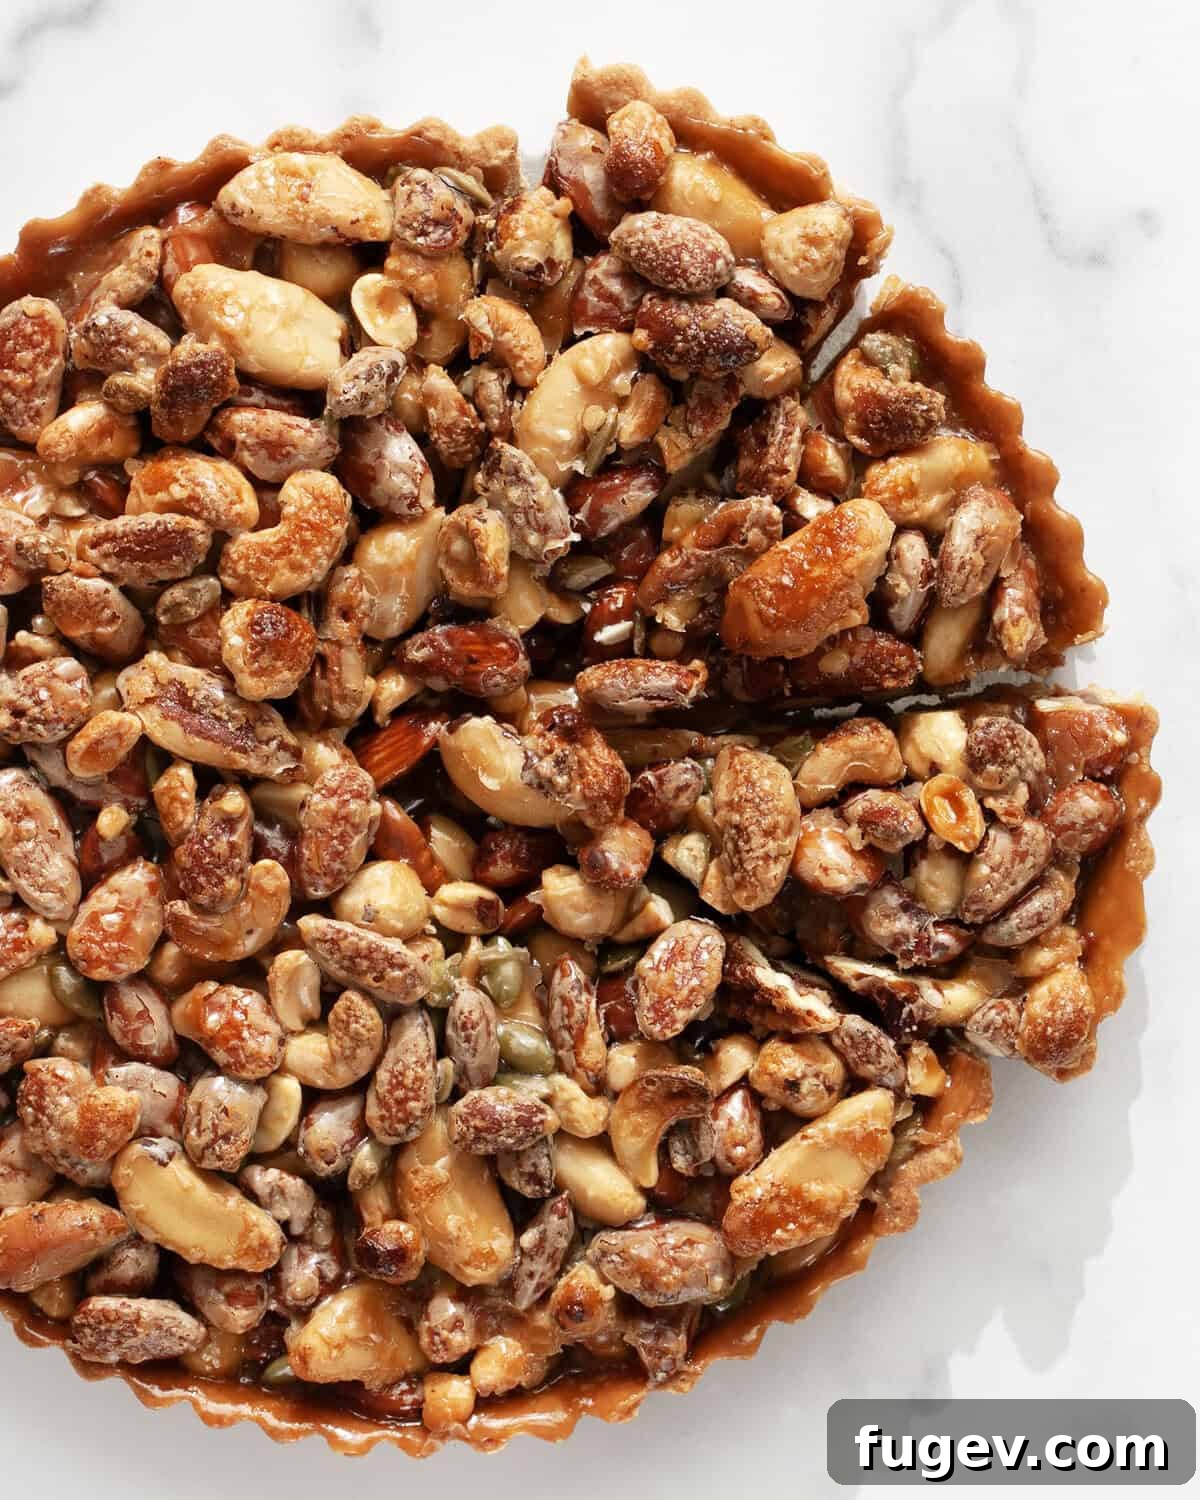
Indulge in the irresistible allure of this ultimate caramel nut tart, a dessert that perfectly balances crunchy, salty, and wonderfully gooey textures. The secret to its profound flavor begins with a cinnamon-infused pastry dough, adding a warm, aromatic note that complements the rich filling. We use a delightful blend of mixed nuts, generously folded into a luxurious batch of homemade caramel, creating a truly spectacular treat. This elegant tart is not just a dessert; it’s a showstopper, making it an ideal choice for fall gatherings, Thanksgiving feasts, or a festive Christmas celebration.
For those moments when you crave the comforting flavors of cinnamon and nuts in a quicker, simpler form, these pecan cinnamon bar cookies offer a delightful alternative.
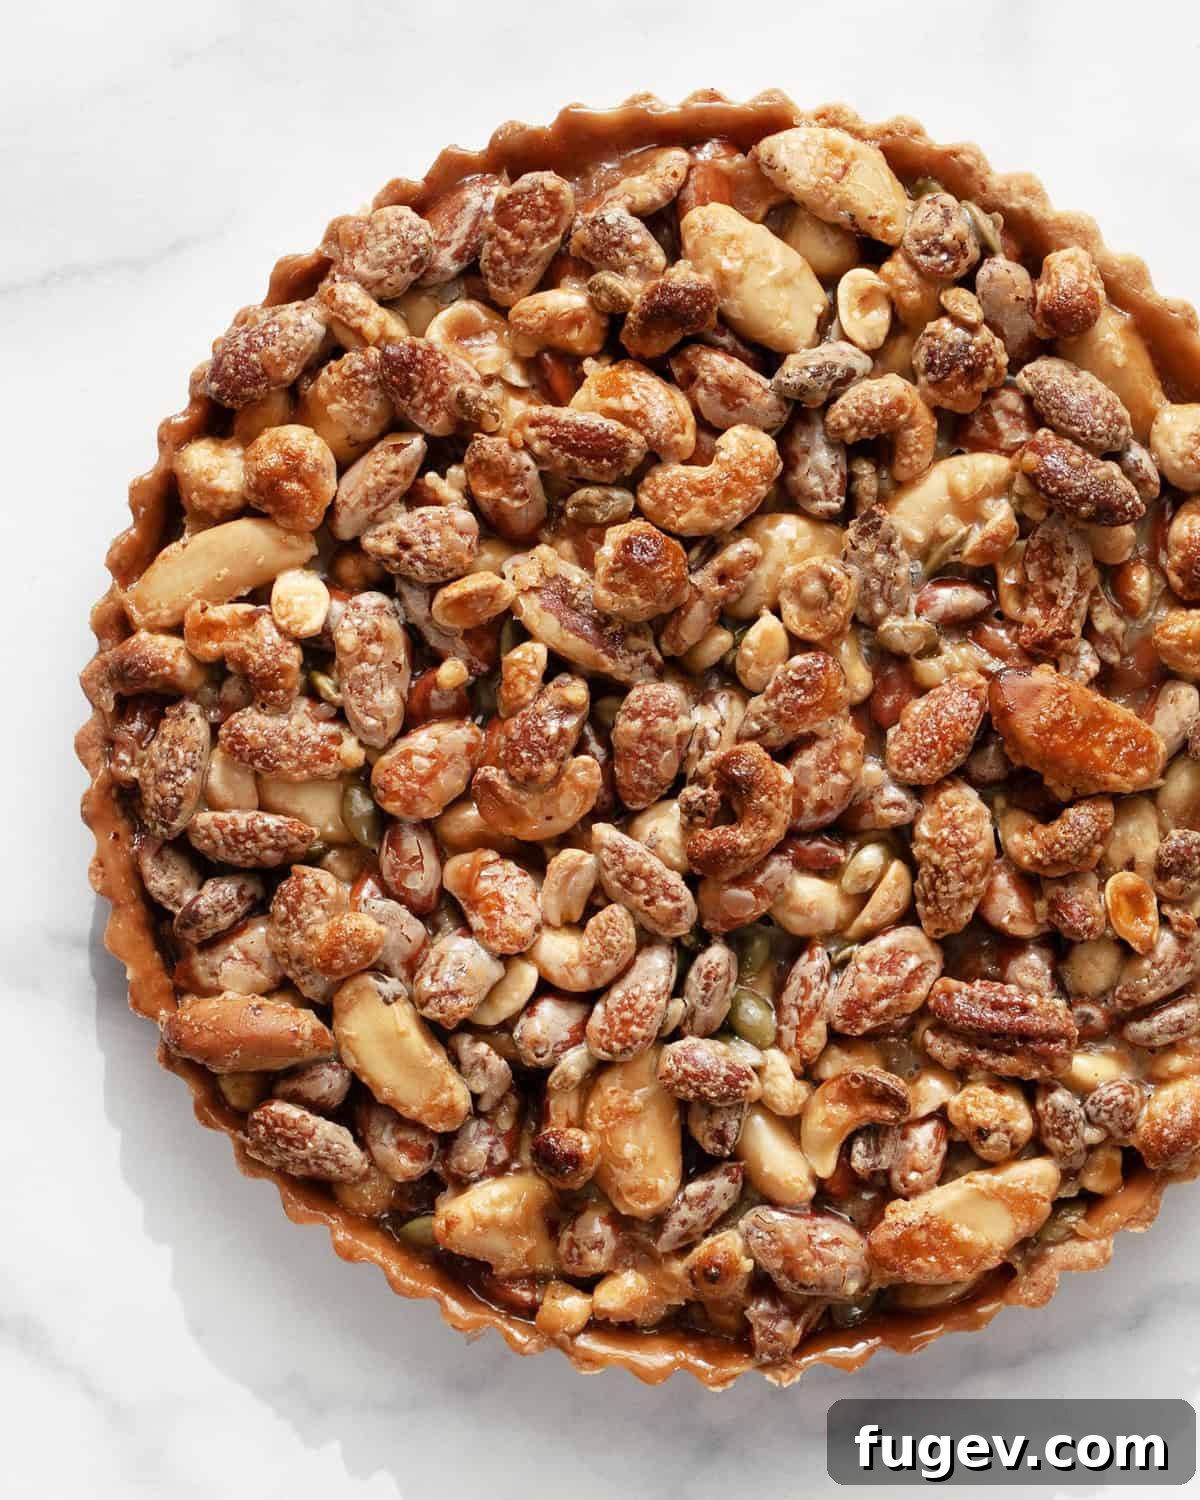
Table of Contents
- Why You’ll Love This Caramel Nut Tart Recipe
- Essential Ingredients for Your Tart
- Step-by-Step: How To Make This Caramel Nut Tart
- Serving Suggestions for Your Nut Tart
- Storage & Freezing Tips
- Expert Recipe Tips for Success
- More Irresistible Dessert Recipes
- Caramel Nut Tart Recipe Card
Why You’ll Love This Caramel Nut Tart Recipe
This caramel nut tart isn’t just another dessert; it’s a testament to timeless flavors and baking simplicity. Here’s why this recipe will become a cherished staple in your kitchen:
- A Holiday Classic with Familiar Flavors: Caramel and nuts are intrinsically linked with the cozy, festive atmosphere of Thanksgiving and Christmas. These quintessential fall ingredients usher in the holiday season, from late October through the New Year. Their warm, comforting flavors provide a perfect, satisfying conclusion to any special family meal, evoking a sense of nostalgia and celebration.
- Stunning Presentation, Effortless Assembly: While a traditional double-crust pie can be a holiday showstopper, tarts offer the same level of elegance with significantly less fuss. There’s no intricate lattice work or complex crimping involved with a tart, making it an excellent choice for bakers who might feel less confident in their decorative pastry skills. You achieve a beautifully presented dessert without the stress, allowing you more time to enjoy your guests.
- Perfect for Meal Planning – Freeze for Later: Even the most incredible desserts sometimes leave us with leftovers. This tart is wonderfully forgiving and freezes beautifully. Prepare it in advance, or simply freeze individual slices to enjoy at your leisure. Thawing at room temperature takes only a short while, allowing you to savor its deliciousness long after your initial gathering. This makes it incredibly convenient for holiday prep or simply ensuring a delightful treat is always on hand.
- Irresistible Texture and Flavor Profile: From the delicate crunch of the pastry shell, subtly spiced with cinnamon, to the rich, chewy, and slightly salty homemade caramel generously studded with a variety of nuts, every bite is a symphony of textures and tastes. The combination of sweet, salty, and nutty creates an incredibly satisfying experience that will have everyone asking for seconds.
Essential Ingredients for Your Ultimate Caramel Nut Tart
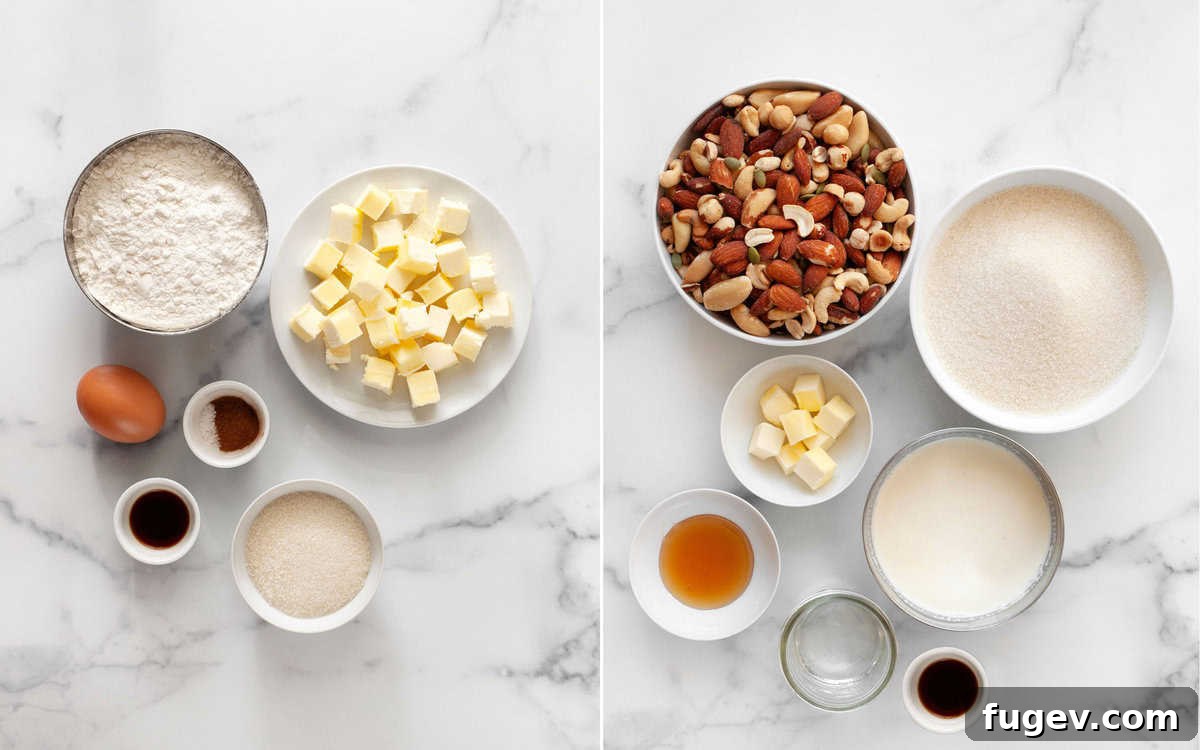
Crafting this delightful caramel nut tart begins with a selection of high-quality ingredients. Each plays a crucial role in achieving that perfect balance of flavor and texture:
- Mixed Nuts: For ultimate convenience and a diverse flavor profile, a bag of salted, roasted mixed nuts is your best friend. These typically feature an appealing assortment of almonds, pecans, cashews, pistachios, and Brazil nuts. Feel free to customize your blend – if you have a favorite nut or wish to avoid a particular type, simply create your own mix. Adding a handful of pumpkin seeds from your pantry can also introduce a lovely earthy crunch. The roasting and salting enhance their flavor, making them pop in the sweet caramel.
- Granulated Sugar: This recipe utilizes granulated sugar in two key ways. A quarter cup is incorporated into the tart shell, providing a subtle sweetness that balances the cinnamon. The remaining sugar, combined with water, forms the essential base for your rich, homemade caramel. Its crystalline structure is vital for creating the desired caramelization.
- Unsalted Butter: Butter is paramount for both the dough and the caramel. For the tart dough, it’s crucial that the butter is well-chilled. Cold butter, when cut into the flour, creates tiny pockets of steam during baking, resulting in a wonderfully flaky and tender crust. A few cubes of unsalted butter are also added towards the end of the caramel-making process, contributing to its luxurious richness and smooth texture.
- Honey: Beyond just adding sweetness, honey introduces a layer of complex flavor to the caramel. Its distinctive floral notes and viscous texture enhance the gooey consistency, making the caramel even more decadent and nuanced than sugar alone.
- Heavy Cream: Essential for transforming the molten sugar into a rich, pourable caramel sauce. Heavy cream adds unparalleled richness, silkiness, and thickness to the caramel, preventing it from becoming too hard or brittle. It also helps to mellow the intense sweetness of the sugar.
- Ground Cinnamon: This warm spice is a non-negotiable ingredient for the tart shell. It infuses the dough with that quintessential, fragrant fall and holiday flavor, creating an aromatic foundation that perfectly complements the nutty caramel filling.
- All-Purpose Flour: The structural backbone of your tart dough. All-purpose flour provides the necessary gluten development for a tender yet sturdy crust that can hold the rich filling without crumbling.
- Large Egg: One large egg acts as a binder in the tart dough, helping to bring the ingredients together and creating a cohesive, workable pastry. It also contributes to the dough’s tenderness and slight richness.
- Pure Vanilla Extract: A splash of pure vanilla extract is added to both the dough and the caramel. Its subtle, sweet aroma enhances all the other flavors, adding depth and complexity. Always opt for pure vanilla extract over imitation for the best results.
- Kosher Salt: Like most expertly crafted baked goods, a touch of kosher salt is indispensable. It acts as a flavor enhancer, an “on-switch” for all the other ingredients, brightening the sweetness of the caramel and balancing the overall profile of the tart, preventing it from being cloyingly sweet.
Step-by-Step: How To Make This Ultimate Caramel Nut Tart
Creating this stunning caramel nut tart is a rewarding baking project. Follow these detailed steps to achieve a perfect, professional-looking, and unbelievably delicious dessert:
Part 1: Preparing the Cinnamon-Infused Tart Shell
The foundation of this tart is its beautifully flaky, cinnamon-spiced crust. Precision here ensures a perfect base for your rich filling.
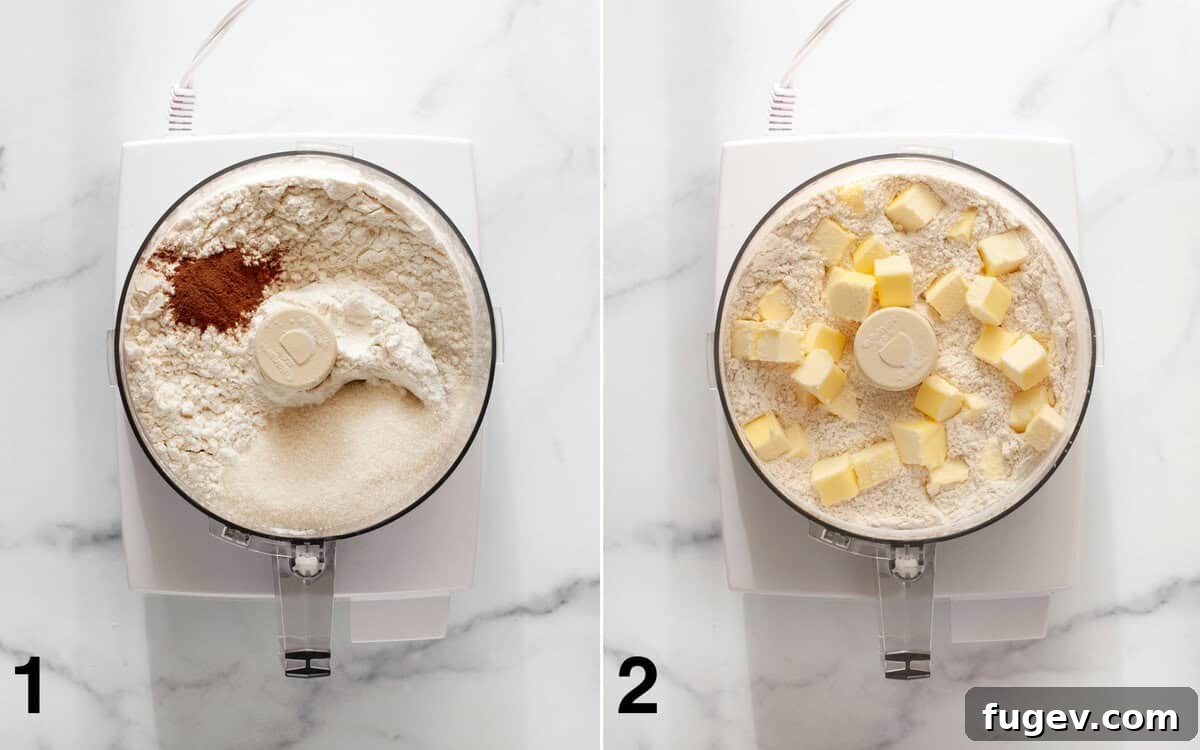
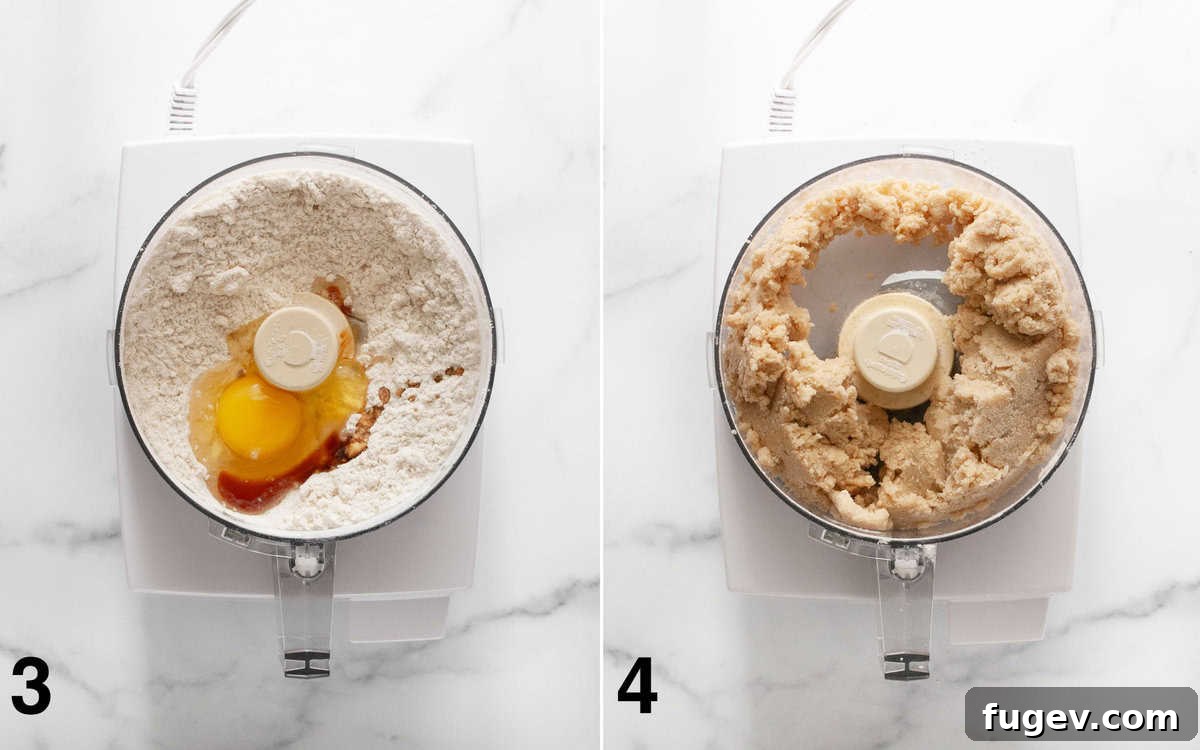
- Combine Dry Ingredients: In the bowl of a food processor, combine the all-purpose flour, ground cinnamon, kosher salt, and granulated sugar. Pulse a few times until all the ingredients are thoroughly mixed. This ensures even distribution of flavor and seasoning throughout the dough.
- Incorporate Cold Butter: Add the cold, cubed unsalted butter to the dry ingredients in the food processor. Pulse in short bursts until the mixture resembles coarse crumbs, with some pea-sized pieces of butter remaining. Avoid over-processing; the butter chunks are essential for flakiness.
- Add Wet Ingredients: Introduce the large egg and vanilla extract to the food processor. These liquid elements will bring the dough together.
- Mix Until Just Clumped: Process again in short pulses, just until the dough begins to clump together and gather around the blade. Stop immediately before it forms a complete ball. Overmixing at this stage can lead to a tough crust.
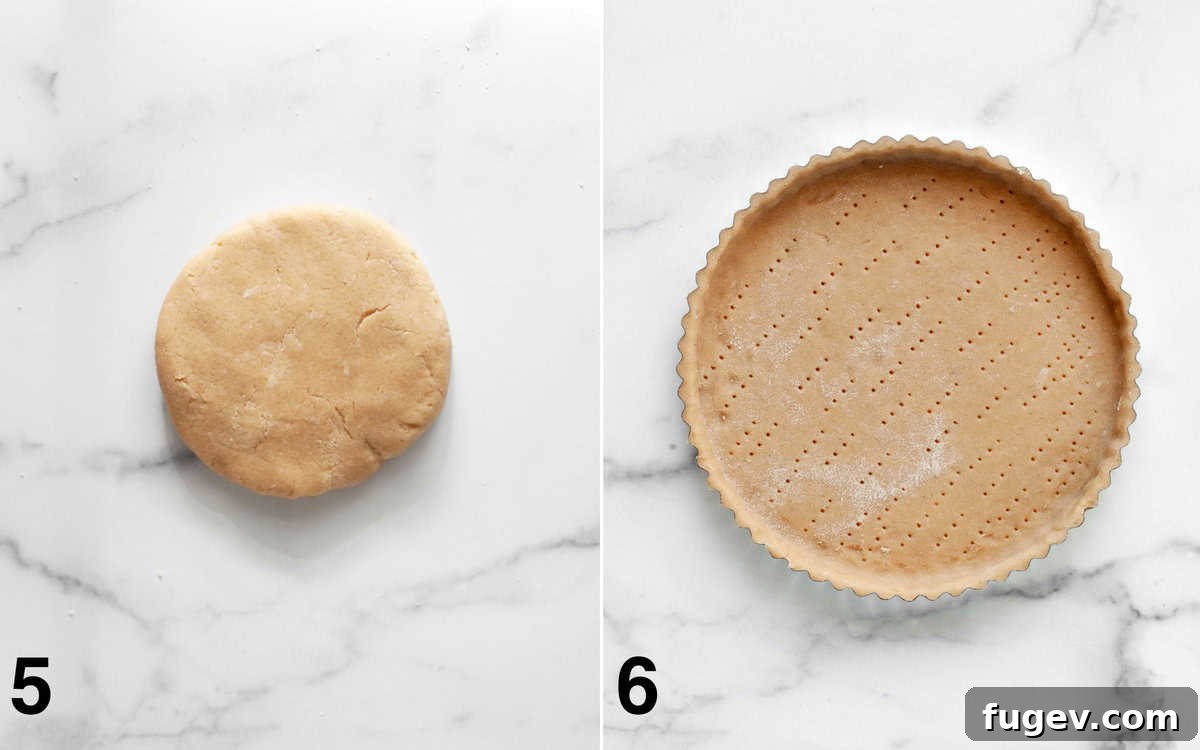
- Chill the Dough: Turn the dough out onto a clean surface and gently pat it into a thick, flat disk, approximately 1 inch thick. Wrap it tightly in plastic wrap and refrigerate for at least 1 hour, or up to 3 days. This chilling period is crucial; it allows the butter to firm up and the gluten to relax, making the dough easier to roll and ensuring a tender crust. This is an excellent make-ahead step for holiday baking.
- Roll Out the Dough: When ready to bake, lightly dust your work surface with flour. Remove the chilled dough from the refrigerator and let it sit for about 10-15 minutes to soften slightly, making it more pliable. Roll the dough into a rough circle, approximately 12 inches in diameter and about 1/8-inch thick.
- Fit into the Tart Pan: Carefully transfer the rolled-out dough into a 9-inch tart pan with a removable bottom. Gently press the dough across the bottom and up the sides of the pan, ensuring it’s evenly distributed. Trim any excess dough from the edges using a sharp knife or by rolling a rolling pin over the top of the pan.
- Blind Bake the Shell: Prick the bottom and sides of the dough all over with a fork. This prevents air bubbles from forming and ensures an even bake. Place the tart shell in the freezer for 30 minutes. This quick freeze helps to prevent the dough from shrinking during baking.
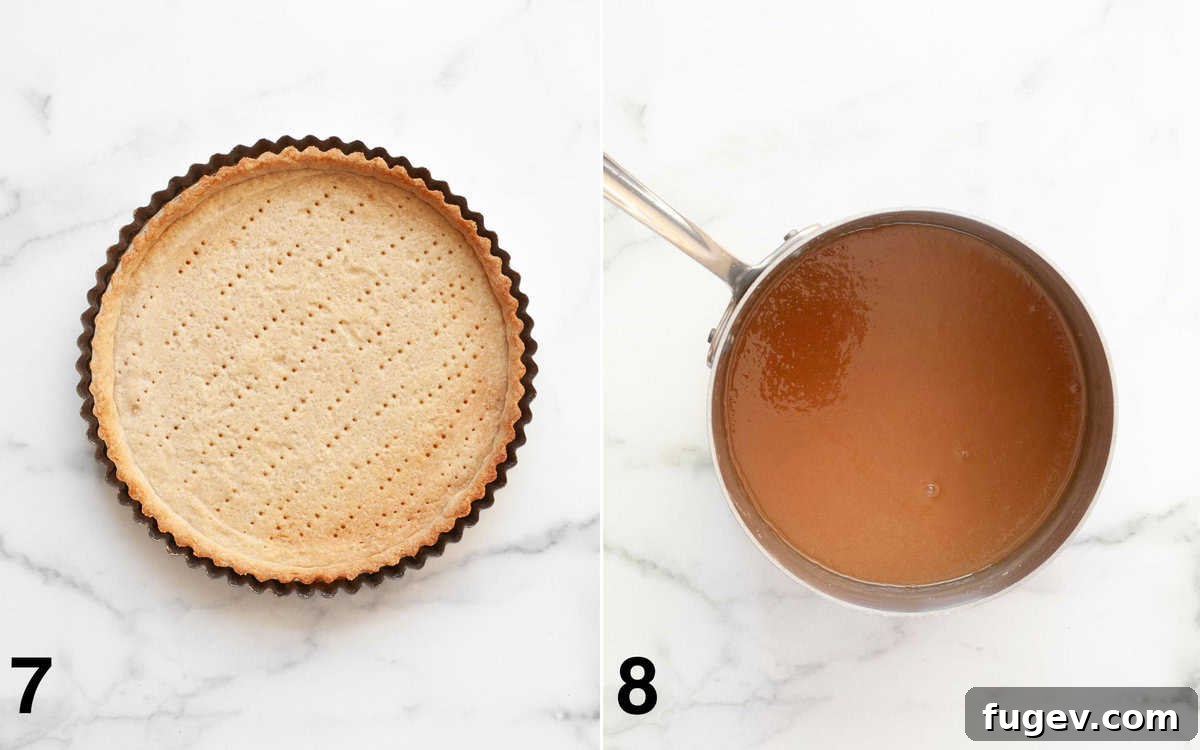
- Bake the Shell: Preheat your oven to 375 degrees F (190 degrees C). Line the chilled dough with aluminum foil, pressing it gently into the contours of the pan. Fill the foil-lined shell with dried beans, rice, or ceramic pie weights. Bake for 25 minutes, or until the edges of the shell begin to turn a light golden brown. Carefully remove the foil and weights, then return the shell to the oven for an additional 10 minutes to crisp up the bottom. The crust should be lightly golden all over.
Part 2: Crafting the Gooey Caramel Nut Filling
The star of the show – a perfectly golden, rich caramel infused with mixed nuts.
- Prepare the Caramel: In a medium-sized, high-sided pot (this prevents boil-overs), combine the granulated sugar and water. Place over medium-low heat, stirring frequently until the sugar completely dissolves. This initial stirring is crucial to prevent crystallization. Once dissolved, increase the heat to medium-high and bring the mixture to a boil *without stirring*. You can gently swirl the pan occasionally, especially as it starts to color. Keep a close eye on it, and if sugar crystals form on the sides of the pot, use a wet pastry brush to gently brush them down into the boiling syrup.
- Achieve Deep Amber Color: Continue to boil until the caramel reaches a beautiful, deep amber color. This usually takes about 8-12 minutes from when it starts boiling. The darker the amber, the richer the flavor, but be careful not to burn it! Immediately remove the pot from the heat once the desired color is achieved.
- Finish the Caramel: Carefully and slowly whisk in the heavy cream. The mixture will bubble up vigorously, so be cautious. Continue whisking until smooth. Then, add the cubed unsalted butter, honey, and vanilla extract, whisking until fully incorporated and the caramel is smooth and glossy.
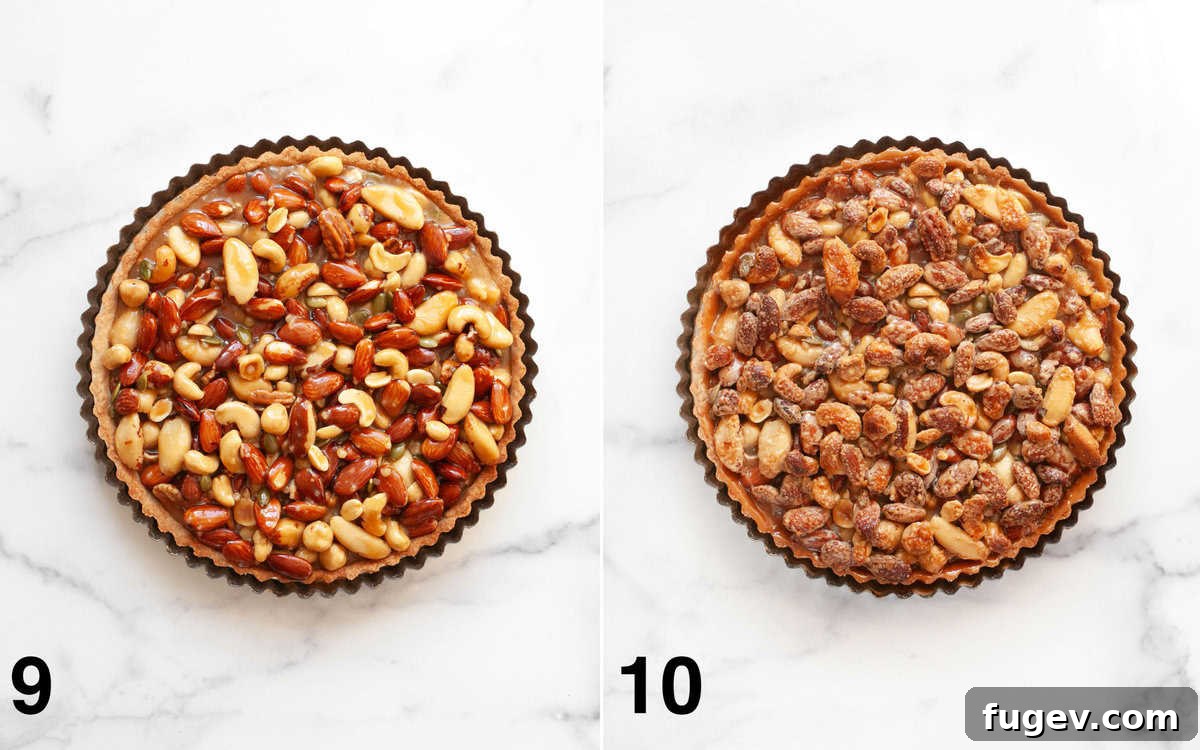
- Fold in the Nuts: Once the caramel is silky smooth, gently stir in the mixed nuts until they are evenly coated.
Part 3: Assembling and Baking the Tart
The final steps bring everything together for a truly magnificent dessert.
- Fill the Crust: Pour the warm caramel-nut filling evenly into the pre-baked tart shell. Spread it gently with a spatula to ensure all nuts are submerged and the surface is level.
- Final Bake: Place the tart back into the 375-degree F (190 degrees C) oven for an additional 15-20 minutes. The filling should be bubbling around the edges, and the nuts on top should appear lightly toasted and fragrant.
- Cool and Serve: Carefully remove the tart from the oven and transfer it to a wire rack to cool completely before serving. This allows the caramel to set properly. Serve slightly warm or at room temperature. The flavors truly shine when it’s not piping hot.
Serving Suggestions for Your Decadent Caramel Nut Tart
This caramel nut tart is destined to be the star of your holiday dessert table. Bookmark this recipe for your Friendsgiving, Thanksgiving, and Christmas celebrations, as it’s sure to impress. Here are a few ways to serve it, ensuring every bite is a memorable one:
- Simply Elegant: The tart is absolutely divine served on its own, either slightly warm or at room temperature. The complex flavors and textures need no embellishment to shine. Slice it neatly and arrange on a beautiful platter for a sophisticated presentation.
- À La Mode Perfection: For an extra layer of indulgence, pair each slice with a generous scoop of high-quality vanilla bean ice cream. The cool, creamy ice cream provides a delightful contrast to the warm, gooey caramel and crunchy nuts. Other great ice cream pairings include butter pecan, salted caramel, or even a subtle coffee flavor.
- Whipped Cream Dream: A dollop of freshly whipped cream can elevate the tart experience. Lightly sweetened whipped cream adds a cloud-like texture and a hint of dairy richness that beautifully complements the deep caramel notes.
- A Sprinkle of Sea Salt: If you want to lean into the “salty” aspect of this sweet-and-salty treat, a delicate sprinkle of flaky sea salt (like Maldon) over each slice just before serving can enhance the caramel’s depth and provide an extra pop of flavor.
- Coffee or Liqueur Pairing: Serve with a warm cup of coffee, espresso, or a spiced tea for a cozy after-dinner treat. For adult gatherings, a small glass of a complementary liqueur, such as an aged rum, bourbon, or an amaretto, can be a wonderful accompaniment.
- Garnish for Flair: A light dusting of cocoa powder, a few extra chopped nuts, or even a tiny sprig of mint can add a touch of visual appeal to your slices.
Storage & Freezing Tips for Caramel Nut Tart
Proper storage is key to enjoying your delicious caramel nut tart for as long as possible. Whether you’re planning ahead or savoring leftovers, these tips will ensure optimal freshness and flavor:
- Room Temperature Storage: This tart can be kept at room temperature for up to 2 days. To maintain its freshness and prevent it from drying out, ensure it’s properly covered. You can use plastic wrap, aluminum foil, or place it in an airtight container. Keep it away from direct sunlight or heat sources.
- Reheating for Warmth: If you prefer to serve your tart warm after it has cooled, preheat your oven to a gentle 300 degrees F (150 degrees C). Place individual slices or the entire tart (if applicable) on a baking sheet and reheat for just a few minutes, typically 5-10 minutes for slices, or slightly longer for a whole tart, until warmed through. Be careful not to overheat, as the caramel can become too soft.
- Freezing for Extended Enjoyment: The caramel nut tart freezes exceptionally well, making it perfect for preparing ahead for special occasions or preserving leftovers.
- Slicing for Convenience: When freezing, I highly recommend cutting the tart into individual slices first. This makes thawing much faster and allows you to enjoy portion-sized treats whenever the craving strikes, without having to thaw the entire tart.
- Packaging for Protection: Wrap each slice tightly in plastic wrap, then again in aluminum foil. This double layer of protection prevents freezer burn and helps preserve its texture and flavor. If freezing a whole tart, wrap it thoroughly in multiple layers of plastic wrap and then foil.
- Thawing Process: Once you decide to enjoy a frozen slice, simply remove it from the freezer and let it thaw at room temperature. A single slice thaws remarkably quickly, usually within about 15-30 minutes. You can also gently reheat thawed slices in a 300-degree F oven for a few minutes to restore a warm, gooey texture.
- Freezer Lifespan: When properly stored, this tart can be kept in the freezer for up to 1 month without significant loss of quality.
Expert Recipe Tips for Caramel Nut Tart Success
Achieving a perfect caramel nut tart isn’t difficult, but a few expert tips can elevate your baking from good to extraordinary:
- The Importance of Cold Butter for Dough: This is a golden rule in pastry making. Unlike creaming butter and sugar for cookies, tart dough (much like pie dough or scone dough) requires cold butter. When you cut cold butter into the dry ingredients, it creates tiny pockets that release steam during baking, resulting in a flaky, tender, and light crust. Soft or melted butter will lead to a dense, tough crust. Ensure your butter is well-chilled and work quickly to keep it cold.
- Customizing Your Nut-to-Caramel Ratio: The amount of mixed nuts you use can significantly impact the final texture of your tart. You have flexibility here, using anywhere between 3/4 pound and 1 pound of mixed nuts.
- If you prefer a tart with a more pronounced gooey caramel texture, opt for less nuts, around 3/4 pound. This allows the rich caramel to be the dominant feature.
- If you love a truly nutty tart, packed with crunch and substantial bite, then stir in a full pound of nuts. This provides a denser, nut-forward filling.
- Caramel Caution: Making homemade caramel requires your full attention. Do not walk away from the stove. Sugar can go from perfectly golden to burnt in a matter of seconds. Use a light-colored, high-sided pot so you can clearly see the color change. If sugar crystals form on the sides of the pot, use a clean pastry brush dipped in water to gently brush them down – this prevents crystallization in your finished caramel.
- Don’t Overmix the Dough: When processing the dough ingredients, stop as soon as it begins to clump. Overmixing develops the gluten too much, leading to a tough and less tender crust. A few visible chunks of butter are perfectly fine.
- Blind Baking is Essential: Blind baking the tart shell (baking it before adding the filling) is crucial for a crisp crust. It prevents the bottom from becoming soggy once the caramel filling is added. Don’t skip the pricking and the freezing step, as these also help prevent shrinkage and puffing.
- Cool Completely Before Slicing: While tempting to dive in warm, allow the tart to cool completely on a wire rack before slicing. This gives the caramel ample time to set, ensuring clean, beautiful slices. If you cut it too soon, the caramel will likely ooze out.
More Irresistible Dessert Recipes to Explore
If you’ve enjoyed baking this caramel nut tart, you might love these other delightful dessert creations:
Salted Caramel Apple Pie: A classic with a sophisticated twist.
Cinnamon Owl Shortbread Cookies: Charming and buttery, perfect for fall.
Almond Flour Cake: A light and elegant gluten-friendly option.
Caramel Nut Tart
Cook: 50 mins
Chilling & Freezing Time: 1 hr
Total: 2 hrs 50 mins
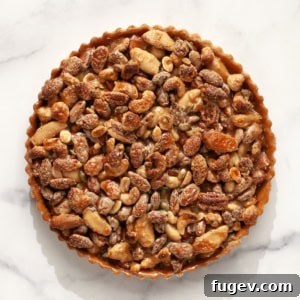
This exquisite caramel nut tart offers a perfect symphony of textures and flavors: crunchy, salty, and wonderfully gooey. The addition of ground cinnamon to the dough elevates its flavor, creating an unforgettable holiday dessert.
Ingredients
For the Tart Dough:
- 1 1/2 cups all-purpose flour, plus more for work surface
- 1/2 teaspoon ground cinnamon
- 1/4 teaspoon kosher salt
- 1/4 cup granulated sugar
- 1/2 cup unsalted butter, cold and cut into cubes
- 1 large egg
- 1 teaspoon pure vanilla extract
For the Caramel Nut Filling:
- 1 1/4 cups granulated sugar
- 1/4 cup water
- 2/3 cup heavy cream
- 2 tablespoons unsalted butter, cut into cubes
- 1 tablespoon honey
- 1 teaspoon pure vanilla extract
- 3/4 – 1 pound roasted salted mixed nuts (such as almonds, peanuts, cashews, pecans, pistachios, walnuts, pumpkin seeds)
Save This Recipe
Don’t miss out on new recipes! Get this one and more sent directly to your inbox every week. Visit our subscription page to sign up!
Instructions
- Prepare the Tart Shell Dough: In a food processor, pulse together the flour, cinnamon, 1/4 teaspoon salt, and 1/4 cup sugar until combined. Add the 1/2 cup chilled cubed butter and pulse until the mixture resembles coarse crumbs. Add the egg and 1 teaspoon vanilla extract, then mix until the dough just begins to clump together. Do not overmix.
- Chill the Dough: Gently pat the dough into a 1-inch-thick disk. Wrap it tightly in plastic wrap and chill in the refrigerator for at least 1 hour, or up to 3 days. This resting period is essential for a tender crust.
- Roll Out the Dough: Remove the chilled dough from the refrigerator and let it warm slightly at room temperature (about 10-15 minutes). On a lightly floured work surface, roll out the dough into a rough circle, approximately 12 inches in diameter and 1/8-inch-thick.
- Fit into Tart Pan: Carefully transfer the rolled dough to a 9-inch tart pan with a removable bottom. Gently press it into the pan and trim any excess dough from the edges. (Any extra dough can be refrigerated for up to 3 days or frozen for up to 1 month for future use).
- Prepare for Blind Baking: Prick the bottom and sides of the dough all over with a fork. Place the tart shell in the freezer for 30 minutes to firm up.
- Preheat Oven: Preheat your oven to 375 degrees F (190 degrees C).
- Blind Bake the Shell: Line the chilled dough with aluminum foil and fill it with dried beans, rice, or pie weights. Bake for 25 minutes, until the shell starts to turn a light brown. Remove the foil and weights, then bake for an additional 10 minutes to ensure the bottom is crisp.
- Make the Caramel: While the tart shell bakes, combine 1 1/4 cups granulated sugar and 1/4 cup water in a medium saucepan with high sides. Place over medium-low heat, stirring frequently until the sugar completely dissolves. Increase the heat to medium-high and bring the caramel to a boil without stirring. You may gently swirl the pan, especially as it begins to brown. If sugar crystals form on the sides, brush them down with a wet pastry brush.
- Finish the Caramel: Continue boiling until the caramel reaches a deep amber color (approx. 8-12 minutes). Immediately remove from heat and carefully whisk in the heavy cream, then the 2 tablespoons butter, honey, and 1 teaspoon vanilla extract until smooth.
- Add the Nuts: Stir the roasted, salted mixed nuts into the warm caramel until they are thoroughly coated.
- Assemble and Bake the Tart: Pour the caramel-nut filling evenly into the pre-baked tart shell. Return the tart to the 375-degree F (190 degrees C) oven and bake for another 15-20 minutes, or until the filling is bubbling around the edges and the nuts are lightly toasted.
- Cool and Serve: Remove the tart from the oven and cool completely on a wire rack before serving. Serve warm or at room temperature.
Notes
*Nut Quantity: You can use between 3/4 pound and 1 pound of mixed nuts. For a gooier caramel tart, use 3/4 pound. For a denser, more nutty tart, stir in 1 pound.
Make-Ahead Dough: The tart dough can be prepared up to 3 days in advance. Wrap it tightly and store it in the refrigerator.
Storage: Store the baked tart at room temperature for up to 2 days, covered with plastic wrap, foil, or in an airtight container. To serve warm, reheat in a 300-degree F (150 degrees C) oven for a few minutes.
Freezing: For best results when freezing, cut the tart into individual slices. Wrap each slice well and thaw at room temperature. It can be frozen for up to 1 month.
Nutrition
Carbohydrates: 46g |
Protein: 7g |
Fat: 30g |
Saturated Fat: 11g |
Polyunsaturated Fat: 4g |
Monounsaturated Fat: 13g |
Trans Fat: 0.4g |
Cholesterol: 54mg |
Sodium: 63mg |
Potassium: 209mg |
Fiber: 3g |
Sugar: 27g |
Vitamin A: 514IU |
Vitamin C: 0.2mg |
Calcium: 37mg |
Iron: 2mg
Nutrition information is automatically calculated and should be used as an approximation.
Additional Info
Cuisine: French
Did you make this recipe?
Share your creation! Mention @lastingredient on Instagram and tag it #lastingredient!