
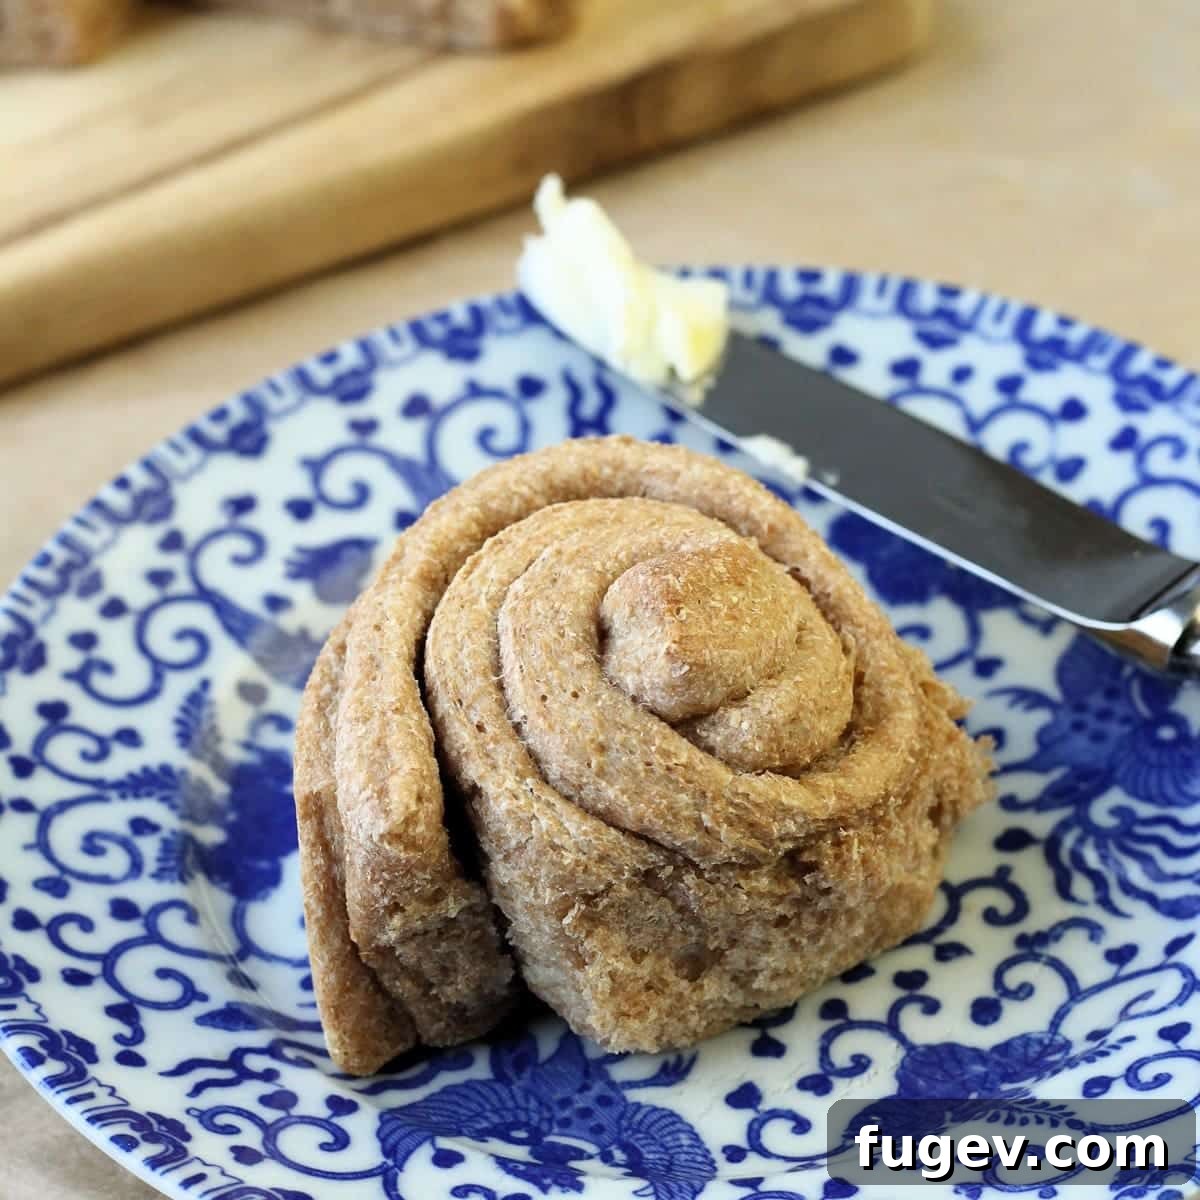
Irresistibly Soft & Fluffy Whole Wheat Rolls with a Hint of Honey
Crafting the perfect dinner roll can elevate any meal, and these Whole Wheat Rolls are truly a testament to that. They are incredibly soft, delightfully fluffy, and boast a tender crumb that melts in your mouth. Each wholesome roll contains just around 50 calories, making them a guilt-free indulgence. A delicate touch of honey in the dough not only adds a subtle sweetness but also contributes to their amazing texture, making them an ideal accompaniment for any occasion, from a casual weeknight dinner to a festive holiday spread.
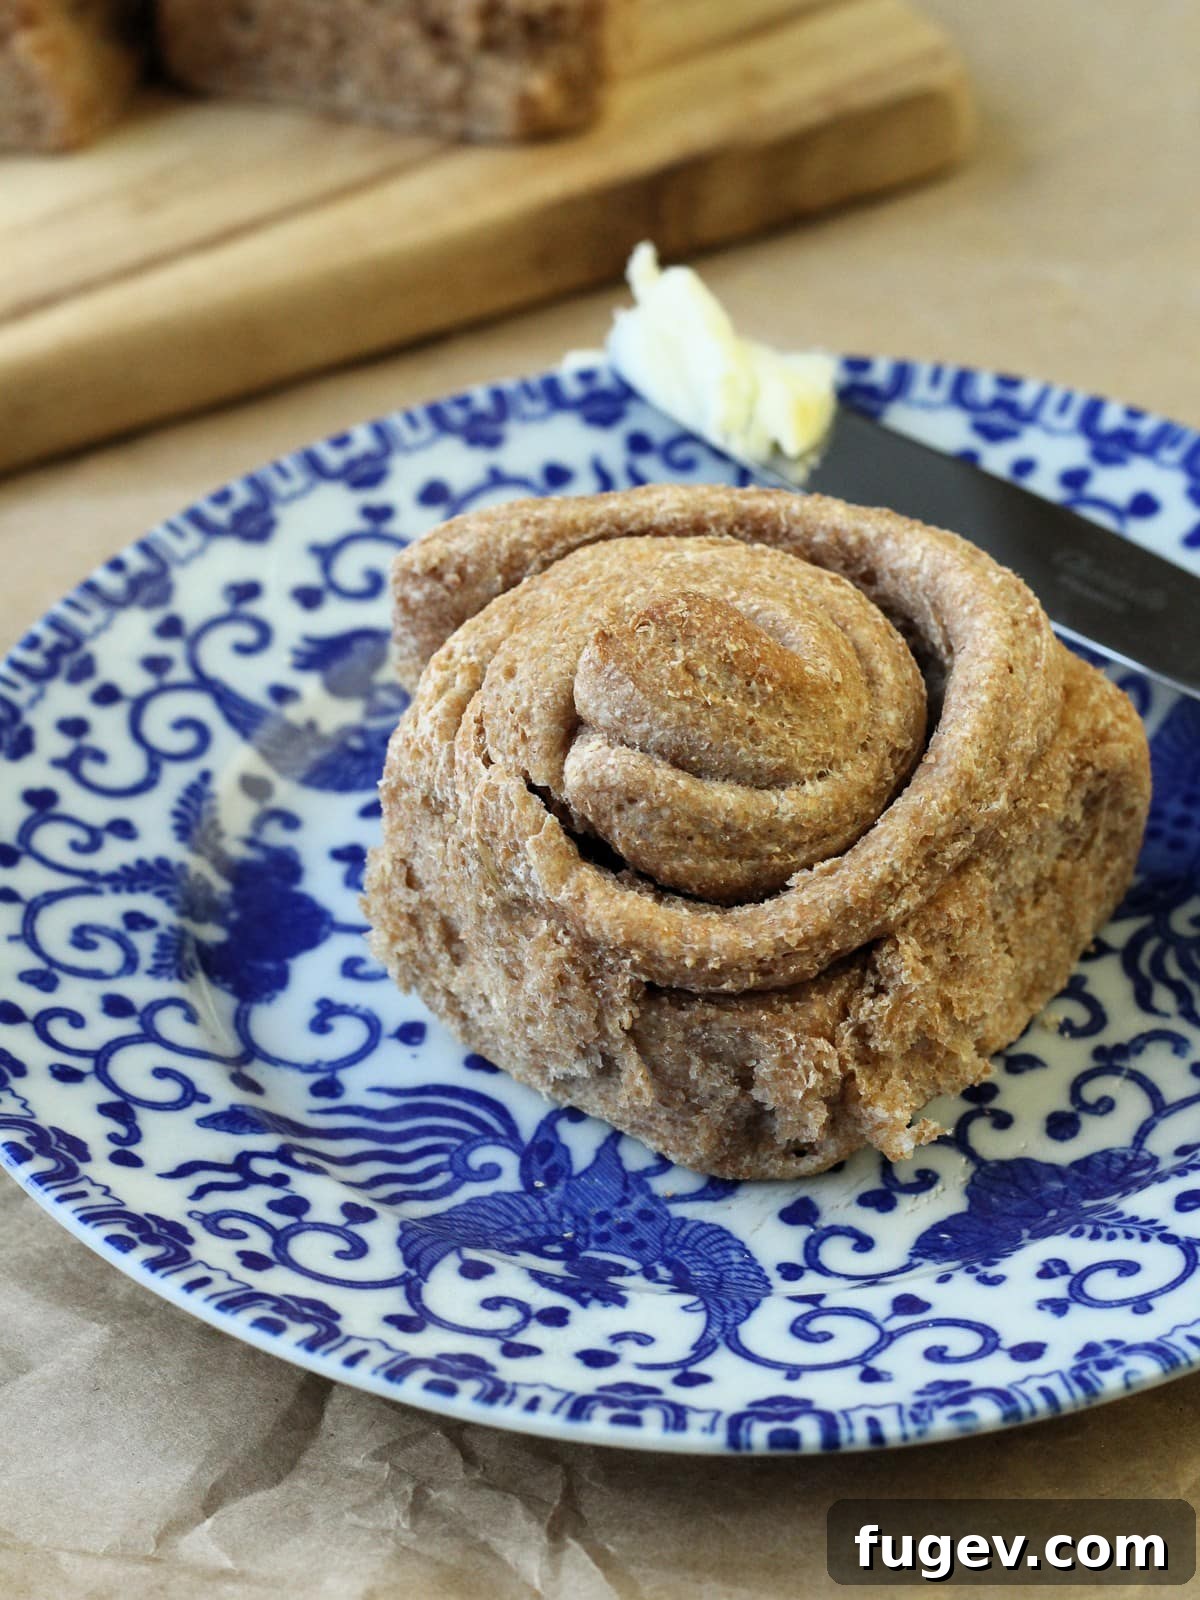
A Quick Look At The Recipe
This is a brief summary of the recipe. Jump to the recipe to get the full details and exact measurements.
Jump to Recipe
Prep Time
25 minutes
Cook Time
18 minutes
Proof Time
2 hours
Total Time
2 hours 43 minutes
Servings
48 rolls
Difficulty
Easy with a little patience
Calories *
54 kcal per serving
Technique
Mix dough, proof, shape into spirals, proof again, and bake until golden.
Flavor Profile
Soft, mildly sweet, and wholesome with a tender crumb.
* Based on nutrition panel
Featured Comment
⭐⭐⭐⭐⭐”These are great dinner rolls! The whole wheat flour and slight honey flavor went great with the chili I made. The spiral had many people complimenting the rolls and how professional they looked.” -Mara
Why You Will Adore These Honey Whole Wheat Rolls
- Flavorful & Effortless Dinner Rolls: These aren’t just any dinner rolls; they’re a delightful blend of rustic goodness and gourmet flavor. The magic lies in the addition of honey and buttermilk, which work in harmony to enrich the dough with a touch of sweetness and essential fat. This not only perfectly balances the robust, nutty notes of whole wheat flour but also creates a dough that is incredibly supple and a true joy to work with, even for novice bakers. The result is a roll that’s bursting with flavor and surprisingly simple to master.
- Nutritious and Delicious Without Compromise: Embrace the goodness of whole grains without sacrificing taste! Whole wheat flour elevates these rolls, infusing them with extra fiber, vital nutrients, and a pleasingly subtle nutty flavor. Baking your bread from scratch puts you in complete control of the ingredients, allowing you to avoid unwanted additives and tailor it to your preferences. Once you’ve perfected these, why not try this easy classic dinner roll recipe next for another homemade triumph?
- The Ultimate Meal Prepping Solution: Imagine having warm, fresh-baked rolls ready whenever the craving strikes! This recipe is a dream come true for meal preppers. You can easily bake a large batch, partially cook them until just set, then freeze them for later. When you’re ready for freshly baked goodness, simply pop the frozen rolls directly into the oven, and finish baking them until golden brown. This convenient method ensures you always have wholesome, homemade bread at your fingertips without the daily effort.
Table of Contents
- Why You Will Adore These Honey Whole Wheat Rolls
- The Story Behind These Rolls
- Essential Ingredients & Smart Substitutions
- Creative Variations to Explore
- Professional Baking Tips for Success
- Step-by-Step Guide: How to Make Whole Wheat Rolls
- Chef Lindsey’s Expert Recipe Tip
- Recipe FAQs: Your Questions Answered
- Recommended Bread Recipes
- Whole Wheat Rolls Recipe
- Before You Go
The Story Behind These Rolls: My First Bread Recipe
These honey whole wheat rolls hold a special place in my heart, as they represent the very first bread recipe I ever created from scratch! There’s a profound joy in baking your own bread, and this recipe delivers on all fronts: wholesome, healthy, and perfectly balanced with just the right touch of sweetness from natural honey and a hint of sugar. They are wonderfully fluffy and surprisingly filling, making them an excellent choice for a nutritious side dish. Think of them as the more robust, whole-wheat cousin to my popular graham clover rolls, offering a slightly denser texture without compromising on tenderness.
There’s truly nothing that compares to the comforting aroma and taste of a freshly baked dinner roll. As soon as these emerge from the oven and cool just enough to handle, I wholeheartedly encourage you to perform a “quality control” test – slice one open, slather it with butter, and savor every bite. For an unforgettable weeknight dinner, these rolls pair magnificently with a savory main course like this brown sugar glazed meatloaf, accompanied by a generous helping of creamy mashed potatoes and a vibrant side of rosemary lemon roasted cauliflower. It’s a meal that promises comfort, flavor, and homemade goodness in every bite.
Essential Ingredients & Smart Substitutions
Crafting perfect whole wheat rolls starts with understanding each ingredient’s role. Here’s a detailed look at what you’ll need and how you can adapt the recipe:
- Buttermilk: This ingredient is a true MVP in bread baking. Buttermilk not only provides essential hydration but its acidity works wonders by tenderizing the gluten in the flour, resulting in incredibly soft and moist rolls. It also imparts a subtle tang that beautifully complements the sweetness of the honey.
- Substitution: If you don’t have buttermilk on hand, you can easily make your own by adding 2 tablespoons of white vinegar or lemon juice to a liquid measuring cup, then filling the rest with whole milk until it reaches 2 cups. Let it sit for 5-10 minutes until it slightly curdles. Alternatively, any full-fat milk or your preferred plant-based milk substitution can be used, though the texture might vary slightly.
- Unsalted Butter: Butter adds richness, flavor, and helps achieve that desirable golden-brown crust. Using unsalted butter gives you precise control over the overall salt content in your recipe.
- Active Dry Yeast: This yeast requires activation in warm water, a crucial step to ensure your dough rises beautifully. It’s reliable and provides consistent results.
- Substitution: You can substitute with double the weight of fresh yeast (which can be added directly to the dough) or half the weight of instant yeast. If using instant yeast, there’s no need to proof it; simply mix it directly with your dry ingredients.
- Water: Used to activate the yeast. The temperature is critical – too cold, and the yeast won’t activate; too hot, and it will kill the yeast. Aim for lukewarm water, between 100°F and 110°F (38°C-43°C).
- Granulated Sugar: Beyond adding sweetness, sugar acts as food for the yeast, helping it activate and produce carbon dioxide, which makes the rolls rise. It also aids in browning the crust.
- Honey: Our signature ingredient provides a unique, wholesome sweetness and contributes significantly to the rolls’ tender crumb and beautiful golden hue.
- Substitution: Maple syrup or agave nectar can be used as alternatives, though they may slightly alter the flavor profile.
- Kosher Salt: Salt is not just for flavor; it’s vital for controlling yeast activity and strengthening the gluten structure in the dough, leading to a better rise and texture.
- Whole Wheat Flour: This is the star of our rolls, providing a nutty flavor, a wholesome character, and a boost of fiber and nutrients. I highly recommend either King Arthur or Bob’s Red Mill Whole Wheat Flour. Both brands are renowned for carefully controlling the temperature during the flour grinding process, which is essential for preserving the natural flavors, antioxidants, and vitamins that can be diminished at warmer temperatures.
- Substitution: For a lighter, airier roll with a more open crumb, you can substitute up to half the weight of the whole wheat flour with all-purpose flour or bread flour. This is a great technique, similar to that used in this delicious whole wheat sandwich bread recipe, allowing you to gradually introduce whole wheat into your baking.
Please refer to the recipe card below for the full information on specific ingredient quantities and measurements.
Creative Variations to Explore
While these whole wheat rolls are perfect as is, they also serve as an excellent canvas for culinary creativity. Don’t hesitate to experiment and make them uniquely yours!
- Mix in Some Savory or Sweet Flavors: Just like my cherry pecan sourdough bread (made with my very own sourdough starter recipe!), these rolls welcome additions. Consider folding in your favorite chopped nuts like walnuts or pecans, or dried fruits such as cranberries, raisins, or chopped apricots for a sweet and textural twist. For a savory approach, dried herbs like rosemary, thyme, or even a sprinkle of garlic powder can be wonderful.
- Enhance the Swirl: The spiral shape of these rolls is already impressive, but you can make it even more special. Before rolling up the dough, spread a thin layer of melted butter, then sprinkle it with a mixture of cinnamon and sugar for a dessert-like treat, reminiscent of these irresistible cinnamon rolls with cream cheese icing. For a savory swirl, brush with garlic butter and fresh chopped herbs like chives, parsley, or dill. You could even add some finely grated Parmesan cheese!
- Experiment with Sweeteners: If you’re looking for different flavor depths, molasses can impart a deep, rich, and warm flavor to the rolls, perfect for autumnal meals. Alternatively, you can use agave syrup or more honey to adjust the sweetness to your liking. Each sweetener will bring its own unique character to the final product.
- Boost Nutrition with Seeds and Grains: Elevate the nutritional profile and add fascinating textures by incorporating a variety of seeds and grains. Flax seeds, sunflower seeds, poppy seeds, or even caraway seeds (for a distinctive touch, much like in this steakhouse-style pumpernickel bread) can be mixed into the dough. Grains like cooked quinoa, rolled oats (as I often do in my multigrain bread recipe), or even a high-fiber grain cereal can add an extra layer of health and complexity.
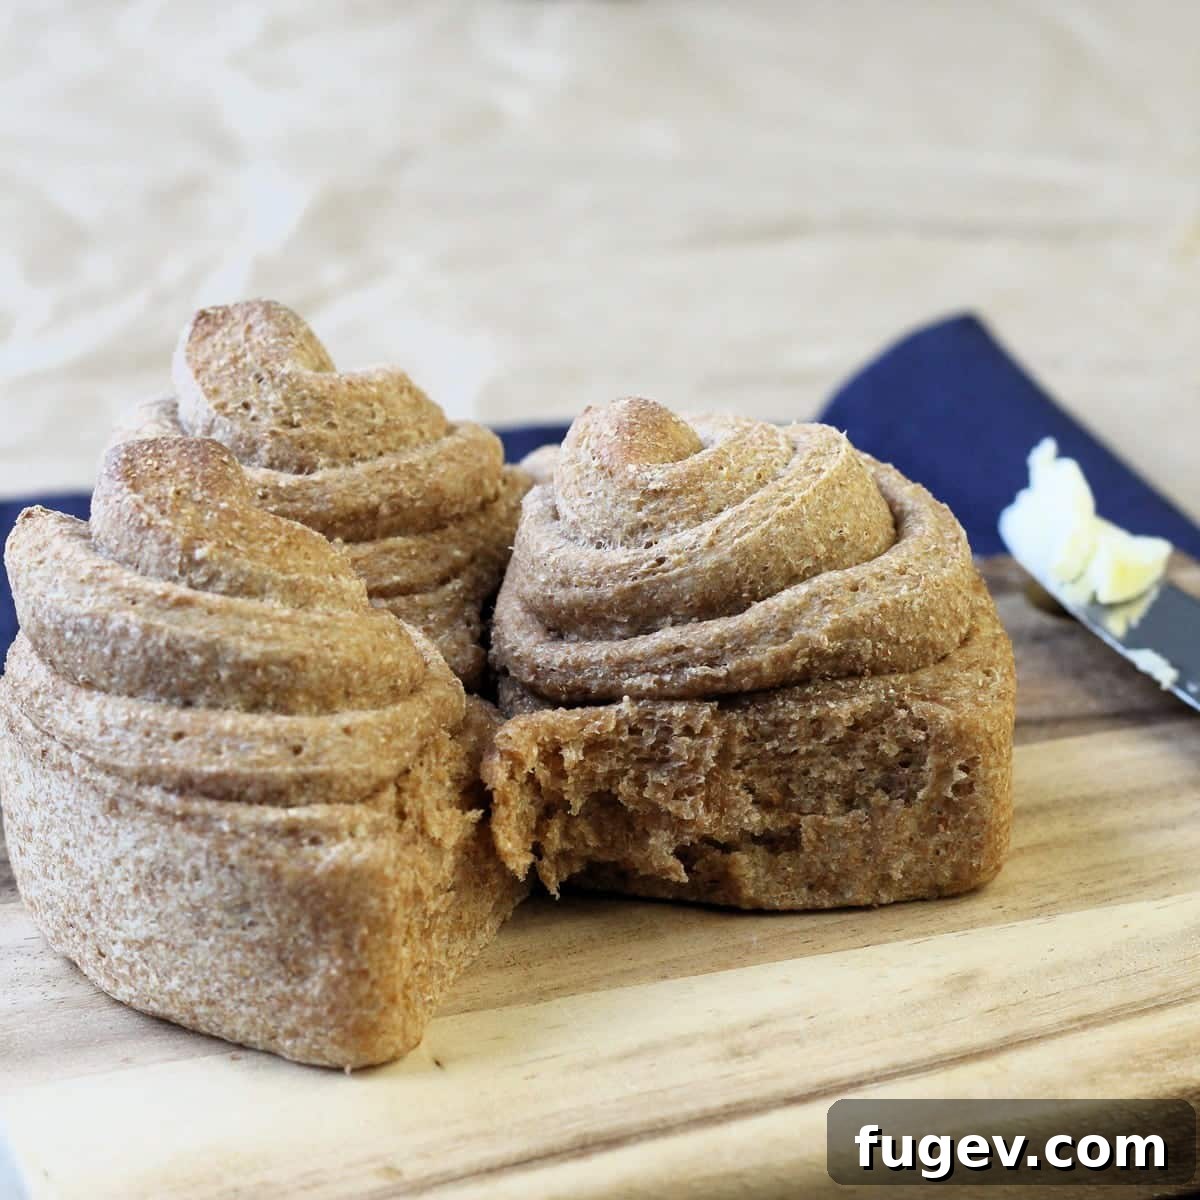
Professional Baking Tips for Success
Achieving bakery-quality rolls at home is entirely within your reach with a few expert insights. Here are some professional tips to guide you through the process:
- Precision is Key: Use a Scale and a Ruler: Baking, especially bread making, is a science where precision truly pays off. Using a kitchen scale to weigh your ingredients, particularly flour, ensures an exact and consistent balance. Volume measurements can vary greatly due to packing differences, leading to inconsistent results. When it comes to shaping your spiral rolls, a ruler will be your best friend. Cutting each strip to an even width (about 2 inches) guarantees that all your rolls are uniform in size, promoting even baking and a beautiful presentation.
- Patience with Flour Hydration: Add Flour Slowly: Whole wheat flour has a higher protein content and often requires more time to properly hydrate compared to all-purpose flour. Rushing this process can lead to a dry, dense dough. By adding the flour gradually, one cup at a time, you allow the gluten to properly develop and the flour to fully absorb the liquid. This ensures your bread achieves the perfect, tender, and airy texture that distinguishes exceptional rolls. Don’t be tempted to dump it all in at once!
- Protect Your Yeast: Don’t Overheat the Water or Buttermilk Mixture: Yeast is a living organism, and its vitality is crucial for your bread’s rise. The ideal temperature range for activating yeast is between 100°F and 110°F (38°C-43°C). If your buttermilk or water mixture heats past 110°F, you risk killing the yeast, which will prevent your dough from rising. If it accidentally gets too hot, don’t panic! Simply place the saucepan in the fridge or carefully cool it over an ice bath until it reaches the correct temperature. Always use a thermometer for accuracy.
- Embrace Proper Kneading: Kneading is what develops the gluten, giving your bread its structure and chewiness. Whether by hand or with a stand mixer, knead until the dough is smooth, elastic, and passes the windowpane test (you can stretch a small piece until it’s thin enough to see light through without tearing). Under-kneading results in a dense, crumbly texture, while over-kneading can make the dough tough.
- Create a Warm Proofing Environment: Yeast thrives in warmth. Find a consistently warm spot in your kitchen (ideally 80°F – 85°F) for your dough to rise. This could be a slightly warm oven (turned off, of course, or with just the light on), a sunny spot, or near a warm appliance. A warm environment encourages consistent and efficient rising.
Step-by-Step Guide: How to Make Whole Wheat Rolls
Follow these detailed instructions to create perfect, tender whole wheat dinner rolls every single time. For precise measurements and further details, please refer to the comprehensive recipe card located at the bottom of this page.
Part 1: Making the Dough – The Foundation of Great Rolls
- Gently Heat the Liquid Mixture: In a small saucepan, combine the buttermilk, unsalted butter, honey, and kosher salt. Heat this mixture over medium heat, stirring frequently, until the butter has completely melted and the mixture reaches a temperature of precisely 110°F (43°C). Use a thermometer to ensure accuracy, as this temperature is crucial for the yeast.
- Activate Your Yeast (Proofing): While your liquid mixture is warming, prepare your active dry yeast. In a small bowl, add ¼ cup of warm water, also between 100°F – 110°F (38°C-43°C). Sprinkle the yeast over the water, then add 1 tablespoon of granulated sugar. Stir gently to combine. Allow this mixture to sit undisturbed for about 10 minutes. A healthy, active yeast will visibly triple in size and become foamy, indicating it’s ready to use. If it doesn’t foam, your yeast may be old or the water temperature was incorrect, and you’ll need to start this step again.
- Combine Wet Ingredients: Pour the warmed buttermilk mixture and the proofed yeast mixture into the bowl of a stand mixer. Whisk them together briefly to ensure they are well combined.
- Gradually Incorporate Flour: Attach the dough hook to your stand mixer. Begin adding the whole wheat flour, one cup at a time, mixing on low speed after each addition. Continue adding flour until you achieve a stiff dough that begins to pull away from the sides of the bowl.
- Chef’s Note: At this stage, I typically increase my KitchenAid mixer speed to 2 and let the dough hook work its magic. Within about 2 minutes, the dough should climb up the hook and cleanly separate from the sides of the bowl, indicating proper consistency.
- Knead Until Smooth and Elastic: Once you have a cohesive dough ball, continue kneading on setting 2 for approximately 2 more minutes. The goal is to achieve a smooth, elastic dough that no longer sticks to your fingers when gently touched. A quick test: take a small piece of dough and gently stretch it – it should form a thin “window pane” without tearing. This confirms optimal gluten development.
- Kneading by Hand (Alternative): If you’re kneading by hand, lightly flour a clean surface. Press the dough away from you with the palms of your hands, then stretch an edge of the dough and fold it back towards the center. Rotate the dough a quarter turn and repeat this pressing and folding motion. Continue turning, folding, and kneading until the dough transforms into a smooth, elastic ball that no longer sticks to your unfloured board. This process typically takes 8-10 minutes.
Part 2: Proofing and Shaping – Bringing Your Rolls to Life
- First Rise (Bulk Fermentation): Lightly grease a large bowl with vegetable oil. Place the kneaded dough ball into the bowl, turning it once to ensure all sides are coated with oil. This prevents drying out. Cover the bowl snugly with a damp towel or plastic wrap. Place it in a warm location (ideally 80°F – 85°F or 27°C-30°C) and let it rise for 1 hour, or until the dough has impressively tripled in size.
- Prepare Baking Pans: While the dough is on its first rise, prepare your baking vessels. Grease 48 standard muffin tins thoroughly for individual spiral rolls. If you prefer a more traditional round shape, you can use standard cake pans or a large baking dish; just ensure they are also well-greased.
- For Standard Rolls: If you opt for a simpler, standard round roll, after the first rise, gently punch down the dough. Divide it into 48 equal pieces (using a scale for accuracy is best). Shape each piece into a smooth ball and arrange them about 1 inch apart in your chosen baking dish. Cover with a damp cloth and proceed to the second rise.
- Roll and Cut the Dough: Once your dough has tripled in size, gently punch it down to release the air. Transfer the dough to a lightly floured surface. Using a rolling pin, roll the dough out into a large, even rectangle, approximately 1/4 to 1/3 inch thick. Then, using a pastry wheel or a pizza cutter, cut the dough into strips about 2 inches wide. This technique is similar to how you would prepare the base for delicious sourdough cinnamon rolls.
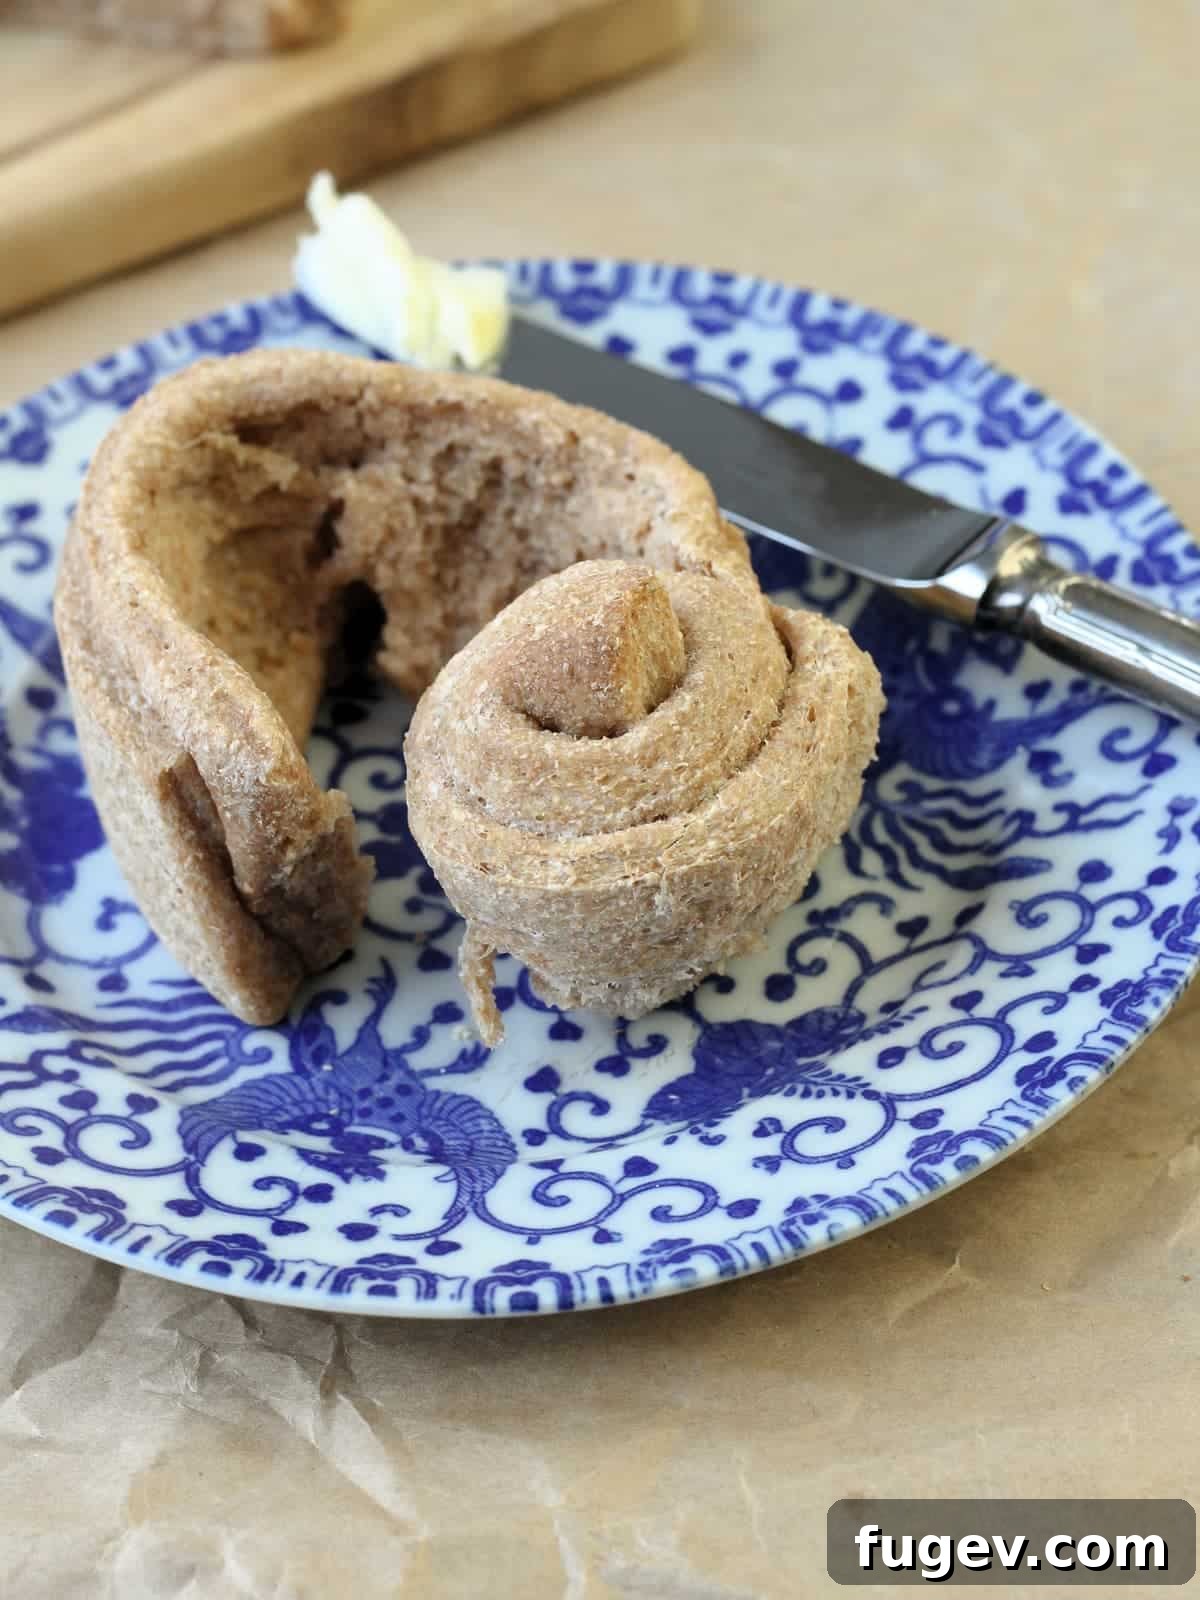
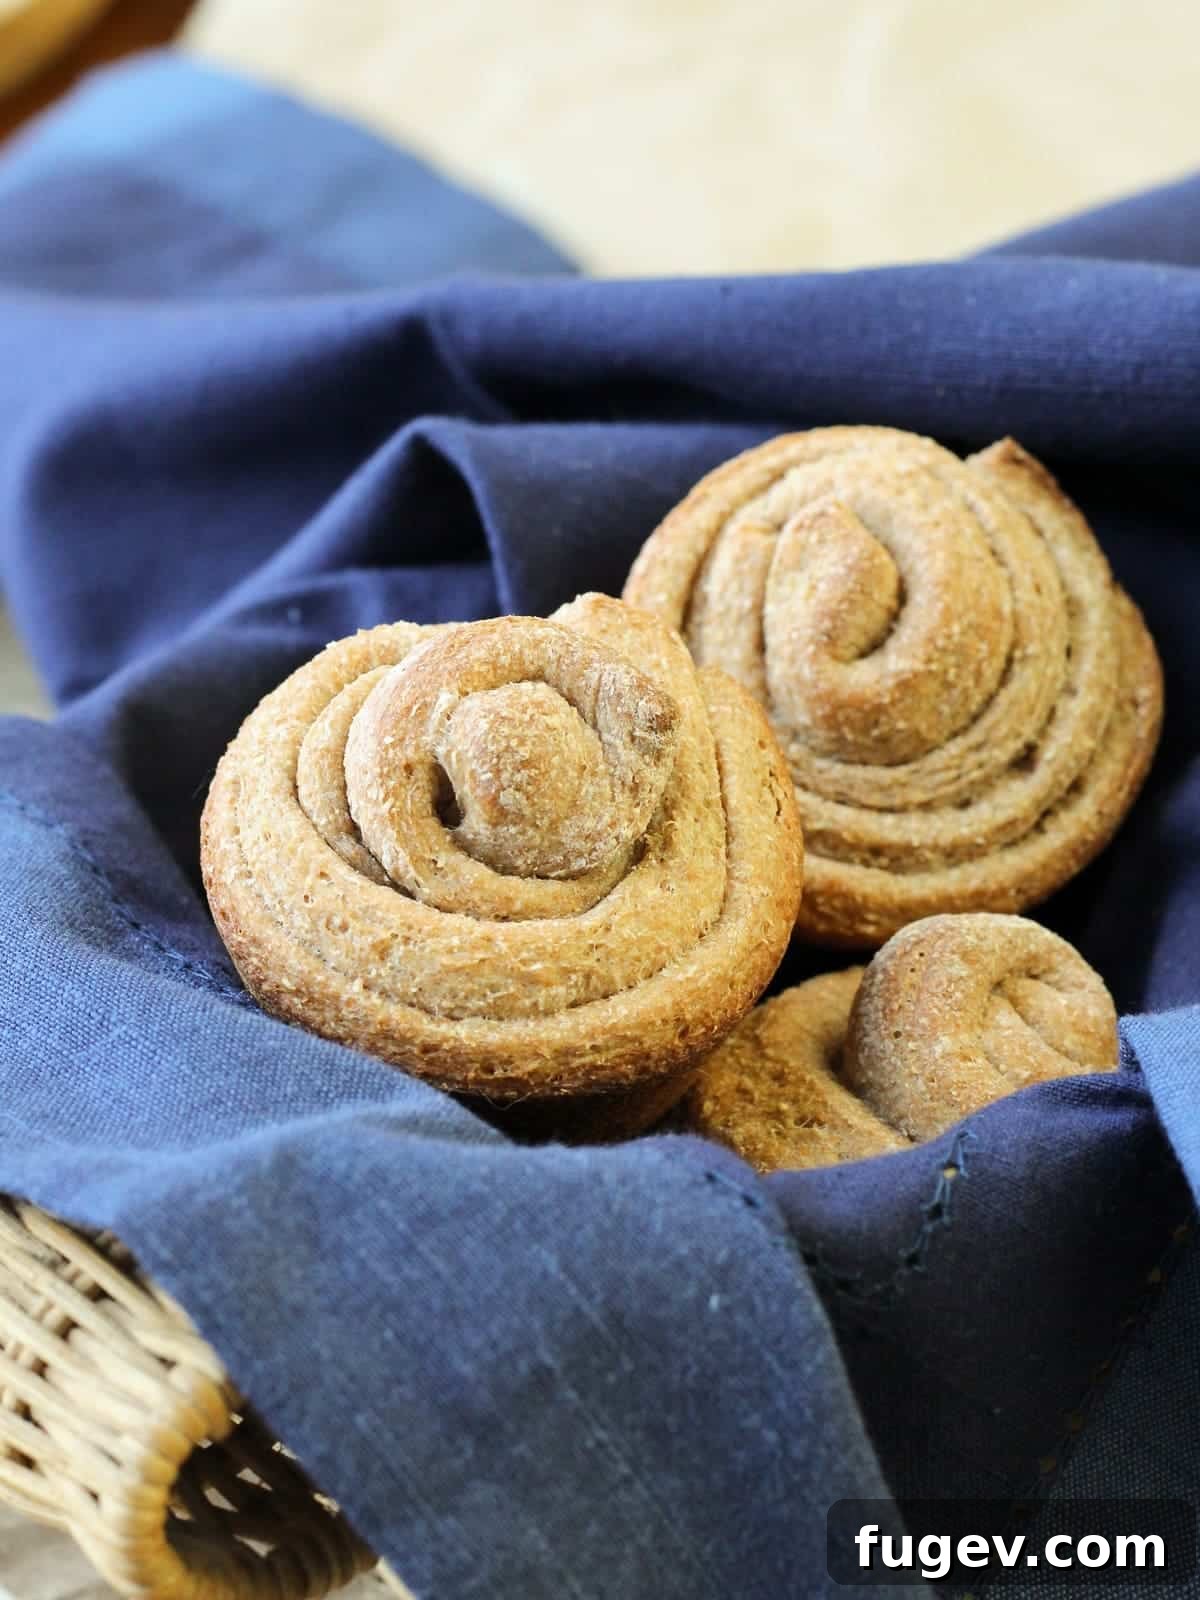
- Shape the Spiral Rolls: Take each 2-inch strip, fold it in half lengthwise, and then tightly roll it up to create a neat spiral. Place each individual spiral into a greased muffin tin cup. Work relatively quickly to prevent the dough from drying out. Repeat this process until all the dough has been used and all muffin tins are filled. Cover the pans again with a damp cloth.
- Tip for Larger Rolls: If you desire larger, more substantial rolls, simply roll up one strip and then continue rolling with another strip, folded over, attaching it to the end of the first spiral. This creates a larger, more impactful roll.
- Second Rise (Proofing for Volume): Let the shaped rolls rise for another hour in a warm place. They should double in size and feel noticeably light and airy to the touch, indicating they are fully proofed and ready for baking.
Part 3: Baking Your Golden Rolls
- Bake with a Dual Temperature Approach: Preheat your oven to 400°F (200°C). Bake the rolls at this higher temperature for an initial 8 minutes. This initial burst of heat helps the rolls rise quickly (known as oven spring) and sets their structure. After 8 minutes, reduce the oven temperature to 350°F (175°C) for the remaining 10-20 minutes of baking. Begin checking for doneness after 10 minutes at the lower temperature. A toothpick inserted into the center of a roll should come out clean. The rolls should be beautifully golden brown on top.
- Cool Properly: As soon as the rolls are baked, carefully remove them from their muffin tins. Transfer them immediately to a wire rack to cool completely. It’s crucial not to leave them in the hot tins, as the residual heat and trapped steam will cause the bottoms of your perfectly baked rolls to become soggy. Cooling on a wire rack allows air to circulate around them, preserving their crisp exterior and soft interior.
Chef Lindsey’s Expert Recipe Tip
Always pay meticulous attention to the bake time of your rolls, as it can vary significantly based on your specific oven and the type of baking pan you’re using (e.g., individual muffin tins vs. a large baking dish where rolls are baked together). To ensure perfect doneness, I recommend checking the internal temperature of the centermost roll; it should register between 180°F (82°C) and 190°F (88°C). If you’re ever in doubt about whether they’re fully baked, err on the side of caution and bake them for an additional 5 minutes. A slight overbake is better than an underbaked, doughy roll!
Recipe FAQs: Your Questions Answered
Once your whole wheat rolls have fully cooled, store them in an airtight container or a well-sealed plastic bag at room temperature for up to 2-3 days. Because they are free of preservatives, their texture and flavor will be at their best if consumed within this timeframe. For longer storage, these rolls freeze beautifully for up to 2 months. To freeze, simply place cooled rolls in a freezer-safe bag, pressing out as much air as possible. Reheat frozen rolls directly in a preheated oven at 300°F (150°C) for about 10-15 minutes, or until warmed through.
Dense rolls are a common baking frustration, often stemming from a few key issues. The primary culprits are typically under-proofing, over-proofing, or the use of inactive yeast. If you under-proof the bread, the yeast hasn’t had enough time to fully activate and produce sufficient gas, leading to a heavy, compact crumb that won’t rise well in the oven. Conversely, if you over-proof the bread, it will rise rapidly but then collapse in the oven or during baking, resulting in a dense, sometimes sticky texture. Lastly, if your yeast is dead or inactive (often due to expired yeast or incorrect water temperature during activation), your dough won’t rise at all, yielding “hockey pucks” instead of fluffy rolls. Other factors can include using too much flour, insufficient kneading, or a cold proofing environment. Always ensure your yeast is fresh, proof it correctly, measure your flour accurately, and knead adequately for optimal results.
These versatile whole wheat rolls are a fantastic addition to almost any meal! For a simple yet delightful treat, serve them warm with a generous smear of softened butter, a drizzle of extra honey, or your favorite fruit jam. They are also the perfect accompaniment to hearty dishes like this Italian sausage soup or a robust lamb stew recipe, ideal for soaking up every last drop of flavorful broth. Consider using them as mini sandwich buns for sliders, or alongside a fresh salad. They even make a wonderful addition to a breakfast spread, perhaps toasted and served with eggs.
Explore More Delicious Bread Recipes
Yeasted Bread Recipes
100% Whole Wheat Bread
Yeasted Bread Recipes
Whole Wheat Sandwich Bread Recipe
Dinner Roll Recipes
Brioche Bun Recipe
Yeasted Bread Recipes
Brioche Bread Recipe
If you tried this recipe and loved it, please leave a 🌟 star rating and let me know how it goes in the comments below. I love hearing from you; your comments make my day!
Whole Wheat Rolls
Comment
Print Recipe
Ingredients (US Customary)
- 2 cups buttermilk
- 2 tablespoons unsalted butter
- 2 ¼ teaspoons dry active yeast (1 package)
- ¼ cup water
- 1 teaspoon sugar
- 2 tablespoons honey
- 1 ½ teaspoons kosher salt
- 5 cups whole wheat flour
Instructions
Make the Dough:
-
Heat the buttermilk, butter, honey, and salt in a small saucepan over medium heat until the butter has melted and the mixture is 110°F (43°C), stirring frequently.
-
While your milk mixture is warming, proof your yeast. Add ¼ cup of warm water (100°F – 110°F or 38°C-43°C) to the yeast and stir to mix. Then, add 1 tablespoon of sugar to the yeast/water mixture. Wait 10 minutes and if the mixture has tripled in size and is foamy, then the yeast is healthy & ready to use.
-
Pour the milk mixture and the proofed yeast mixture into a bowl of a stand mixer and whisk together until well combined.
-
With the dough hook attachment, add the whole wheat flour one cup at a time, mixing on low speed and continuing to add flour until you have a stiff dough that begins to pull away from the sides of the bowl.
-
Once you have a cohesive dough, continue kneading on setting 2 for about 2 minutes (or 8-10 minutes by hand). Mix until you have a smooth, elastic dough that doesn’t stick to your fingers when you touch it. You can also test by gently pulling a rough window pane.
Proofing and Shaping the Dough:
-
Grease a large bowl with vegetable oil. Place the dough ball in the bowl and turn it to coat all sides with oil. Cover with a damp towel or plastic wrap and place in a warm location (80°F – 85°F or 27°C-30°C) for 1 hour, or until the dough has tripled in size.
-
Grease 48 muffin tins thoroughly for spiral rolls. You can also use cake pans or a regular baking dish if planning on making standard round rolls.
-
Roll the dough into an even rectangle on a lightly floured surface. Then, using a pastry wheel or pizza cutter, cut the dough into strips about 2 inches wide.
-
Fold each strip in half lengthwise and then roll it up tightly to form a spiral. Place each spiral into each greased muffin tin cup. Working quickly, repeat this step until all the dough has been shaped. Cover pans with a damp cloth and set aside to rise.
-
Let the shaped dough rise for another hour in a warm place until it has doubled in size and feels light and airy to the touch.
Bake Rolls:
-
Preheat oven to 400°F (200°C). Bake the rolls for 8 minutes at 400°F and then decrease the temperature to 350°F (175°C) for the remaining 10-20 minutes. Start checking these after 10 minutes. A toothpick inserted in the center should come out clean, and the internal temperature should be 180°-190°F.
-
Remove the rolls from the tins immediately after baking and cool them completely on a wire rack. This prevents them from becoming soggy from steam.
Notes
Presentation – I bake these in a muffin tin for easy individual portions and freezing, but a cake pan or regular baking dish works perfectly for standard round rolls too.
Technique for Freezing – For ultimate convenience, I often partially bake the rolls (until just set), freeze them, then finish baking them straight from the freezer whenever fresh rolls are desired.
Variation – This versatile dough can also be made into two wholesome loaves of bread! Follow the instructions outlined in my 100% whole wheat bread recipe for guidance on shaping and baking loaves.
Storage – These rolls are truly at their best when enjoyed fresh. However, they can be stored at room temperature for 2-3 days, or reheated from frozen and still be delicious for later use.
Nutrition
Before You Go: More Homemade Bread Delights
I sincerely hope you’ve enjoyed crafting and savoring this flavorful, easy-to-make spiral whole wheat roll recipe. There’s a special satisfaction that comes with baking homemade bread, and these rolls are a fantastic addition to any baker’s repertoire. If you’re eager to continue your journey into the wonderful world of bread making, I invite you to explore our other delicious dinner roll recipes. You might particularly love the comforting taste of these fluffy potato rolls or the unique seasonal charm of our pumpkin herb dinner rolls! Happy baking!