
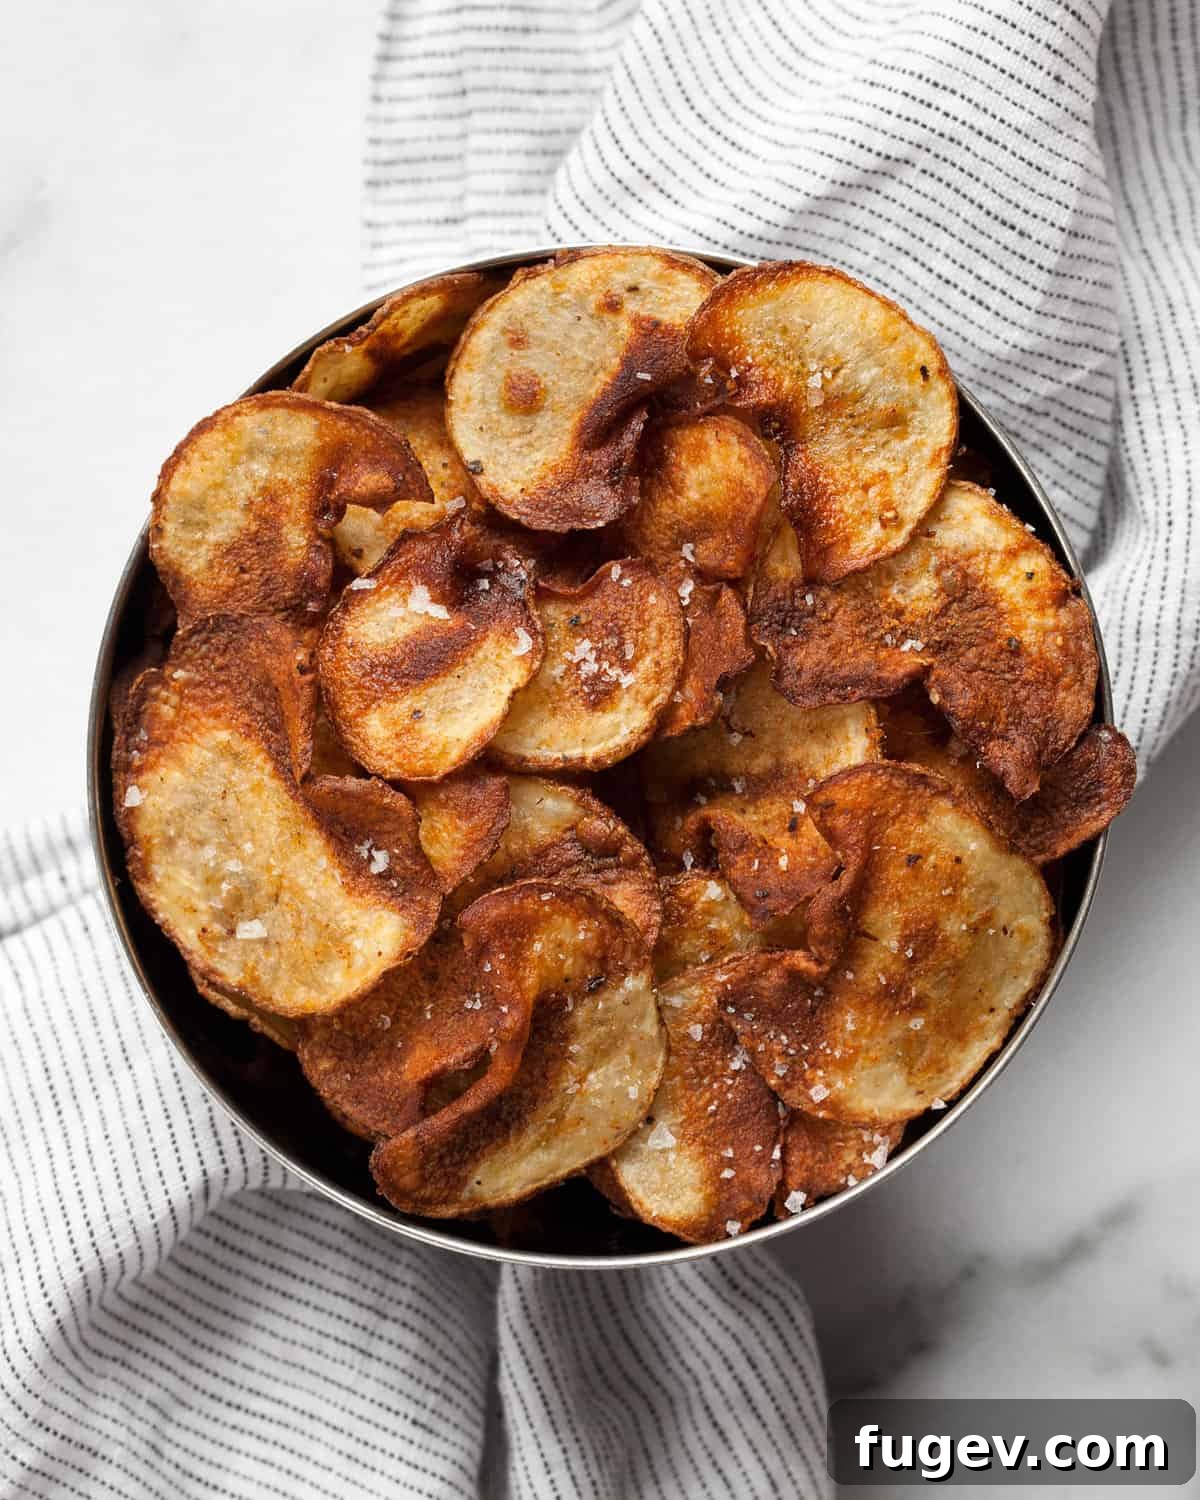
Crispy Baked Potato Chips: Your Ultimate Guide to Homemade Perfection
Forget the greasy, store-bought bags and ditch the need for an expensive air fryer! Prepare to transform humble potatoes into irresistibly crispy, homemade baked potato chips right in your own oven. This comprehensive guide will show you how to create a simple yet incredibly satisfying snack, bursting with flavor from a carefully crafted blend of dried spices. All you need are a few basic ingredients, two sheet pans, and a conventional oven to unlock a world of crunchy goodness. Get ready to impress your taste buds and loved ones with a snack that’s both healthier and infinitely more delicious than anything you’ll find in a package.
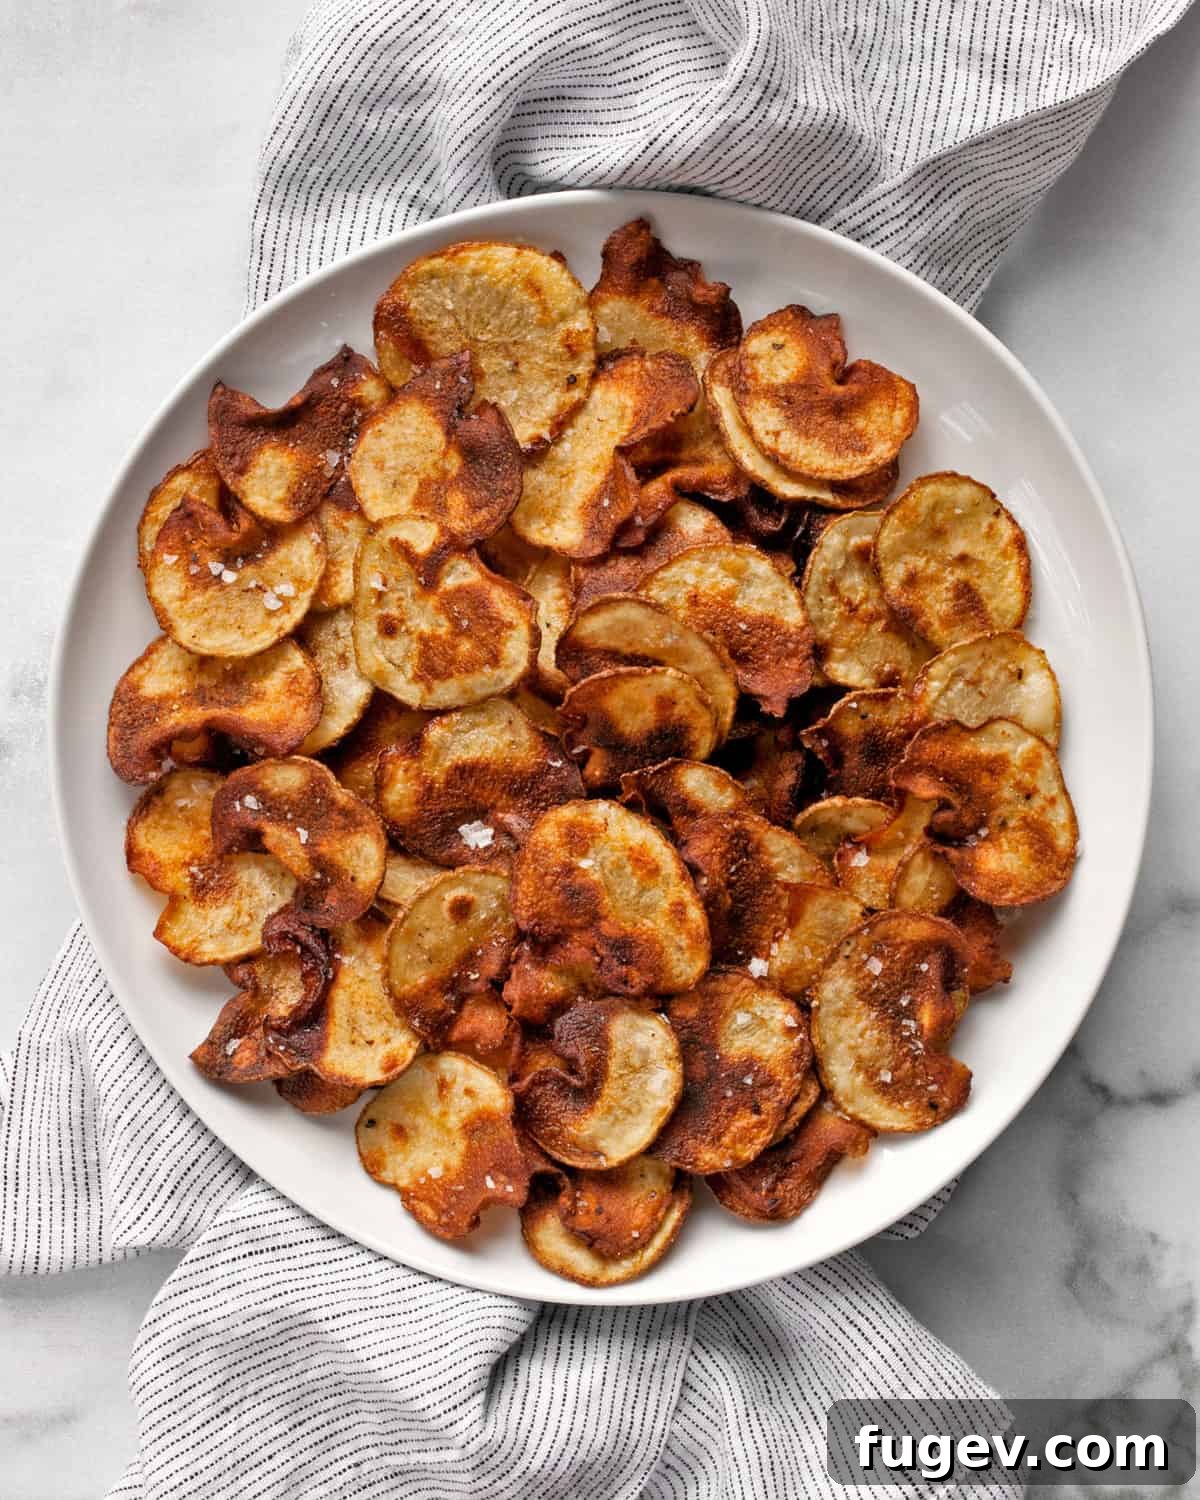
Table of Contents
- Why You’ll Absolutely Love This Baked Potato Chip Recipe
- Selecting the Best Potatoes for Perfectly Crispy Chips
- Essential Ingredients for Your Homemade Chips
- Exciting Optional Additions and Flavor Variations
- Step-by-Step Guide: How To Make Crispy Baked Potato Chips
- Understanding Why All Chips Don’t Crisp at the Same Rate
- Serving and Storing Your Delicious Homemade Potato Chips
- Frequently Asked Questions About Baked Potato Chips
- More Irresistible Crunchy Snack Recipes
- The Full Baked Potato Chips Recipe Card
Why You’ll Absolutely Love This Baked Potato Chip Recipe
There’s something incredibly satisfying about creating snacks from scratch. This particular recipe for oven-baked potato chips stands out for several compelling reasons, making it a go-to choice for anyone seeking a healthier, more flavorful, and effortlessly enjoyable treat. It’s a testament to how simple ingredients can yield extraordinary results without needing any fancy equipment.
1. Uncomplicated and Wholesome: An Easy From-Scratch Snack
In a world full of highly processed options, this recipe offers a refreshing return to simplicity. It’s an incredibly easy snack to whip up, allowing you full control over every ingredient. By making your own potato chips, you eliminate unwanted additives, excessive sodium, and unhealthy fats often found in commercial varieties. You’ll appreciate the transparency and fresh goodness that comes from preparing food with your own hands, ensuring a snack that’s not just delicious but also a healthier alternative for you and your family.
2. A Symphony of Flavors: The Best Spice Mixture
Move beyond plain salt and pepper! While these are fundamental, our unique spice blend truly elevates these chips, giving them a distinct personality and a depth of flavor you won’t find in a standard bag. The aromatic notes of paprika, the savory warmth of onion and garlic powder, and a subtle kick from cayenne pepper combine beautifully with salt and black pepper. This carefully balanced mix creates a tantalizing taste experience that will make these homemade chips utterly addictive and leave you reaching for more. You can also easily customize this blend to suit your own palate.
3. Accessibility and Convenience: No Air Fryer Needed for These Oven-Baked Potato Chips
Many recipes for crispy snacks tout the air fryer as an essential tool. However, this recipe proves that you don’t need another countertop appliance to achieve perfectly crisp results. Your trusty oven, a kitchen staple, is all you need. This makes our baked potato chips recipe accessible to everyone, regardless of their kitchen gadget collection. It’s a testament to traditional baking methods, delivering fantastic crunch and flavor using equipment you already own, freeing up valuable kitchen space and saving you money.
Selecting the Best Potatoes for Perfectly Crispy Chips
The secret to achieving that coveted crispy texture in your homemade potato chips lies fundamentally in your choice of potato. Not all potatoes are created equal when it comes to chip-making. You’ll want to select varieties that are naturally high in starch and low in moisture. These characteristics are crucial because high starch content contributes to a more golden-brown color and a firmer structure when baked, while low moisture content means less water needs to evaporate, leading to a quicker and superior crisping process.
For optimal results, we highly recommend using Russet potatoes or Yukon Gold potatoes. Russets, with their floury texture and lower water content, are champions of crispiness. They brown beautifully and develop a delightful crunch. Yukon Golds, while slightly waxier than Russets, also have a good starch-to-moisture ratio and lend a slightly sweeter, buttery flavor and a wonderful golden hue to your chips. Avoid waxy potatoes like red new potatoes or round white potatoes, as their higher moisture content makes it challenging to achieve a truly crisp, chip-like texture; they tend to remain chewier or softer even after extended baking.
Essential Ingredients for Your Homemade Chips
Crafting these delectable oven-baked potato chips requires just a handful of straightforward ingredients. Each component plays a vital role in achieving that perfect balance of flavor and irresistible crispness. Here’s a closer look at what you’ll need to gather:
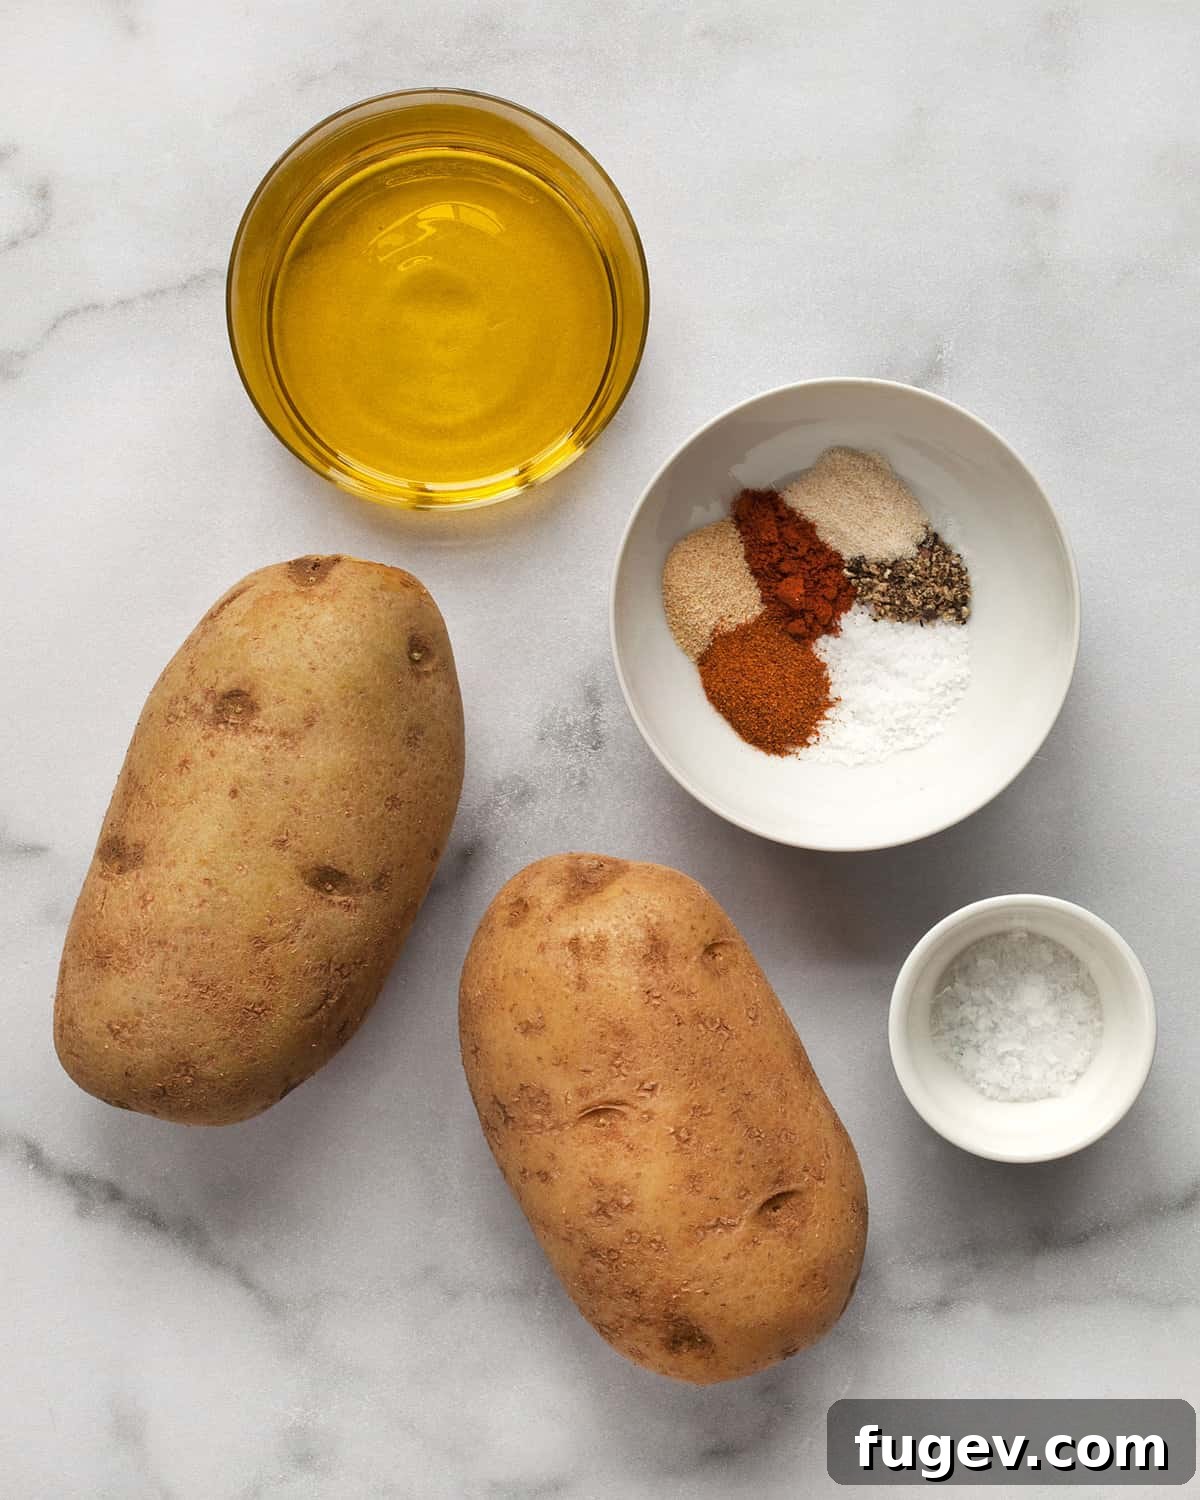
- Potatoes: As highlighted, Russet potatoes or Yukon Gold potatoes are your best bet. Their high starch and low moisture content are key to achieving a truly crispy chip when baked. The starch allows for better browning and structural integrity, while less moisture means they dry out faster and become brittle and crunchy, just like a great chip should be.
- Spice Blend: This is where the magic happens! Our signature blend for seasoning the raw potato slices includes:
- Paprika: Adds a lovely reddish hue and a mild, sweet, peppery flavor.
- Onion Powder: Delivers a savory, aromatic depth without the moisture of fresh onion.
- Garlic Powder: Provides a pungent, earthy taste that perfectly complements potatoes.
- Cayenne Pepper: Introduces a subtle warmth and a touch of heat, enhancing the overall flavor profile. Adjust to your preferred spice level.
- Salt: Essential for seasoning and bringing out the natural flavors of the potato. We use kosher salt for its flaky texture and ability to adhere well.
- Black Pepper: Offers a sharp, woody counterpoint to the other spices.
- Oil: A good quality olive oil is crucial. It helps the spices adhere to the potato slices, promotes even browning, and contributes to the desired crisp texture. Its healthy monounsaturated fats also make these baked chips a more wholesome choice compared to those fried in less healthy oils. You can also experiment with avocado oil for a neutral flavor.
- Flaky Sea Salt: This is the perfect finishing touch! A sprinkle of Maldon or another type of flaky sea salt after baking adds a beautiful crystalline texture and a burst of clean, briny flavor. The larger flakes adhere well to the warm chips and provide a pleasant textural contrast, enhancing the eating experience.
Exciting Optional Additions and Flavor Variations
While the classic spice blend is outstanding, don’t hesitate to get creative with your homemade baked potato chips! Customizing the seasoning allows you to tailor them to any palate or occasion. Here are a few fantastic ideas to inspire you:
- Finely Grated Parmesan Cheese: Sprinkle a light layer of Parmesan over the chips during the last few minutes of baking, or immediately after they come out of the oven. The cheese will melt slightly and crisp up, adding a rich, salty, umami flavor that is absolutely divine.
- Truffle Salt or Flavored Finishing Salts: For a gourmet touch, swap out the standard flaky sea salt for a luxurious truffle salt. The earthy, aromatic notes of truffle will elevate your chips to a sophisticated snack. Other flavored salts, like smoked paprika salt or chili-lime salt, can also introduce exciting new dimensions to your chips.
- Fresh Herbs: Minced fresh chives or finely chopped parsley, sprinkled over the chips just before serving, add a vibrant freshness and a pop of color. For a different profile, consider a touch of rosemary or thyme, which pair wonderfully with potatoes. Make sure the herbs are finely minced so they distribute evenly and don’t overpower the delicate chip.
- Spicy Kick: If you love heat, increase the amount of cayenne pepper in the spice blend, or add a pinch of chili powder or red pepper flakes for an extra fiery crunch.
- Smoky Flavor: A dash of smoked paprika can deepen the savory notes and add a delicious, smoky undertone to your chips.
Experimentation is key! These additions allow you to create endless flavor combinations, ensuring your homemade baked potato chips never get boring.
Step-by-Step Guide: How To Make Crispy Baked Potato Chips
Making your own crispy baked potato chips is a rewarding process that’s simpler than you might think. Follow these detailed steps to achieve perfectly golden and crunchy results every time. Precision in preparation, especially slicing and drying, is key to success.
Before you begin, preheat your oven to 425 degrees F (220 degrees C). Position two oven racks in the center of the oven to ensure even heat distribution. Prepare two large baking sheets by lightly greasing them with non-stick cooking spray or lining them with parchment paper. This prevents sticking and aids in crisping.
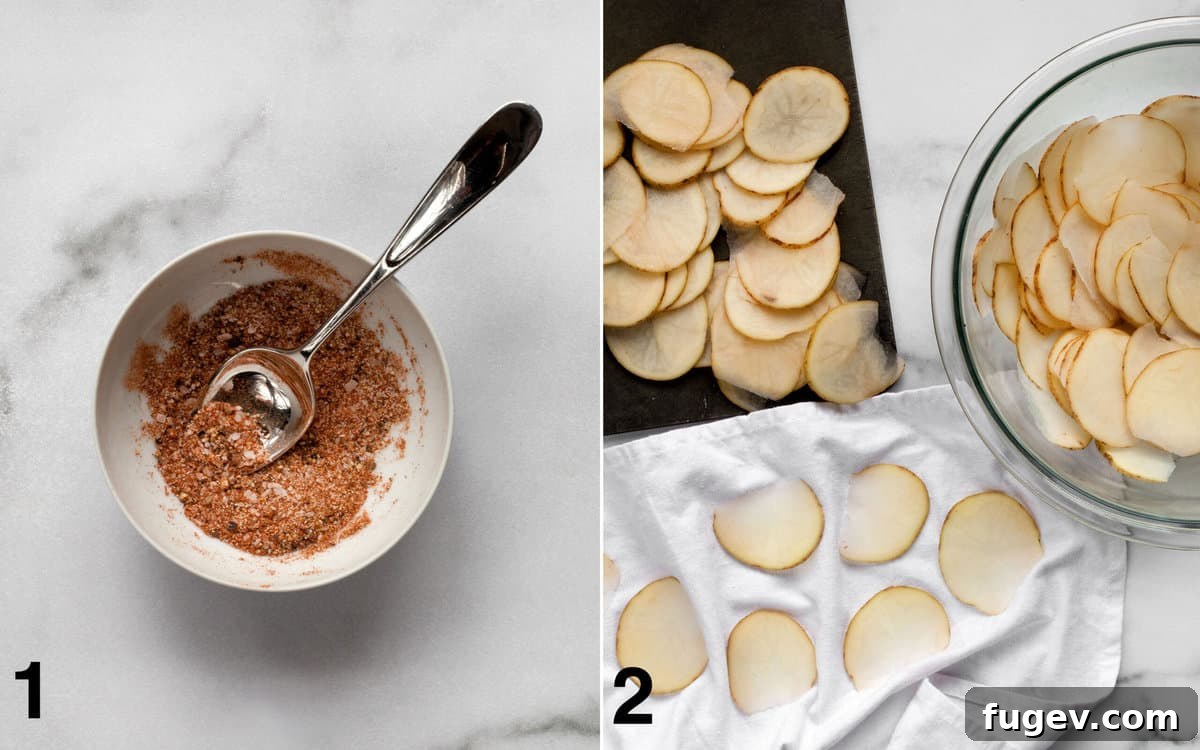
1. Prepare the Aromatic Spice Mixture.
In a small bowl, combine all your dried spices: paprika, onion powder, garlic powder, cayenne pepper, kosher salt, and black pepper. Stir them together thoroughly until well blended. This ensures that each potato slice gets an even coating of flavor. Having this prepared beforehand streamlines the seasoning process.
2. Precisely Slice and Thoroughly Dry the Potatoes.
The thickness of your potato slices is paramount for achieving crispness. Aim for incredibly thin slices, ideally around 1/16-inch thick. A mandoline slicer is highly recommended for this step, as it provides consistent, uniform slices quickly and safely. If using a sharp knife, take your time to slice as thinly and evenly as possible. Consistency is key for even baking. Once sliced, place the potato rounds in a single layer on a clean kitchen towel or paper towels. Gently pat them dry to remove as much excess moisture as possible. This step is critical; reducing moisture is what helps the chips become truly crisp, rather than soft or chewy.
3. Season the Potatoes Evenly with Spices and Oil.
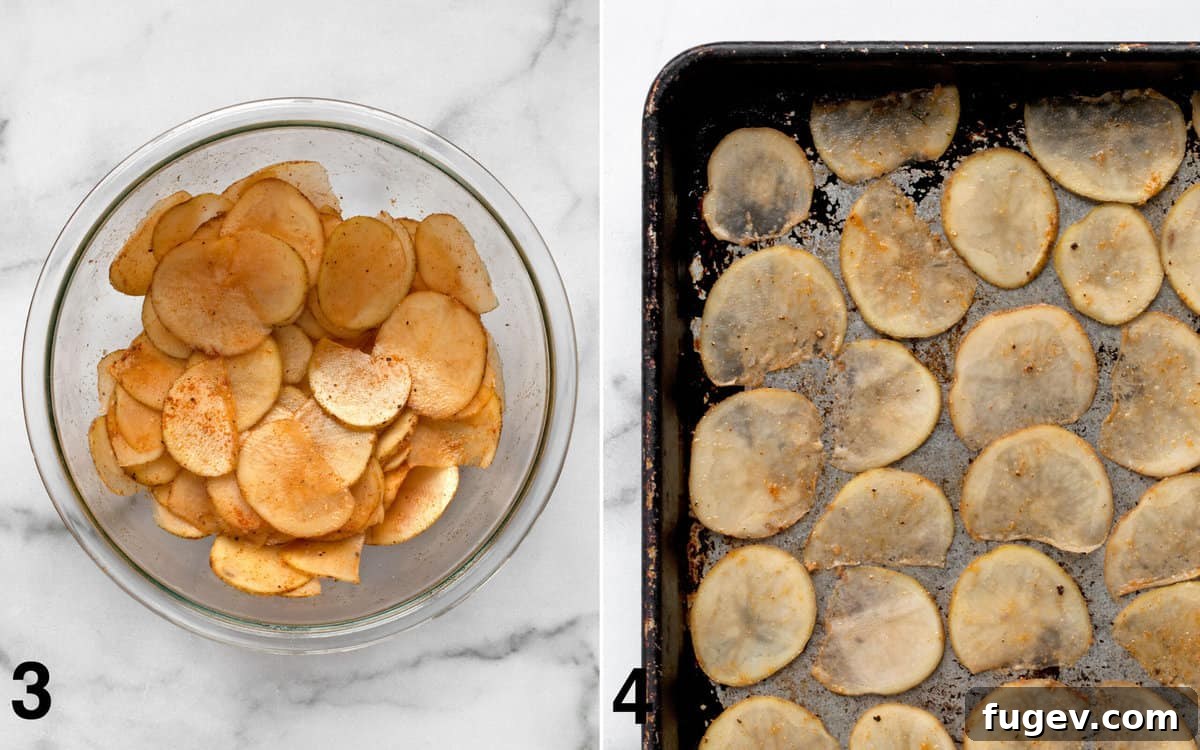
Transfer the thoroughly dried potato slices into a large mixing bowl. Drizzle them with olive oil, then sprinkle the prepared spice mixture over the potatoes. For the best coating, use your clean hands to gently toss and massage the oil and spices into the potato slices. Ensure every surface of every chip is beautifully and evenly seasoned. This hands-on approach guarantees maximum flavor distribution.
4. Arrange and Bake to Golden Perfection.
Carefully arrange the seasoned potato slices in a single layer on the prepared baking sheets. It’s crucial that the slices do not overlap. Overlapping will trap moisture and prevent the chips from crisping up evenly; instead, they will steam. You might need to use both baking sheets to avoid overcrowding. Place the baking sheets in the preheated oven and bake for 8-10 minutes. At this point, the chips should just begin to turn golden brown at the edges. Using tongs, carefully flip each chip to the other side. Rotate the baking sheets (top to bottom, front to back) to account for oven hot spots, and continue baking for another 3-4 minutes, or until the chips are deep golden brown and wonderfully crisp. Keep a close eye on them during this final stage, as they can burn quickly.
5. Finish with Flaky Sea Salt and Serve.
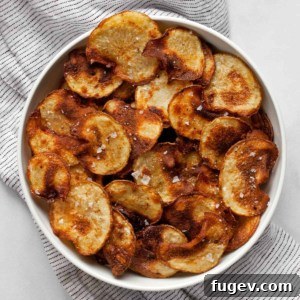
Once the chips are baked to your desired crispness, remove the baking sheets from the oven. Immediately sprinkle the hot chips with flaky sea salt. The residual heat will help the salt adhere beautifully. Let them cool slightly on the baking sheets for a minute or two before transferring them to a serving bowl. Enjoy your fresh, warm, and incredibly crunchy homemade baked potato chips!
Understanding Why All Chips Don’t Crisp at the Same Rate
When baking homemade potato chips, it’s common to find that not all slices crisp up simultaneously. This is a perfectly normal phenomenon, and understanding the reasons behind it will help you manage the baking process more effectively for optimal results. Don’t be discouraged if you need to remove some chips earlier than others; it’s part of the charm of making them from scratch!
- Inconsistent Moisture Levels in Potatoes: Even potatoes of the same variety can have slightly different internal moisture contents. Some might be naturally drier, while others retain more water. The more moisture a potato slice holds, the longer it will take to dry out and crisp up in the oven. While patting them dry helps significantly, it’s almost impossible to achieve absolute uniformity across all slices. Embrace this natural variation as a hallmark of homemade goodness.
- Variations in Slice Thickness: Despite your best efforts with a mandoline or a sharp knife, achieving perfectly identical thickness for every single potato slice is incredibly challenging, if not impossible. Even a tiny variation in thickness can dramatically impact baking time. Thinner slices will crisp much faster than slightly thicker ones. This is another reason why some chips will be ready sooner. Learning to gauge doneness by color and feel is more important than strictly adhering to a timer for the entire batch.
- Oven Temperature Inconsistencies (Hot Spots): Most home ovens, especially older models, are not perfectly consistent in temperature. They often have “hot spots” where the heat is more intense and “cold spots” where it’s slightly lower. This means that chips positioned in hotter areas of the baking sheet or oven will cook and crisp faster than those in cooler areas. To combat this, rotating your baking sheets halfway through the baking process (turning them front to back and swapping racks if using two) can help promote more even cooking, but vigilance is still required.
The key takeaway here is to be attentive. Keep a close eye on your chips, especially during the last few minutes of baking. Don’t hesitate to remove individual chips from the pans as they reach golden-brown perfection, allowing the remaining, less-done chips to continue baking until they’re just right. This staggered approach ensures you get the maximum amount of perfectly crisp chips from every batch.
Serving and Storing Your Delicious Homemade Potato Chips
There’s nothing quite like a freshly baked, warm batch of homemade potato chips. The aroma, the immediate crunch, and the vibrant flavors are truly at their peak right out of the oven. These chips are best enjoyed on the very same day they are baked to experience their ultimate crispness and taste. They make for an exceptional snack on their own, but their versatility allows them to shine in many culinary contexts.
Serving Suggestions:
- As a Standalone Snack: Simply pile them high in a bowl and let everyone dig in! They are perfect for movie nights, game days, or a casual get-together with friends.
- With Dips: Elevate your chip experience by pairing them with your favorite dips. A classic French onion dip, a tangy sour cream and chive dip, a robust homemade salsa, or a creamy hummus would all be fantastic complements to the savory, spiced flavors of these chips.
- A Perfect Side Dish: Move beyond the standard potato salad or fries. These crispy baked potato chips make an excellent, lighter side dish to a variety of meals. They pair wonderfully with hearty sandwiches, wraps, or as a crunchy accompaniment to burgers. Imagine them alongside homemade Black Bean Burgers, or as a delightful textural contrast to a comforting bowl of Roasted Tomato Soup and a grilled cheese sandwich. They add a gourmet touch to any lunch or dinner.
Storage Tips for Leftovers:
While best fresh, you can certainly store any leftover homemade potato chips. Place them in an airtight container at room temperature for up to 2 days. Be aware, however, that they will likely lose some of their initial crispness over time and may become slightly softer. If you wish to revive some of their crunch, you can spread them on a baking sheet and re-bake them in a 300°F (150°C) oven for a few minutes until they crisp up again. Be careful not to burn them!
Frequently Asked Questions About Baked Potato Chips
Yes, absolutely! When you bake potato chips instead of deep-frying them, you significantly reduce the amount of oil absorbed, leading to a much healthier snack. Baked chips typically have less saturated fat and fewer calories compared to their fried counterparts, especially when using heart-healthy oils like olive oil. This gives you a crunchy, satisfying snack without the guilt associated with traditional fried chips.
Both methods can yield crispy chips, but they offer different benefits. Frying typically produces a very consistent, deep crispness due to the rapid heat transfer of oil. However, baking offers a significantly healthier alternative without the mess and added fat of deep-frying. With proper technique—thin slicing, thorough drying, and even baking—you can achieve wonderfully crispy, golden-brown chips in the oven that are just as satisfying, if not more so, due to their cleaner flavor profile.
Several key steps contribute to maximum crispness. First, choose high-starch, low-moisture potatoes like Russets or Yukon Golds. Second, slice the potatoes incredibly thin and uniformly (a mandoline is ideal). Most importantly, thoroughly pat the sliced potatoes dry with a towel to remove as much surface moisture as possible before seasoning and baking. Finally, arrange them in a single layer on your baking sheets without any overlap to allow for even airflow and crisping. Monitoring them closely during baking and removing individual chips as they finish ensures no chip gets left behind in its quest for crunch.
Absolutely. While olive oil is recommended for its flavor and health benefits, you can certainly experiment with other oils. Avocado oil is a popular choice for its high smoke point and neutral flavor, which won’t interfere with your spice blend. Grapeseed oil or sunflower oil are also good options. Avoid oils with very low smoke points or overly strong flavors that might clash with the potato and spices.
Soggy chips are usually a result of excess moisture. To prevent this, ensure you dry your potato slices extremely well after cutting them. Don’t overcrowd the baking sheets; arrange chips in a single, non-overlapping layer so moisture can evaporate efficiently. Use two baking sheets if necessary. Also, ensure your oven is preheated to the correct temperature. If chips are baked at too low a temperature, they will dry out slowly rather than crisping quickly.
More Irresistible Crunchy Snack Recipes
If you’re a fan of the satisfying crunch, here are more homemade snack recipes to explore and enjoy:
- Homemade Everything Crackers
- Crispy Sriracha Lime Chickpeas
- Easy Sheet Pan Nachos
- Healthy Baked Sweet Potato Chips
- Flavorful Baked Beet Chips
Did you create these healthier potato chips? We’d love to hear from you! Please leave a rating and comment below to share your experience and tips. Thank you for trying our recipe!
Baked Potato Chips Recipe
4.75 from 4 votes
Paige Adams
15 mins
12 mins
27 mins
2
No air fryer is required for these incredibly crispy baked potato chips. With just two sheet pans and a hot oven, you can create a healthier, perfectly seasoned snack that everyone will love.
Ingredients
- Non-stick cooking spray (or parchment paper)
- 1/4 teaspoon paprika
- 1/4 teaspoon onion powder
- 1/4 teaspoon garlic powder
- 1/4 teaspoon cayenne pepper (adjust to taste)
- 1/2 teaspoon kosher salt
- 1/4 teaspoon black pepper
- 2 medium Russet potatoes or Yukon Gold potatoes (about 1 lb total)
- 2 tablespoons olive oil
- Flaky sea salt for serving (Maldon recommended)
Instructions
- Preheat your oven to 425 degrees F (220 degrees C) with oven racks positioned in the center. Lightly grease 2 large baking sheets with non-stick cooking spray or line them with parchment paper.
- In a small bowl, combine the paprika, onion powder, garlic powder, cayenne pepper, kosher salt, and black pepper. Stir well to create your spice blend.
- Using a mandoline slicer or a very sharp knife, carefully slice the potatoes into uniform rounds, approximately 1/16-inch thick. Arrange the sliced potatoes in a single layer on clean kitchen towels and pat them thoroughly dry to remove as much excess moisture as possible.
- Transfer the dried potato slices to a large mixing bowl. Drizzle with olive oil and sprinkle with the prepared spice mixture. Use your hands to gently toss the potatoes, ensuring every slice is evenly coated with oil and seasoning.
- Arrange the seasoned potato slices in a single layer on your prepared baking sheets, making sure no slices overlap. Overlapping will prevent even crisping.
- Bake for 8-10 minutes, or until the edges of the chips start to turn golden brown. Carefully flip each chip to the other side using tongs. Rotate the baking sheets (top to bottom, front to back) for even baking, and continue to bake for another 3-4 minutes, or until the chips are golden brown and wonderfully crispy. Keep a close watch as baking times can vary and they can burn quickly.
- Once baked to perfection, remove the chips from the oven. Immediately sprinkle with flaky sea salt while still warm. Serve warm and enjoy!
Notes
For best results, use parchment paper instead of non-stick cooking spray on your baking sheets; it often prevents sticking more effectively and helps with cleanup.
Be vigilant during the baking process! Due to natural variations in potato moisture and oven hot spots, some chips may crisp up faster than others. Don’t hesitate to remove individual, perfectly golden-brown chips from the baking sheets as they finish, allowing the remaining chips to continue baking until they reach your desired crispness.
Feel free to get creative with your seasonings. Before serving, you can sprinkle on a touch of finely grated Parmesan cheese or fresh, minced herbs like chives or parsley. For a gourmet twist, consider using a flavored finishing salt, such as truffle salt or a chili-lime salt, instead of plain flaky sea salt.
Store any leftover baked potato chips in an airtight container at room temperature for up to 2 days. While they will still be delicious, note that they might lose some of their initial crispness. You can gently reheat them in a low oven (around 300°F/150°C) for a few minutes to help revive some of their crunch, but watch them closely to prevent burning.
Nutrition
Calories: 296kcal | Carbohydrates: 39g | Protein: 5g | Fat: 14g | Saturated Fat: 2g | Polyunsaturated Fat: 2g | Monounsaturated Fat: 10g | Sodium: 593mg | Potassium: 909mg | Fiber: 3g | Sugar: 1g | Vitamin A: 231IU | Vitamin C: 12mg | Calcium: 31mg | Iron: 2mg
Nutrition information is automatically calculated and should be used as an approximation only.
Additional Info
Appetizers & Snacks
American
Did you make this recipe?
Mention @lastingredient on Instagram and tag it #lastingredient!
Recipe originally published July 5, 2013. Updated March 9, 2023 for enhanced clarity, detail, and SEO optimization.